10 Tips for Better Bike Saddle Comfort | Fitting Guide
How-To
Almost every rider I've fitted has a saddle story: the century that ended at mile 60 because the perineum went numb, the new bike that somehow felt worse than the old one, the “comfort” saddle that turned out to be the problem. Most of that pain traces back to a handful of fixable issues - saddle width, height, tilt, shorts, and a few habits riders pick up early and never revisit. This guide walks through the 10 fixes that, in my experience, account for the bulk of saddle complaints.
Quick Answer
Proper saddle comfort requires three things: a saddle that matches your sit bone width, correct saddle height and position, and appropriate cycling shorts. Most discomfort comes from a saddle that's too narrow or too wide, set at the wrong height, or tilted incorrectly. Use our Saddle Size Calculator and Saddle Height Calculator to dial in your measurements.
Tip 1: Get the Right Saddle Size
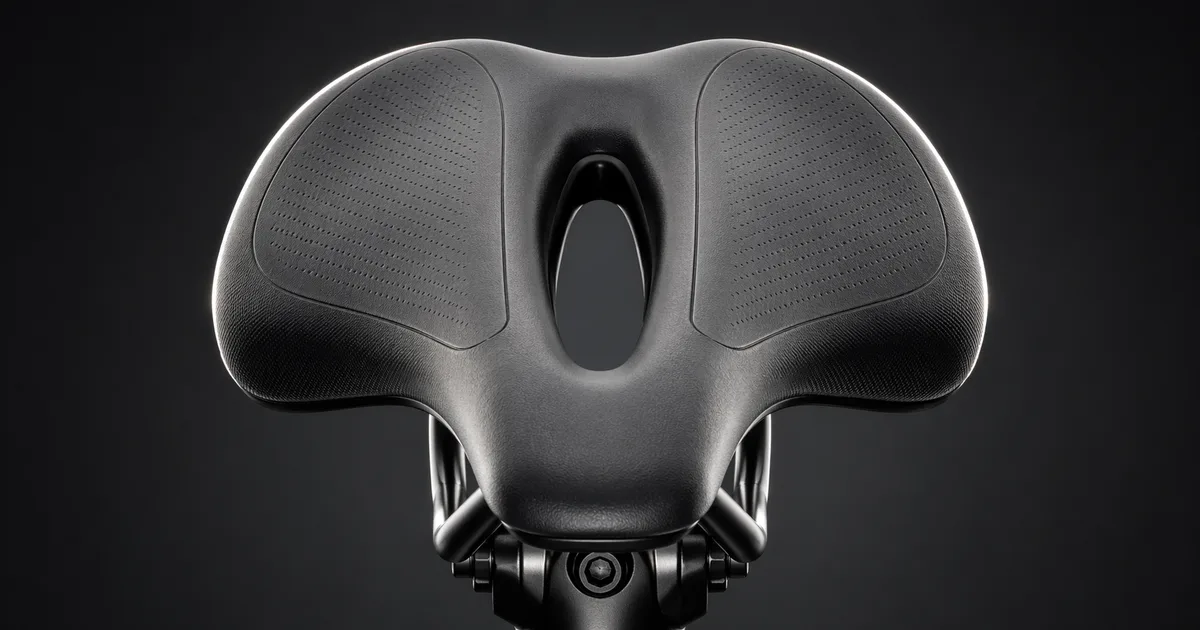
The single most important factor in saddle comfort is matching your saddle width to your sit bone width. Your sit bones (ischial tuberosities) are the two bony points at the bottom of your pelvis that bear your weight when seated. If your saddle is too narrow, your soft tissue takes pressure it shouldn't. Too wide, and your inner thighs rub and your pedaling efficiency drops.
How to Measure Your Sit Bones at Home
You don't need a fancy fitting studio to measure your sit bones. Here's a simple at-home method:
- Place a piece of corrugated cardboard on a hard, flat surface (not a cushioned chair).
- Sit down firmly on the cardboard, lean slightly forward to mimic your riding position.
- Stand up carefully and look at the two deepest impressions on the cardboard.
- Measure the distance between the centers of the two impressions in millimeters.
- Add 20-25 mm to this measurement to get your ideal saddle width (the extra accounts for how your sit bones rest on the saddle).
Saddle Width Guidelines
| Sit Bone Width | Saddle Width | Category |
|---|---|---|
| < 120 mm | 130-143 mm | Narrow |
| 120-140 mm | 143-155 mm | Medium |
| > 140 mm | 155 mm+ | Wide |
Several brands have built their reputation on consistent fit across these widths. Selle Italia and Fizik dominate the narrow/medium performance range, Prologo covers most road sit-bone widths, and Selle Royal plus Ergon lean wider with extra padding for touring and commuting. Brooks England leather saddles break in to a custom shape over a few hundred miles. For curated picks across categories, see our pick of the best saddles for 2026.
Pro Tip
Use our Saddle Size Calculator to get a precise saddle width recommendation based on your sit bone measurement. Free - no account required.
Tip 2: Adjust Your Saddle Height
Saddle height has a dramatic effect on both comfort and power output. A saddle that's too high puts excessive strain on the back of your knees and causes rocking on the saddle. Too low, and your knees take the brunt, plus you lose power.
The 109% Method
The most reliable formula for setting saddle height is the 109% method. Multiply your inseam length by 1.09 to get the distance from the center of the bottom bracket (the axle where the cranks attach at the base of the frame) to the top of the saddle.
Example Calculation
If your inseam is 82 cm:
82 cm × 1.09 = 89.4 cm saddle height (measured from the center of the bottom bracket to the top of the saddle along the seat tube).
Optimal Knee Extension
At the bottom of your pedal stroke, your knee should have a bend of approximately 25-35°. This range provides the best balance of power and comfort. You can check this with a smartphone goniometer app (an angle-measuring tool) or by having someone observe your leg extension from the side.
Find Your Ideal Saddle Height
Enter your inseam in our Saddle Height Calculator and get your exact saddle height in seconds - so you can set it once and ride pain-free. Free - no account required.
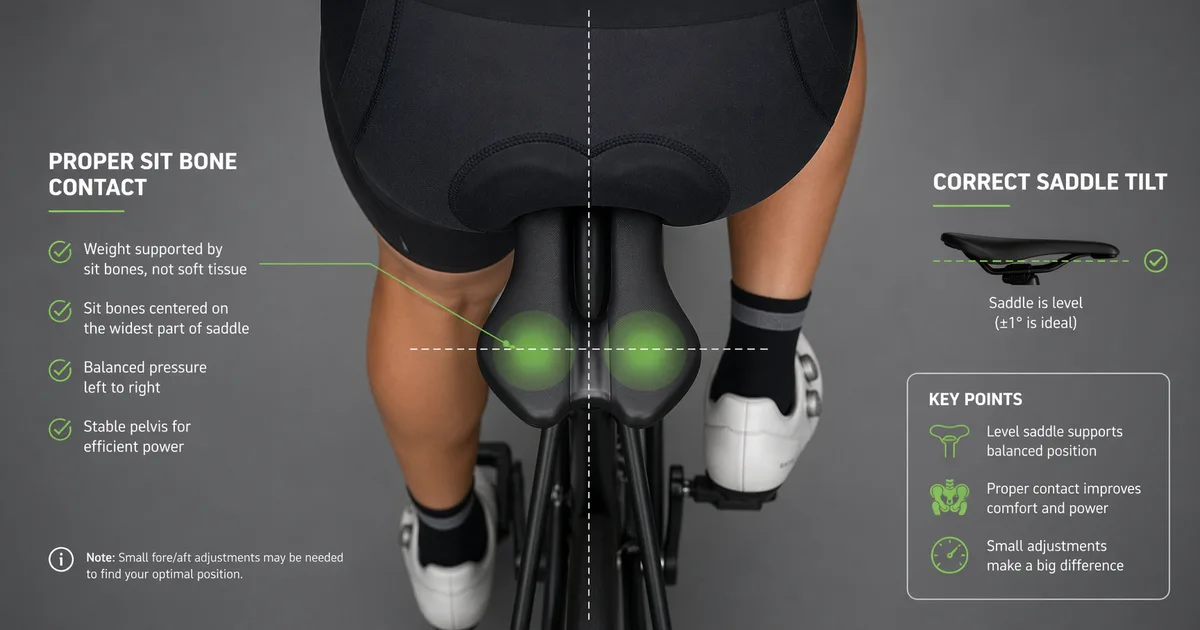
Tip 3: Check Your Saddle Angle
Even a few degrees of saddle tilt can make the difference between comfort and agony. An incorrect angle can cause you to slide forward or backward, putting pressure on the wrong areas.
Starting Point: Level
Always start with your saddle perfectly level. Use a spirit level or a smartphone level app placed along the length of the saddle. This gives most riders a neutral, comfortable position.
Fine-Tuning: 1-3° Adjustments
From the level starting point, make small adjustments of 1-3° at a time:
- Slight nose-down tilt (1-3°): Can relieve pressure on soft tissue, especially for riders in aggressive positions. Be careful - too much tilt pushes you onto your hands and wrists.
- Slight nose-up tilt (1-2°):Can help riders who feel like they're constantly sliding forward on the saddle. More common with relaxed riding positions.
Signs of Incorrect Saddle Angle
- Constantly sliding forward on the saddle (nose too far down)
- Numbness or pressure in soft tissue areas (nose too far up)
- Excessive hand/wrist pressure (nose too far down)
- Lower back pain (nose too far up or down)
Tip 4: Position the Saddle Correctly (Fore/Aft)
Saddle fore/aft position (how far forward or backward the saddle sits on its rails) determines how your weight is distributed between the saddle and handlebar, and how your knees track over the pedals.
The KOPS Method
Knee Over Pedal Spindle (KOPS) is the traditional starting point. With your cranks horizontal (at the 3 o'clock position), drop a plumb line from the front of your forward kneecap. It should fall approximately over the pedal spindle.
- Knee forward of spindle: Slide the saddle back
- Knee behind spindle: Slide the saddle forward
Weight Distribution
Aim for approximately a 60/40 weight distribution between the saddle and handlebars. Getting this ratio right means your sit bones carry most of your weight without overloading your hands and wrists - the sweet spot where nothing goes numb.
Comfort vs. Performance
Recreational riders may prefer the saddle slightly further back for a more upright position and more weight on the saddle. Competitive riders often push the saddle forward for a more aggressive, aerodynamic posture. Find what works for your riding style and goals.
Tip 5: Wear Quality Cycling Shorts
No saddle setup can fully compensate for poor cycling shorts. A good chamois (the padded insert in cycling shorts) is your primary interface between your body and the saddle. It reduces friction, manages moisture, and provides targeted cushioning - meaning less chafing and fewer hot spots on long rides.
Chamois Selection
- Thickness isn't everything: A thick, soft chamois can actually cause more problems by bunching up. Look for a medium density with good shape.
- Multi-density chamois: Higher quality shorts use variable-density chamois - firmer where your sit bones rest, softer in transition areas - so pressure is distributed evenly instead of concentrated on a single point.
- Watch the seam placement, not just the count: Flat- locked or offset seams keep stitching off the perineum and inner thigh, where chafing actually shows up around mile 30 or on hot, seated climbs. A short with one well-placed seam beats a short with three that run straight across the contact zone.
Proper Fit
Cycling shorts should fit snugly without bunching. Always wear them directly against the skin - never over underwear. Underwear creates seams and holds moisture exactly where you don't want it.
Budget Guide
| Tier | Price | What You Get |
|---|---|---|
| Basic | $30-60 | Single-density chamois, adequate for short rides under 1 hour |
| Quality | $60-120 | Multi-density chamois, better fabrics, suitable for rides of 1-3 hours |
| Premium | $120+ | Top-tier chamois, compression fabrics, advanced moisture management, ideal for 3+ hour rides |
Tip 6: Use Chamois Cream
Chamois cream reduces friction between your skin and the chamois pad, preventing chafing and saddle sores. It's a simple addition to your routine that can make a major difference on longer rides.
Application Technique
- Apply directly to your skin (sit bone area and any spots prone to chafing) or to the chamois pad itself.
- Use a generous, even layer - don't be stingy.
- Some riders prefer to apply to both skin and chamois for maximum coverage.
Product Selection
- Look for products that are anti-bacterial to help prevent saddle sores.
- Avoid products with menthol or strong cooling agents if you have sensitive skin.
- Natural ingredient options (tea tree oil, aloe) are available for those who prefer them.
When to Use Chamois Cream
Consider using chamois cream on any ride over 45-60 minutes, or any time you're prone to chafing. In hot, humid conditions, it becomes even more important as sweat increases friction.
Tip 7: Build Up Gradually
Your body needs time to adapt to sitting on a saddle, especially if you're new to cycling or returning after a break. Trying to do too much too soon is one of the main causes of saddle discomfort.
Progressive Training Schedule
| Period | Ride Duration | Frequency |
|---|---|---|
| Week 1-2 | 20-30 minutes | 3-4 rides per week |
| Week 3-4 | 30-60 minutes | 3-5 rides per week |
| Week 5-8 | 60-90+ minutes | 4-5 rides per week |
Adaptation Timeline
Most riders find that saddle discomfort significantly decreases after 2-3 weeks of consistent riding. Full adaptation typically takes 4-8 weeks. Be patient - your body is forming the necessary calluses and strengthening the muscles that support you on the saddle.
Warning Signs
While some soreness is normal during the adaptation period, certain symptoms mean you should stop and reassess:
- Numbness or tingling: Indicates nerve compression - adjust saddle position or width immediately.
- Sharp pain during riding:Something is wrong with your setup. Don't ride through it.
- Pain that persists after riding: If soreness lasts more than a day or two, review your fit.
- Skin breakdown or sores: Stop riding until healed and address hygiene, shorts, and saddle fit.
Tip 8: Stand Occasionally
Even with a perfect saddle setup, prolonged sitting in one position puts continuous pressure on the same contact points. Standing periodically relieves this pressure and restores blood flow.
The Every 10-15 Minutes Guideline
Make a habit of standing out of the saddle every 10-15 minutes during your ride. Even brief 10-15 second efforts make a difference.
Methods to Stand
- Climbs: Use natural terrain as an excuse to get out of the saddle.
- Sprints: Short accelerations out of the saddle break up the monotony and the pressure.
- Simple hover: Just lift your backside a few centimeters off the saddle while coasting or soft-pedaling.
Benefits Beyond Comfort
Standing periodically also engages different muscle groups, improves circulation in your legs, and can help prevent lower back stiffness on longer rides.
Tip 9: Keep Clean
Hygiene is an underrated factor in saddle comfort. Bacteria thrive in warm, moist environments - exactly the conditions created by cycling. Poor hygiene is a leading cause of saddle sores.
Pre-Ride Protocol
- Always start with clean, dry skin.
- Apply chamois cream as needed (see Tip 6).
- Wear freshly washed cycling shorts - never reuse shorts between rides without washing.
Post-Ride Protocol
Get out of your shorts as soon as you can - sitting around in damp chamois for an hour after a ride is how most saddle sores I've seen actually start. Rinse the contact areas with soap and water (a proper shower is better, but a sink and a washcloth will do at a trailhead), then let the skin air-dry fully before you put on anything else. The drier you finish, the less you'll deal with on tomorrow's ride.
Equipment Maintenance
- Wash cycling shorts after every ride using a gentle cycle and sports-specific detergent.
- Avoid fabric softeners - they can clog the chamois pad and reduce its moisture-wicking properties.
- Air dry when possible. Excessive heat (tumble dryers) can degrade the chamois pad over time.
- Wipe down your saddle occasionally with a damp cloth to remove sweat and salt buildup.
Tip 10: Consider a Bike Fit
If you've worked through the tips above and still experience persistent discomfort, a professional bike fit can identify issues that are difficult to diagnose on your own.
When Professional Fitting Is Recommended
- You've tried multiple saddles and positions without finding comfort.
- You experience recurring pain or numbness that doesn't improve with adjustments.
- You have a pre-existing injury or anatomical asymmetry.
- You're training for an event and want to optimize both comfort and performance.
- You've recently changed bikes or components.
What a Professional Bike Fit Includes
- Physical assessment: Flexibility testing, limb length measurement, and injury history review.
- Dynamic analysis: Video capture and motion analysis while you ride on a trainer or fit bike.
- Contact point optimization: Saddle height, setback, tilt, cleat position, handlebar reach, and stack.
- Equipment recommendations: Saddle shape and width, stem length, handlebar width, and crank length based on your anatomy.
- Follow-up:Many fitters include an adjustment session after you've ridden with the new setup.
Expected Investment
| Fit Type | Cost | What's Included |
|---|---|---|
| Basic Fit | $100-150 | Static measurements, basic saddle and handlebar adjustments |
| Saddle + Cockpit Fit | $200-300 | Dynamic analysis, video, full contact point optimization, equipment recommendations |
| Premium/Retül (3D motion-capture) Fit | $300-400 | 3D motion capture, detailed report, follow-up adjustments, ongoing support |
Try These Free Calculators First
Before investing in a professional fit, dial in your setup with our free calculators - no account required: Saddle Height, Saddle Size, Reach & Stack, and Handlebar Width. Many riders resolve their discomfort with these tools alone. See our Complete Bike Fitting Guide for step-by-step instructions.
Frequently Asked Questions
For a complete walkthrough of every adjustment, see our Complete Bike Fitting Guide. If your discomfort is related to reach, our Bike Stem Length Guide covers handlebar position in depth.
Conclusion
Saddle comfort isn't a mystery - it's a combination of proper equipment selection, correct setup, and good habits. By following these 10 tips, most riders can eliminate saddle discomfort entirely. Imagine finishing every ride thinking about the scenery you passed - not the saddle you sat on. That's the goal, and it's well within reach.
Key Takeaways
- Start with saddle width: Measure your sit bones and choose a saddle that matches. This is the foundation of comfort.
- Dial in your height: Use the 109% method (inseam × 1.09) and verify with the 25-35° knee angle check.
- Keep it level: Start with a level saddle and make only small 1-3° adjustments from there.
- Invest in shorts: Quality cycling shorts with a good chamois are as important as the saddle itself.
- Build up gradually: Allow 4-8 weeks for full adaptation, starting with short rides.
- Stay clean: Good hygiene prevents most saddle sores.
- Know when to get help:A professional bike fit ($100-400) can solve persistent issues that self-adjustment can't.
Related Calculators & Tools
Match your sit bone width to the right saddle
Find your optimal saddle height
Get the right handlebar width for comfort
Compare frame geometry for better comfort
Continue Reading

Fine-tune your reach and handling with the right stem

Dial in saddle height, reach, and handlebar position

Frame size, standover height, and reach explained

Reach, stack, and trail-specific sizing explained