Mountain Bike Sizing Guide 2026 | Trail Geometry + Calc
Guide
Quick Answer
Multiply your inseam (cm) by 0.66 to get your mountain bike frame size. Aim for 3-4 inches (75-100 mm) of standover clearance, and prioritize reach over stack for trail handling. Use our MTB Size Calculator for a personalized recommendation.
A wrong-sized mountain bike telegraphs itself the first time the trail gets technical. Too long, and the front wheel washes in tight corners because you can't weight it without folding over the bars. Too short, and your knees brush the bars on steep climbs while the bike wheelies out from under you. Either way, you spend the ride wrestling the bike instead of reading the trail.
Getting the right mountain bike size is critical for control, comfort, and confidence on the trail. Unlike road bikes where aerodynamic efficiency drives sizing, MTB sizing revolves around handling, standover clearance, and the ability to move around on the bike. This guide walks you through every aspect of mountain bike sizing, from geometry fundamentals to discipline-specific formulas.
Specialized Mountain Bike Tools
Before diving into theory, use these calculators to quickly find your numbers:
Enter your height and inseam to get a personalized frame size, recommended reach range, and standover clearance target.
Get front and rear PSI targets based on your weight, tire width, and trail conditions - so you can stop guessing and start gripping.
Calculate your ideal saddle height for efficient pedaling and comfortable climbs - results include dropper post travel guidance.
Find the stem length that balances steering speed and front-wheel traction for your riding style.
Mountain Bike Geometry Fundamentals
Mountain bike geometry has evolved dramatically over the past decade. Understanding the key measurements helps you pick the right size and compare bikes across brands. Here are the six numbers that matter most.
Reach
Reach is the horizontal distance from the center of the bottom bracket (the bearing assembly at the junction of the frame's down tube, seat tube, and chainstays) to the top of the head tube. It's the single best indicator of how long a bike will feel when you're riding. A longer reach gives more stability at speed, meaning you can carry momentum through rough sections with less effort; a shorter reach makes the bike nimbler at low speed, so you can thread tight switchbacks more easily. Modern trail bikes have significantly longer reach numbers than bikes from even five years ago. Plug your height into our reach and stack fit calculator to see the cockpit numbers that suit you before comparing frames.
Stack
Stack is the vertical distance from the bottom bracket center to the top of the head tube. A higher stack puts you in a more upright position, which is comfortable for long rides and reduces strain on your lower back and wrists - but shifts weight rearward, which can reduce front-wheel traction on climbs. A lower stack allows a more aggressive riding position, keeping weight forward for better cornering grip and descending control.
Standover Height
Standover height is the vertical distance from the ground to the top of the top tube at its lowest point. You need enough clearance to straddle the bike comfortably with both feet flat on the ground. On a mountain bike, generous standover clearance is essential because you frequently need to dismount quickly on rough terrain.
Head Tube Angle
The head tube angle (the angle between the fork's steering axis and the ground) measures the tilt of the fork steering axis relative to the ground. Slacker angles (63-65°) increase stability at high speed and on steep descents, giving you more confidence to let the bike run. Steeper angles (67-69°) quicken steering response and improve climbing traction by keeping more weight over the front wheel. Most modern trail bikes sit between 64° and 66°.
Seat Tube Angle
The seat tube angle (measured from the seat tube to the horizontal) affects your pedaling position relative to the bottom bracket. Steeper seat tube angles (76-78°) position you directly over the BB for efficient power transfer, especially on climbs - meaning more of your effort goes into forward motion rather than rocking the bike. This is the trend in modern MTB design: steep seat tubes paired with slack head tubes give you the best of both worlds.
Chainstay Length
Chainstay length (the distance from the bottom bracket to the rear axle) controls rear-end character. Shorter chainstays (420-435 mm) make the rear end playful and easier to manual or lift over obstacles, so the bike feels lively and responsive on jump trails and tight singletrack. Longer chainstays (440-460 mm) provide more stability and better traction on climbs, keeping the rear wheel planted when you're grinding up loose, steep terrain.
Professional MTB Sizing Formulas
Primary Formula: Inseam-Based Sizing
The most widely used method for determining mountain bike frame size is the inseam multiplier. Measure your inseam in centimeters-stand barefoot, place a book between your legs snug against your crotch, and measure from the top of the book to the floor.
Mountain Bike Frame Size (cm) = Inseam (cm) × 0.66
For example, an 84 cm inseam gives 84 × 0.66 = 55.4 cm, which translates to roughly a Medium or Large depending on the brand.
Note
This formula gives a starting point. Always cross-reference with the manufacturer's size chart since sizing conventions vary between brands. Use our MTB Size Calculator for a recommendation that accounts for height, inseam, and riding style - free, no account required.
Reach-Based Sizing
Many experienced riders and bike fitters now prefer reach as the primary sizing metric because it directly describes how long the bike feels. Rather than relying on traditional S/M/L labels (which vary by brand), you can compare reach numbers directly across different manufacturers.
A general guideline: your ideal reach in millimeters should roughly equal your torso length minus 100 mm, then adjusted for arm length and riding preference. However, the practical approach is to reference the table below and fine-tune from there.
Size Categories by Reach
| Size | Reach (mm) | Typical Rider Height |
|---|---|---|
| XS | 400-425 | 5'0″-5'4″ (152-163 cm) |
| Small | 425-450 | 5'4″-5'8″ (163-173 cm) |
| Medium | 450-475 | 5'8″-6'0″ (173-183 cm) |
| Large | 475-500 | 6'0″-6'3″ (183-191 cm) |
| XL | 500-525+ | 6'3″+ (191 cm+) |
Standover Calculation
You can also verify size using standover height. Subtract the bike's standover measurement from your inseam to get your standover clearance:
Standover Clearance = Inseam (cm) − Standover Height (cm)
Aim for at least 75 mm (3 inches) of clearance for cross-country, and 100-150 mm for trail, enduro, and downhill riding.
Standover Clearance Requirements
Standover clearance is the space between the top tube and your crotch when straddling the bike. On mountain bikes, adequate clearance is a safety requirement-you need to dismount quickly when things go wrong on technical terrain.
Clearance by Riding Style
| Riding Style | Minimum Clearance | Why |
|---|---|---|
| Cross-Country (XC) | 75 mm (3″) | Lower speeds, smoother surfaces, less sudden dismounting |
| Trail | 100 mm (4″) | Mixed terrain requires quick dismounts and body movement |
| Enduro | 125 mm (5″) | Aggressive descending and technical features demand extra room |
| Downhill (DH) | 150 mm+ (6″+) | Maximum clearance for steep, high-speed descents and crashes |
Measuring Technique
- Stand over the bike in your riding shoes on flat ground.
- Position the bike upright with the wheels straight-don't lean it.
- Measure the gap between your crotch and the top tube at its lowest point.
- Have a friend help or use a book held level against your crotch and measure down to the top tube.
Common Mistakes
- Measuring with shoes off- Always use your riding shoes. Mountain bike shoes can add 15-25 mm of height.
- Ignoring suspension sag - Measure with the suspension at full extension (unweighted) for a worst-case scenario.
- Measuring at the wrong point - Measure at the lowest point of the top tube, not where it meets the seat tube.
- Not accounting for terrain - If you ride aggressive trails, err on the side of more clearance, not less.
Reach vs Stack Optimization
Reach and stack together define your riding position more accurately than any traditional size label. Understanding their relationship helps you choose between sizes and compare bikes across brands.
Why Reach Matters More Than Frame Size
Reach controls the horizontal distance between you and the handlebars. A 10 mm difference in reach is noticeable on the trail-it changes weight distribution, steering input, and how much you need to lean forward. Reach is harder to adjust after purchase than stack (which you can change with headset spacers or stem angle).
Stack Height Considerations
Stack determines how high your handlebars sit relative to the bottom bracket. Higher stack = more upright position = better comfort on long rides and less weight on hands. Lower stack = more aggressive forward lean = better weight distribution for steep descents. You can increase stack by adding headset spacers or using a higher-rise stem, but you can't easily reduce it below the frame's built-in stack.
Stack-to-Reach Ratios by Discipline
The stack-to-reach ratio reveals a bike's intended riding position. A higher ratio means a more upright riding position; a lower ratio means a more aggressive, forward-leaning stance.
| Discipline | Stack-to-Reach Ratio | Position |
|---|---|---|
| Cross-Country | 1.35-1.45 | Aggressive, forward-leaning for climbing efficiency |
| Trail | 1.40-1.50 | Balanced position for climbing and descending |
| Enduro | 1.45-1.55 | Upright, rearward-biased for descending confidence |
Between-Sizes Analysis
When you fall between two sizes, reach is the deciding factor. If you're between a Medium and a Large:
- Size up (longer reach) if you prioritize stability at speed, ride fast and aggressive descents, or have a longer torso relative to your legs.
- Size down (shorter reach) if you value agility over stability, ride tight and technical trails, or have a shorter torso relative to your legs.
- Consider stem length- A shorter stem (35-50 mm) on a larger frame improves handling; a longer stem (60-80 mm) on a smaller frame adds stability, but beyond these ranges you lose the bike's intended handling character.
Suspension Impact on Sizing
Suspension travel significantly affects how a mountain bike fits and handles. The same frame size can feel different with a 120 mm fork vs. a 160 mm fork.
Front Suspension Effects
- Longer forks raise the front end, slackening the head tube angle and increasing stack height. The bike feels more stable at speed but slower to steer.
- Shorter forks lower the front end, steepening the head tube angle and reducing stack. The bike steers faster and climbs more efficiently.
- Sag affects effective geometry- At 25-30% sag (the amount the suspension compresses under your static body weight, typically for trail riding), the fork compresses 30-45 mm, which lowers the front end and steepens geometry slightly from static numbers.
Rear Suspension Effects
- Rear sag lowers the bottom bracket, changing standover height and the bike's center of gravity. More sag = lower BB = more stability but higher pedal strike risk.
- Anti-squat kinematics affect pedaling position under power. Bikes with high anti-squat stay higher in their travel under pedaling, maintaining a more consistent riding position.
Hardtail vs Full Suspension Sizing
Hardtail
Hardtails have a fixed rear triangle, so their geometry is consistent and predictable. Standover height is determined solely by the frame design. Sizing is more straightforward-the frame size you calculate from your inseam is typically accurate without adjustment.
Full Suspension
Full-suspension bikes change geometry as the rear shock compresses. Bottom bracket height drops, effective seat tube angle changes, and reach shortens slightly under sag. Some riders prefer to size up on full-suspension bikes to maintain reach at sag, especially for bikes with longer travel (150 mm+).
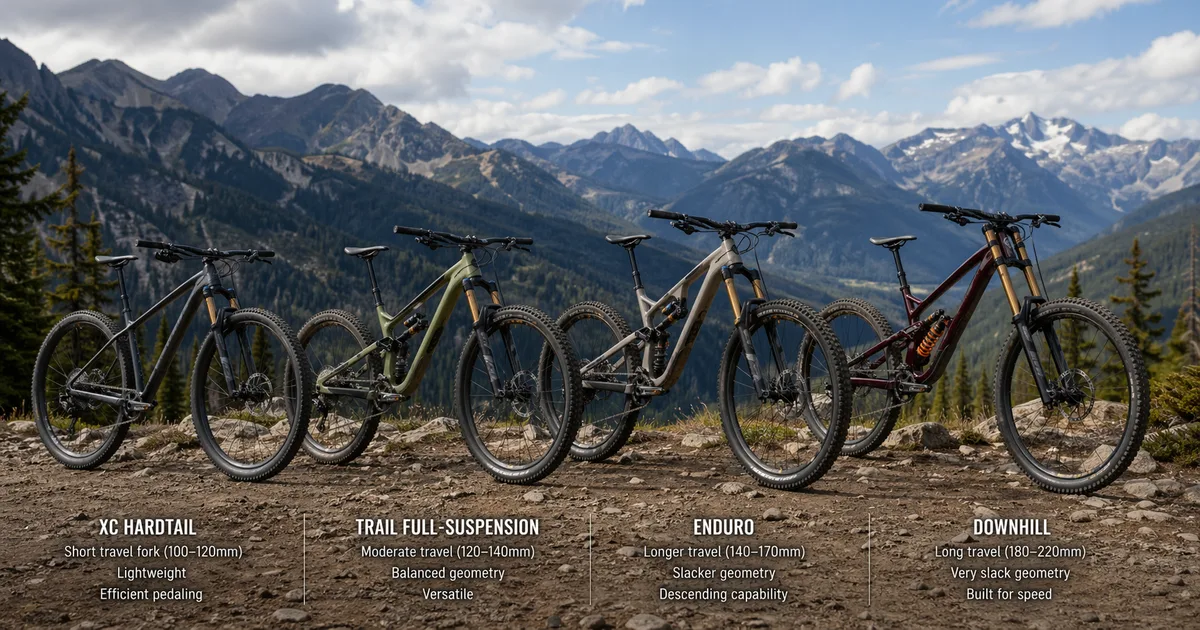
MTB Categories & Sizing Differences
Different mountain bike disciplines have distinct sizing philosophies. A cross-country race bike and a downhill bike in the "same size" can have very different reach, stack, and standover numbers.
Cross-Country (XC)
XC bikes prioritize pedaling efficiency and low weight. Geometry is steeper (68-69° head tube, 74-76° seat tube) with shorter travel (100-120 mm). Sizing tends to be more compact with shorter reach and lower stack for an aggressive climbing position.
XC Frame Size (cm) = Inseam (cm) × 0.67
Examples include the Specialized Epic and Trek Supercaliber.
Trail
Trail bikes are the all-rounders, designed to climb well and descend confidently. Geometry sits in the middle (65-67° head tube, 76-77° seat tube) with 130-150 mm travel. Modern trail bikes have longer reach numbers than their forebears, favoring stability.
Trail Frame Size (cm) = Inseam (cm) × 0.66
Bikes like the Santa Cruz Hightower and Giant Trance set the modern trail benchmark.
Enduro
Enduro bikes are built for timed downhill stages with untimed climbs between them. They have slack geometry (63-65° head tube, 77-78° seat tube), 150-170 mm travel, and longer wheelbases for high-speed stability. Riders often size for reach and descending confidence, accepting a less ideal climbing position.
Enduro Frame Size (cm) = Inseam (cm) × 0.65
Reference platforms include the Pivot Firebird and Norco Range.
Downhill (DH)
DH bikes are gravity-only machines with 180-200+ mm travel, ultra-slack geometry (62-64° head tube), and dual-crown forks. Sizing focuses on maximum standover clearance and a very low center of gravity. Frame sizes are typically limited to 2-3 options (S/M/L) with large reach adjustments between them.
DH Frame Size (cm) = Inseam (cm) × 0.64
The YT Tues and Canyon Sender are popular DH benchmarks.
Cockpit Setup for Trail Riding
Your cockpit-handlebars, stem, and grips-has a massive impact on how the bike handles and how comfortable you are on the trail. Even on a perfectly sized frame, a bad cockpit setup can ruin the ride.
Handlebar Width
Wider handlebars give more leverage and control but can be tiring on long rides and catch on trees. Narrower bars are faster through tight trails but offer less control at speed. Match your bar width to your discipline:
| Discipline | Bar Width (mm) | Notes |
|---|---|---|
| XC | 720-740 | Narrower for efficient climbing and tight trails |
| Trail | 760-780 | Balanced width for all-around riding |
| Enduro | 780-800 | Wider for stability on aggressive descents |
| DH | 780-800 | Maximum leverage for high-speed control |
Pro Tip
Buy handlebars slightly wider than you think you need. You can always cut them down with a pipe cutter, but you can't add material back. Try riding a few sessions before cutting to find your preferred width.
Stem Length
Stem length dramatically affects steering speed and front-end weight. Shorter stems make steering quicker and more responsive; longer stems slow steering and weight the front wheel more for climbing traction.
| Discipline | Stem Length (mm) | Effect |
|---|---|---|
| XC | 70-110 | Longer for climbing traction and stability |
| Trail | 40-60 | Short to medium for balanced handling |
| Enduro | 35-50 | Short for quick steering and body positioning |
| DH | 35-50 | Short for maximum control at high speed |
Grip and Control Setup
- Grip diameter- Thinner grips (30 mm) allow more hand wrap and control feel. Thicker grips (34 mm) reduce hand fatigue on rough terrain by absorbing vibrations.
- Lever reach - Adjust brake lever reach so you can brake with one finger from a neutral wrist position. Your index finger should rest on the end of the lever for maximum leverage.
- Lever angle - Point brake levers slightly downward (about 20-30° below horizontal) so your wrists stay straight on steep descents.
Size Between Frames Decision Guide
Falling between two sizes is one of the most common challenges in mountain bike sizing. Here's a systematic approach to making the right choice.
Professional Decision Matrix
| Factor | Size Up | Size Down |
|---|---|---|
| Riding style | Fast, open trails | Tight, technical singletrack |
| Body proportions | Long torso, shorter legs | Short torso, longer legs |
| Priority | Stability and descending | Agility and maneuverability |
| Arm length | Longer arms (ape index > 1.0) | Shorter arms (ape index < 1.0) |
| Ape index = wingspan ÷ height. A value above 1.0 means your arms are proportionally long for your height, which usually favors a longer reach. | ||
| Experience level | Advanced (can handle longer bikes) | Beginners (easier to maneuver) |
| Terrain | Flowy, high-speed trails | Steep, slow technical terrain |
Testing Protocol
If possible, test ride both sizes before purchasing. Follow this protocol for a fair comparison:
- Set identical cockpit dimensions on both bikes (saddle height, handlebar width, stem length).
- Ride the same trail on both bikes back-to-back so conditions are consistent.
- Test specific scenarios - steep climbs, fast descents, tight switchbacks, and technical features.
- Check comfort after 30+ minutes to assess fatigue and any pressure points.
- Trust your gut - the bike that feels more natural and confident is the right one.
Testing Your MTB Fit
Once you have a bike, verify your fit with both static checks and dynamic testing on the trail.
Static Fit Checks
- Standover clearance - Straddle the bike in riding shoes. You should have the minimum clearance for your discipline (see the clearance table above).
- Saddle height - Sit on the saddle with your heel on the pedal at the bottom of the stroke. Your leg should be fully extended. When clipped in or on the ball of your foot, you should have a slight bend (25-30° knee angle).
- Reach check - In your riding position, your elbows should be slightly bent. If your arms are fully extended, the reach is too long. If your elbows are very bent, it may be too short.
Dynamic Testing: Four Phases
Phase 1: Parking Lot (5 minutes)
Ride in circles, figure eights, and practice slow-speed maneuvers. The bike should feel balanced and easy to turn at walking speed.
Phase 2: Flat Trail (15 minutes)
Ride at moderate speed on a flat, smooth trail. Check for comfortable hand position, no neck or shoulder tension, and even weight distribution between saddle and handlebars.
Phase 3: Climb (10 minutes)
Climb a moderate grade both seated and standing. The front wheel shouldn't wander or lift on steep pitches. You should be able to shift your weight forward without feeling stretched out.
Phase 4: Descent (10 minutes)
Descend moderate terrain in the attack position (standing, knees bent, weight centered). Check that you can comfortably get behind the saddle on steep sections and that the cockpit doesn't feel cramped when your weight is rearward.
Professional Fit Indicators
Signs of a Good Fit
- You can drop your heels and shift weight rearward on a steep descent without feeling stretched over the bars
- Cornering feels intuitive - you can lean the bike under you and weight the outside foot without the front wheel pushing
- Manualing or lofting the front wheel over a root takes a body shift, not a full-on hip thrust to the back tyre
- On long climbs you stay seated and centred - the front wheel doesn't wander and your knees clear the bar sweep
- After two hours on rough trail your hands, neck, and lower back are tired but not painful
Signs of a Poor Fit - Take Action
- Numbness in hands or feet after short rides → Cockpit or saddle adjustment needed
- Lower back pain → Reach may be too long or saddle too low
- Front wheel wanders on climbs → Reach too short, not enough weight on front
- Feeling cramped on descents → Frame may be too small, try longer stem first
- Shoulder and neck tension → Stack too low or reach too long
Long-Term Validation
A truly good fit reveals itself over weeks, not hours. Track these indicators over your first 10-15 rides:
- Fatigue pattern - Are you getting tired in the legs (good, means the bike fits) or in the back, neck, and hands (bad, means fit issues)?
- Confidence progression - Your confidence should increase as you get used to the bike. If it plateaus or decreases, the fit may be holding you back.
- Post-ride comfort - Soreness in cycling muscles is normal. Pain in joints, numbness, or tingling indicates a fit problem.
- Handling instincts- The bike should feel like an extension of your body. If you're constantly fighting it, the size or setup needs adjustment.
Advanced Geometry Considerations
Modern Geometry Trends
The mountain bike industry has shifted toward longer, lower, and slacker geometry across all categories. Key trends include:
- Longer reach- Modern trail bikes have 10-20 mm more reach per size than bikes from 2018-2020. This is paired with shorter stems (35-50 mm) for quicker steering. The practical benefit: you feel more centered on the bike at speed, with less tendency to go over the bars on steep descents.
- Slacker head tube angles - Trail bikes now run 64-66° head tube angles that were enduro-only territory five years ago. This improves descending confidence, letting you commit to steeper lines you might have walked before.
- Steeper seat tube angles - Moving from 73-74° to 76-78° puts riders over the BB for better pedaling, compensating for the longer front-center caused by slacker head angles. Translation: climbs feel more efficient even though the bike is longer overall.
- Lower bottom brackets - BB drop (the vertical distance the bottom bracket sits below the wheel axle centerline) has increased, lowering the center of gravity for stability. You feel more planted in corners, though the trade-off is higher pedal strike risk on rocky terrain.
- Longer wheelbases - The wheelbase (total distance between front and rear axle centers) has grown as a combined effect of longer reach and slacker head angles. The result is a calmer, more composed ride at speed, though tight switchbacks require more effort.
Suspension Kinematics
Advanced riders should consider how suspension design affects fit. Key kinematics to understand:
- Anti-squat - How much the suspension resists compression under pedaling force. High anti-squat keeps the BB height more consistent while pedaling, so your pedal strokes feel firm and direct rather than bobbing the suspension.
- Axle path - The arc the rear axle traces through its travel. A rearward axle path helps the wheel roll over square-edge hits more smoothly, while a more vertical path can feel harsher on rocks and roots.
- Leverage ratio - How the rear shock compression rate changes through travel. A progressive leverage curve provides more support deep in travel, which means the bike resists bottoming out on big hits even with a plush initial feel.
Geometry Customization
Many modern mountain bikes offer geometry adjustments:
- Flip chips- Small inserts at the shock mount or dropout that change head tube angle, BB height, and chainstay length by 0.5-1°. Use the "low" setting for more stability and the "high" setting for nimbler handling.
- Adjustable headset cups - Offset headset cups that change the head tube angle by 0.5-1° without affecting other geometry numbers.
- Adjustable dropouts - Allow you to change chainstay length to tune rear-end handling character.
Shop mountain bikes
A selection of mountain bikes available on Amazon - useful for comparing sizes and price points once you know your fit.
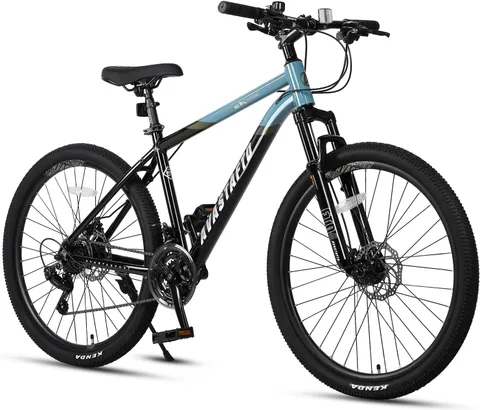
AVASTA
AVASTA Earth 26/27.5 Mountain Bike
Entry-level aluminum hardtail in 26" and 27.5" wheels with a switchable (lockable) suspension fork, 21-speed Shimano-compatible drivetrain, and dual mechanical disc brakes. Single frame size per wheel; adjustable saddle/stem fits 5'3"-6'2" depending on wheel choice. Hidden cable routing and quick-release wheels.
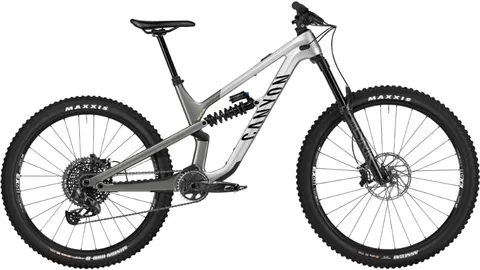
Canyon
Canyon Spectral
Trail/enduro bike with 150mm travel. Modern long geometry-many riders size down from road sizing; prioritize reach over height.
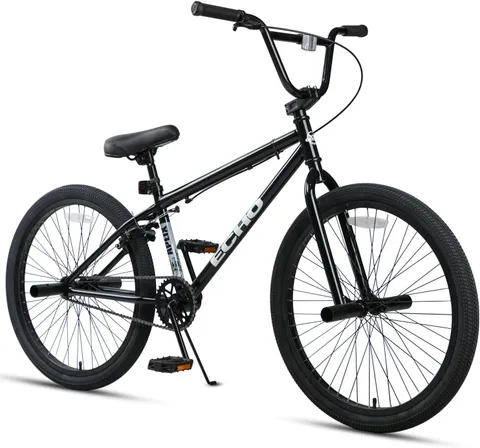
CUBSALA
CUBSALA Echo 24 BMX
24" beginner BMX with high-tensile steel frame, rear U-brake, and 4 stunt pegs included. Fits riders 4'10"-6'0" - large enough for teens and most adults but lighter and more flickable than a 26" mountain bike. Ships 85% pre-assembled.
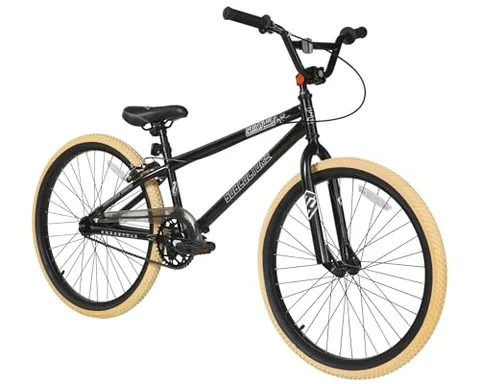
Dynacraft
Dynacraft Tony Hawk Subculture 24" BMX
Licensed Tony Hawk 24 in BMX cruiser for teens and small adults (height 4'10" to 5'6", inseam 26-30 in). Steel frame with longer top tube than a 20 in BMX, single rear rim brake, pegs included. The 24 in wheel makes it a comfortable street cruiser rather than a park bike - good for tall pre-teens who have outgrown a 20 in BMX but aren't ready for a full mountain bike.
As an Amazon Associate we earn from qualifying purchases. This helps support our free calculators.
Frequently Asked Questions
For broader bike sizing guidance, check out our Complete Bike Fitting Guide and How to Choose the Right Bike Size.
Conclusion
Mountain bike sizing is more nuanced than picking a frame based on your height. The right size depends on your inseam, riding style, discipline, and personal preference. Start with the inseam × 0.66 formula, verify with standover clearance, and use reach as your primary comparison metric when shopping across brands.
Remember that modern MTB geometry has shifted toward longer, lower, and slacker designs-if you're coming from an older bike, a modern frame in the "same size" will feel very different. Test ride when possible, and don't hesitate to adjust your cockpit with stem length and handlebar width to dial in the fit.
Get the size right and the bike stops being something you fight. You notice it on the second lap of a familiar trail - the corner you always braked early for is suddenly the corner you carry speed through, because you can actually weight the front tyre. That's the whole goal: a bike that does what you ask without arguing about it.
Ready to Find Your Size?
Use our Mountain Bike Size Calculator to get a personalized frame size, reach range, and standover target based on your measurements and riding style. Free - no account required.
Related Calculators & Tools
Find your perfect MTB frame size
Optimize your MTB tire pressure
Set the right saddle height for trail riding
Dial in your MTB cockpit position
Compare drivetrain setups and climbing ratios