How to Bleed Hydraulic Disc Brakes (Shimano & SRAM, Step by Step)
How-To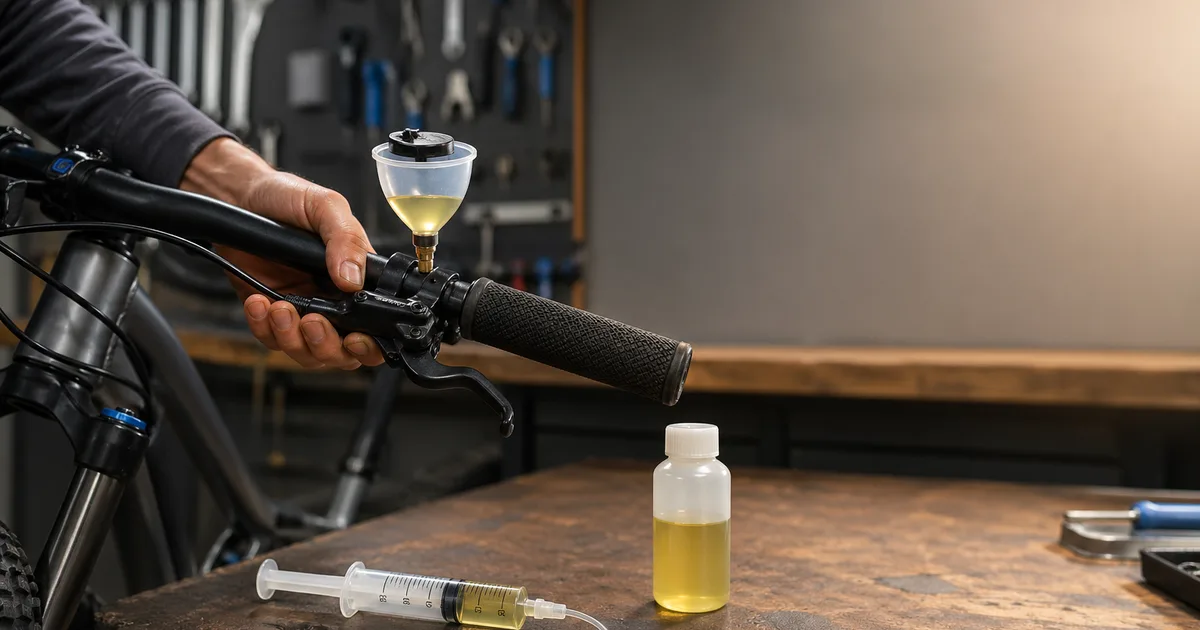
Hydraulic brakes are the single most important system on a modern bike, and a bleed is the one home-mechanic job where getting it wrong has real consequences - loss of braking, contaminated pads, even a bricked caliper. Done correctly with the right fluid and a few inexpensive tools, a full bleed takes about an hour and costs $50-$80 in parts. This guide covers both Shimano (mineral oil) and SRAM (DOT 5.1) systems, the compatibility rules you cannot break, and an honest list of cases where you should hand it to a shop.
⚠ Safety disclaimer - read before you start
Brake fluid is brake-system specific. Shimano, Magura, Tektro, Campagnolo, and most TRP brakes use mineral oil. SRAM, Hayes, Formula (most), Avid, and Hope use DOT fluid (DOT 4 or DOT 5.1). Never mix them. Putting DOT in a mineral-oil brake - or vice versa - destroys the seals within minutes, can cause a complete loss of braking, and may require replacing the lever and caliper.
DOT fluid also strips paint and is hygroscopic (absorbs water). Wear nitrile gloves and safety glasses, cover your frame with a rag, and clean any spills immediately with water. If you are not 100% confident about which fluid your brake takes, stop and call a shop.
At a Glance
- Time: ~60 minutes for both brakes
- Skill level: Advanced
- Cost: $50-$80 (kit + fluid)
- Tools needed: 7 (kit, blocks, hex set, torque wrench, gloves, glasses, rags)
Who This Is For
- Mountain bikers and gravel riders who notice the lever pulling closer to the bar after a season of hard descents
- Mechanic-curious commuters with hydraulic disc brakes (Shimano BR-MT200 to XTR, SRAM Level to Code) who want to stop paying shop labour
- Anyone who shortened a hose, swapped a lever, replaced a caliper, or contaminated a pad - all of which require a full bleed, not a top-up
When You Actually Need to Bleed
Hydraulic brakes don't need bleeding on a calendar. They need bleeding when the system tells you it has air, contamination, or old fluid in it. There are four clear signals:
- Spongy lever feel.A healthy lever bites firm within the first 10-15 mm of travel. If it feels mushy or compresses further on a second pull, there's air in the system.
- Lever pulls to the bar.The lever bottoms against the grip with no useful braking. This is air, low fluid, or both - and it's a stop-riding fault, not a tomorrow problem.
- Wandering bite point. The pads engage at a different lever position from one descent to the next. Often caused by a bubble migrating around the system as the brake heats and cools.
- You opened the system. Hose shorten, lever swap, caliper replacement, suspected pad contamination - any of these require a full bleed, not a top-up.
If your symptom is just a slowly receding bite point with no other issues and a recent bleed, a top-up via the lever may be enough. For anything else - and any system over two years old - do the full procedure. Pair this work with a pre-ride M-check and a fresh set of brake pads and the bike will feel new.
Mineral Oil vs DOT Fluid - Why It Matters
The seals inside your brake's lever and caliper are designed for one fluid type. Mineral oil and DOT fluid are chemically incompatible - DOT will swell mineral-oil seals into useless mush in under an hour, and mineral oil will do the same to DOT seals more slowly but just as completely. Once you contaminate a brake, the only fix is to replace every seal and hose, which usually means replacing the lever and caliper.
DOT fluid has additional rules. DOT 4 and DOT 5.1 are compatible with each other (both glycol-ether based) - but SRAM specifically calls for DOT 5.1 because of its higher boiling point. DOT 5 is silicone-based and is incompatible with DOT 4/5.1. Never confuse them.
| Brand | Fluid | Notes |
|---|---|---|
| Shimano (all) | Mineral oil | Only Shimano-branded mineral oil - generic blends lack the seal additives |
| SRAM (Level, Code, G2, Guide, HRD) | DOT 5.1 | DOT 4 works in a pinch but bleed soon |
| SRAM Maven, DB8 | Mineral oil | SRAM's newer mineral-oil platform |
| Magura | Royal Blood (mineral) | Brand-specific mineral oil |
| Hayes / Hope / Formula (most) | DOT 4 or 5.1 | Check the specific lever - Formula has both |
| Tektro / TRP (most) | Mineral oil | A few HD-series TRPs use DOT - confirm |
When in doubt, the lever body is usually printed with the fluid type. If the print has worn off, look up the model. Do not guess.
Tools & Supplies
Bleeding kits are system-specific. The cheapest sustainable setup is an OEM kit for your brand plus a small assortment of bleed blocks.
| For Shimano | For SRAM |
|---|---|
| Shimano TL-BT03A funnel bleed kit (~$28) | SRAM Pro Bleed kit, DOT version (~$54) |
| 100 ml Shimano mineral oil | 4 oz SRAM DOT 5.1 fluid |
| Bleed block (BR-M9100 / BR-MT520 etc.) | Bleeding Edge bleed block (Level / Code / G2 / Guide) |
| 7 mm box wrench | T10 / T25 Torx + Bleeding Edge tool |
| Shared: 2.5/3 mm hex keys, torque wrench (1-10 Nm), nitrile gloves, safety glasses, isopropyl alcohol (90%+), lint-free rags, disc brake cleaner. | |
If you service multiple brands, the Park Tool BKM-1.2 covers most mineral-oil systems and the Finish Line Brake Bleed Kit includes adapters for Shimano, SRAM, Magura, and Hayes - fine for occasional use, less durable than OEM kits over years.
Set Up the Bike
Setup is half the bleed. Get this right and the rest is mechanical.
- Mount the bike level.A workstand with a clamp on the seatpost works. The frame doesn't need to be perfectly level, but the lever and caliper do - see below.
- Remove the wheel and pads.Pull the wheel, unscrew the pad-retention pin or screw, and slide the pads out. Inspect them - if they smell like oil or have a glossy black coating, they're contaminated and need to be replaced regardless of the bleed result.
- Insert the bleed block. The block holds the pistons in place at their full retracted position. Skipping this step is the #1 cause of pistons walking out and refusing to retract afterward.
- Level the lever.Loosen the lever clamp and rotate the bar so the reservoir port faces straight up. The reservoir surface should be parallel to the floor - if it's tilted, air gets trapped in the lower corner.
- Level the caliper. The bleed nipple must be the highest point on the caliper. Reposition the bike in the stand or remove the caliper from the post mount and hold it vertical so the nipple points up. For a 4-piston caliper, this is non-negotiable.
- Cover the frame. Drape a rag over the top tube and bottom of the lever clamp. Mineral oil is paint-safe but slippery; DOT will eat clear coat in seconds.
Shimano Funnel Bleed (Gravity)
The Shimano method is straightforward: pour clean oil into a funnel threaded into the lever, open the caliper, and let gravity pull fluid down through the system while air bubbles rise back into the funnel. The Servo Wave architecture in modern Shimano levers means a clean, bubble-free fluid column makes a noticeable difference in lever feel.
Step 1 - Prep the system
Wheel out, pads out, bleed block in. Confirm the lever and caliper are level (see set up the bike). Remove the lever bleed-port screw with a 2.5 mm hex.
Step 2 - Install the funnel
Thread the Shimano funnel into the lever bleed port until the O-ring seats. Don't crank it - finger tight plus a quarter turn is enough. Pour mineral oil in until the funnel is about half full.
Step 3 - Open the caliper
Slide a clear hose over the caliper bleed nipple, run the other end into a catch bottle that already has a few millilitres of clean oil at the bottom. (The oil in the bottle keeps air from sucking back up the hose.) Crack the bleed nipple a quarter turn with a 7 mm wrench.
Step 4 - Let gravity work and watch the funnel
Oil starts flowing down through the system and into the catch bottle. You'll see bubbles rise up into the funnel - that's the goal. Top up the funnel as the level drops; never let it go empty or you'll suck air back into the lever. Run at least 20-30 ml of fresh oil through.
Step 5 - Close the caliper
Once the catch hose runs clear and bubble-free, close the caliper bleed nipple. Torque to 4-6 Nm - Shimano's spec is 4-6 Nm and these brass nipples strip if you crank them.
Step 6 - Lever flicks to free trapped air
Squeeze the lever firmly several times. You'll see micro-bubbles pop up into the funnel. Then flick the lever rapidly with short, sharp pulls while gently tapping the hose along its length and the caliper body with a plastic-handled screwdriver. Stuck bubbles will rise. Continue until the funnel is bubble-free for at least 10 seconds with the lever held closed.
Step 7 - Cap, seal, and torque the lever
Pull the lever to the bar and hold it with a strap. Insert the funnel stopper to trap a column of oil. Quickly unthread the funnel and immediately install the lever bleed-port screw. Torque to ~0.5 Nm - these tiny screws strip with almost any force above finger-tight.
Step 8 - Clean and test
Wipe the lever and caliper down with isopropyl alcohol. Spray the caliper interior and rotor with disc-brake cleaner. Pull the bleed block out, reinstall the pads, refit the wheel, and squeeze the lever. It should feel firm within the first 10-15 mm of travel and shouldn't pull more than halfway to the bar under any pressure.
SRAM Bleeding Edge / Push-Pull (Syringe)
SRAM uses a closed two-syringe push-pull method. Modern SRAM calipers have a Bleeding Edge port - a sprung valve that opens and seals automatically when the syringe fitting threads in, eliminating the messy “crack the bleed nipple, catch the drips” step. Older Avid / pre-2016 SRAM calipers use a standard threaded nipple and a slightly different procedure (noted below).
Step 1 - Prep both syringes
Fill the caliper-side syringe about half-full with DOT 5.1, hold it vertical, and tap to send any visible air to the top. Push the plunger gently to expel that air, then pull a small vacuum and release - this de-gases the fluid. Repeat with the lever-side syringe but fill it less (about a third).
Step 2 - Connect and open the system
Thread the caliper-side syringe into the Bleeding Edge port (T10 screw out first on older systems). Remove the lever-side bleed screw with a T25 and thread the lever syringe in. Check both are sealed - DOT leaks here will damage paint instantly.
Step 3 - Push fluid up from the caliper
Slowly push the caliper-side syringe. Fresh fluid moves up through the hose and into the lever syringe, carrying any air with it. Keep going until the lever syringe has gained roughly the volume you pushed and the line is visually clear of bubbles. Don't push so fast you cavitate the fluid.
Step 4 - Pull-push from the lever side
Now pull a vacuum on the lever syringe and hold for 5 seconds - you'll see new bubbles pop out of the fluid. Push the plunger back down to send fluid back toward the caliper. Repeat the pull-push three or four times. This is where most of the dissolved air comes out.
Step 5 - Final lever-side compression
With the lever-side syringe still attached and roughly half full, squeeze the brake lever firmly several times against the compressed plunger. Hold the brake lever to the bar and remove the lever syringe quickly, replacing the bleed screw. SRAM specifies the lever bleed screw torque at ~1.2 Nm - finger-snug, not cranked.
Step 6 - Pressure-bleed the caliper (optional, RSC / Code RSC)
On Code RSC and high-end Level brakes with adjustable contact point, push the caliper syringe firmly to about 1-2 bar of pressure for 5 seconds, then unthread quickly. The Bleeding Edge valve closes itself. This pressure-bleed step seats the bladder fully and gives the crispest lever feel.
Step 7 - Clean (DOT-aware) and test
Flush everything the fluid touched with water first, then isopropyl alcohol, then disc brake cleaner. DOT will not evaporate harmlessly - it lifts paint and corrodes alloy. Reinstall pads, wheel, rotor, and test as for the Shimano method.
For older Avid / Juicy / pre-Bleeding-Edge systems, replace step 2 with a standard threaded nipple connection: crack the nipple a quarter turn before pushing fluid, close it before disconnecting. Otherwise the procedure is identical.
Reinstall Pads & Bed-In
New pads, fresh fluid, and a clean rotor need bedding-in to deposit a thin, even layer of pad material onto the rotor surface. Skip this and you'll have grabby, vibrating brakes for the first week.
- 20 light drags from ~30 km/h.Accelerate to ~30 km/h on a flat road, drag the brake firmly but don't lock the wheel, slow to ~10 km/h, repeat. This deposits the transfer layer.
- 5 hard but non-locking stops from ~30 km/h.Pull harder. Don't lock - locking glazes the pad and ruins the bed-in.
- No full stops, no panic braking, no parking on hot rotors against a curb. Coast to a stop or release before standing still.
For the full pad procedure (and which compound to pick for the terrain you actually ride), see our brake pad replacement guide.
Common Mistakes
- DOT on paint. Even a single drop strips clear coat. Lay a rag, work over a tray, and rinse with water before reaching for any solvent.
- Reinstalling contaminated pads.If oil - any oil - touched the pad face, it's done. New pads. No exceptions. Trying to burn it off on a long descent will fail loudly.
- Over-tightening bleed-port screws. The lever bleed screw on Shimano is ~0.5 Nm; SRAM is ~1.2 Nm. They strip easily. If you have a small torque driver, use it.
- Missing the bubble in the banjo. Hoses with a banjo fitting at the lever or caliper trap bubbles in the 90-degree bend. Tap the banjo with a plastic handle during the lever-flick step.
- Forgetting the bleed block.Without it, pistons walk out as you push fluid in. They become impossible to retract, and you'll have to push them back manually with a plastic tire lever - risking damage.
- Mixing fluids. Worth saying again. Mineral oil and DOT in the same brake means new lever and new caliper. No flush will save it.
Troubleshooting Matrix
| Symptom | Likely cause | Fix |
|---|---|---|
| Still spongy after bleed | Bubble in banjo or hose | Repeat lever flicks; tap fittings; re-level the lever and caliper |
| Burning smell on first ride | Contaminated rotor or pads from fluid spill | Clean rotor with disc brake cleaner; replace pads if smell persists |
| Wandering bite point | Trapped micro-bubble migrating with heat | Re-bleed with the brake fully heated up after a hard descent |
| Lever pulls to bar after one ride | Lever bleed screw loose, or pad contamination expanding pistons unevenly | Re-torque bleed screw; inspect pads; if pistons look uneven, see “send it to a shop” below |
| One pad rubs constantly | Sticky piston or warped rotor (not always a bleed issue) | True the rotor; clean pistons; if one piston still won't retract, shop it |
| No pressure at all after bleed | Lever bleed screw missing/leaking, or huge air pocket | Reseal the lever and run a full second bleed cycle |
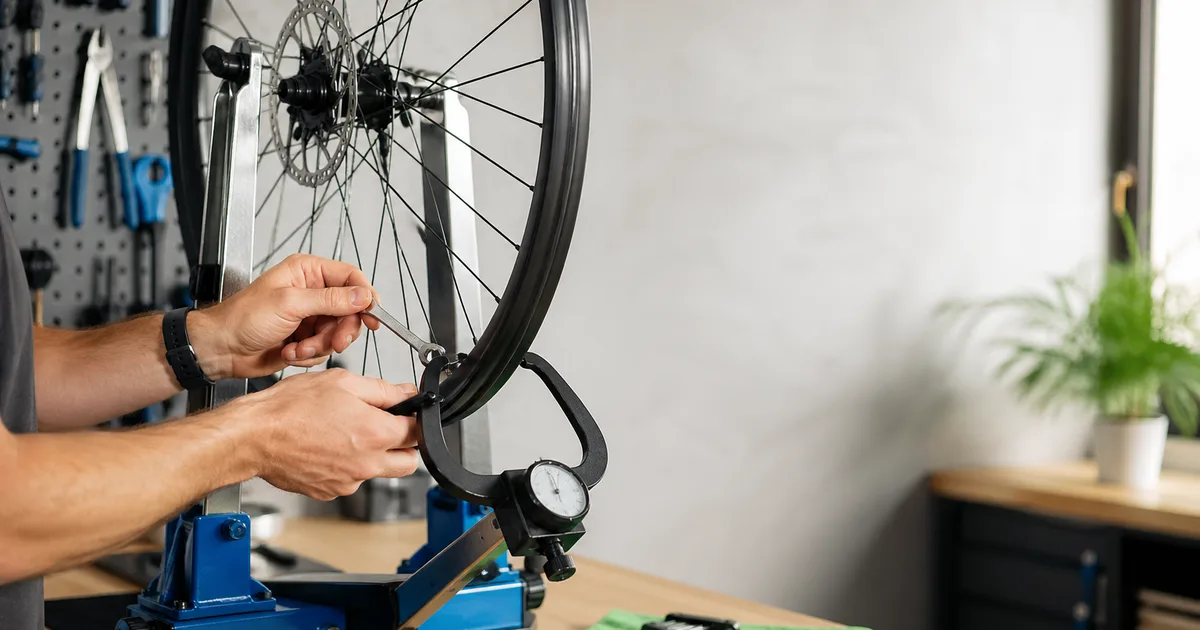
A wandering bite point on a long descent often gets blamed on a bad bleed when the actual culprit is a warped rotor - see our wheel truing basics for rotor truing tips.
When to Send It to a Shop
Honest advice - these are not home jobs
Some brake repairs are advanced enough that the cost of getting them wrong is much greater than a shop visit. Take it in if you are facing any of the following:
- Internal hose routing through the frame (most modern road and many gravel/MTB bikes). Replacing or shortening an internally routed hydraulic hose requires fishing the new hose, fitting a new olive and barb, and running a perfect bleed on the first try - with no air entry through the open connections. A shop has the magnets, guides, and bleed jigs to do this in 30 minutes; at home it can swallow a Saturday.
- Sticky or seized pistons.If a piston refuses to retract, won't advance evenly, or weeps fluid past the seal, the caliper needs to be opened, cleaned, and reassembled with new seals - or replaced entirely. A bleed will not fix a mechanical piston problem.
- Hose at the lever or caliper is leaking. A new barb-and-olive fitting is a one-shot install; if the hose spirals on the cut or the barb seats unevenly, you have a slow leak that ruins pads and never holds pressure. Shops have the press and the practice.
- Suspected fluid contamination(DOT in a mineral system or vice versa). Don't try to flush it - replace the affected components.
- You're unsure which fluid your brake takes. Stop. Call a shop. The 15-minute consult is free; the wrong fluid is a $400 mistake.
Recommended Kits, Fluids & Bleed Blocks
Every BikeSize editor runs at least one of these. Buy the OEM kit for your dominant brake brand first; add the universal kit only if you service multiple bikes.
Bleed Kits, Fluids & Tools
Editor-tested bleed kits and fluids for Shimano and SRAM systems.
Shimano
Shimano TL-BT03A Bleed Kit
OEM funnel-bleed kit for Shimano hydraulic brakes. Includes funnel, stopper plug, and 7mm box wrench. The right tool for every modern Shimano caliper.
SRAM
SRAM Pro Bleed Kit (Mineral Oil or DOT)
Two-syringe pro bleed kit with Bleeding Edge fittings. Buy the DOT version for most SRAM road/MTB brakes; the mineral version covers SRAM Maven and DB8.
Park Tool
Park Tool BKM-1.2 Hydraulic Brake Bleed Kit
Universal mineral-oil bleed kit with Shimano-compatible funnel adapter, syringes, and bleed blocks. The shop-grade option if you service multiple brands.
Finish Line
Finish Line Brake Bleed Kit
Budget-friendly universal bleed kit with adapters for Shimano, SRAM, Magura, and Hayes. Good first kit for home mechanics.
Shimano
Shimano Mineral Oil (100 ml)
The only fluid you should put in a Shimano brake. Do not substitute generic mineral oil - Shimano’s formula has additives matched to the seals.
SRAM
SRAM DOT 5.1 Brake Fluid (4 oz)
Genuine SRAM DOT 5.1 - the spec for SRAM Level, Code, G2, Guide, and HRD road brakes. DO NOT use DOT 5 (silicone) and never mix with mineral oil.
As an Amazon Associate we earn from qualifying purchases. This helps support our free calculators.
Frequently Asked Questions
Conclusion
A clean bleed is one of the highest-leverage hours of work you can do on a bike. Lever feel, modulation, and confidence on long descents all live in the fluid column between your hand and the caliper. Match the right fluid to your system, set up the bike carefully, follow the procedure for your brand, and respect the shop callout for the cases that genuinely need a pro. If anything in this guide felt unclear, stop and call a shop - there is no ego in delegating a brake job.
For the full maintenance picture, pair this with our pad replacement guide, the pre-ride M-check, and a regular frame and drivetrain wash. Brakes work best on a bike that's otherwise dialled.
Related Calculators & Tools
Confirm rotor size compatibility when you reinstall the wheel after a bleed
Reset pressures for the bed-in laps after the bleed is finished
Sanity-check overall fit if you bought the bike used and inherited mystery brakes
Continue Reading
A wobbly rotor often gets blamed on brakes - true the wheel first

Cold weather changes how mineral oil and DOT fluid behave - plan for it

Pair a fresh bleed with the right MTB size for confident descents
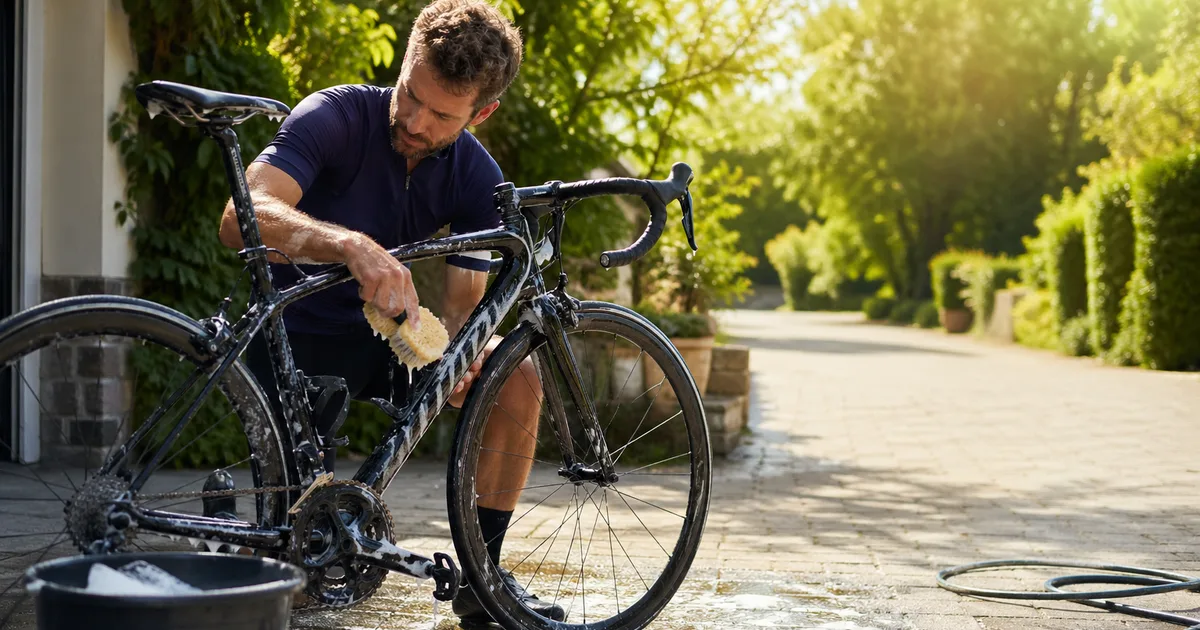
Clean the bike before you bleed - contamination kills new pads fast