How to Replace Bike Brake Pads (Rim & Disc)
How-To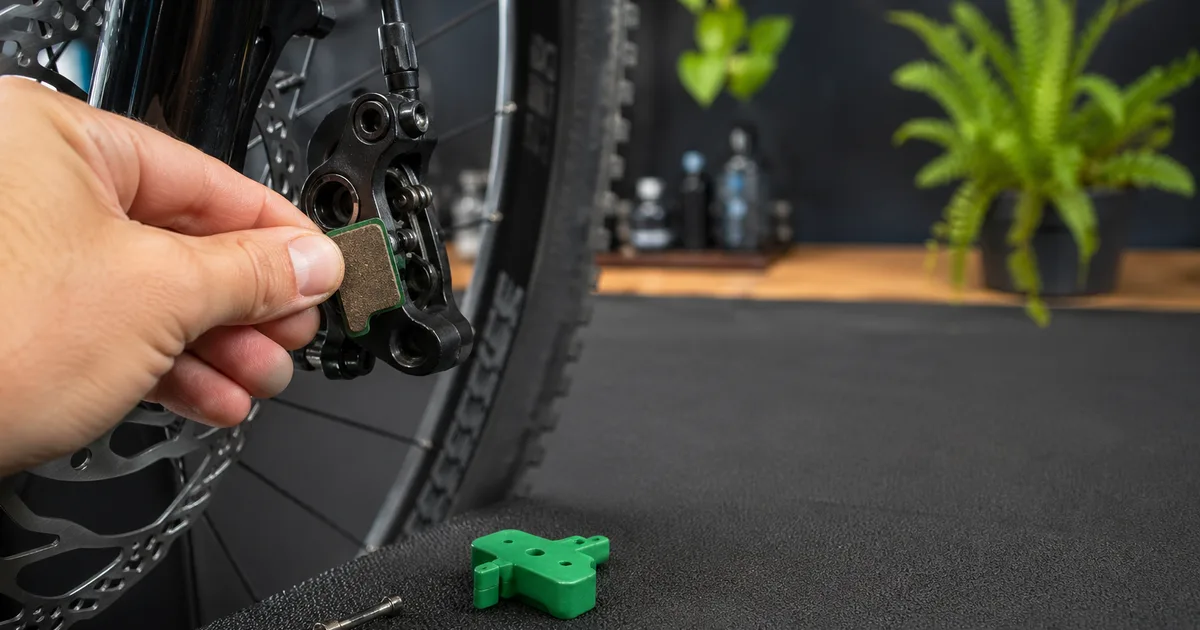
Brake pads are the cheapest, highest-impact safety part on your bike. Worn pads turn a confident, one-finger stop into a panic-grab; new pads installed wrong can squeal, glaze, or simply fail to bite. This guide walks through the wear thresholds for both rim and disc, the actual swap (rim brakes one path, disc brakes the other), the sintered-versus-organic decision, and the bed-in routine that makes the difference between “new pads” and “new pads that actually stop the bike.” Budget about 45 minutes the first time and roughly $40 in parts.
At a Glance
- Time:~45 minutes (first time), 15 minutes once you've done it twice
- Skill level: Intermediate
- Cost: $20-$60 per wheel for pads
- Tools: Hex keys, Torx, pliers, brake cleaner, torque wrench
Quick Answer
Replace rim pads when the wear-indicator groove is no longer visible (about 1 mm of pad material remaining). Replace disc pads when the friction material plus backing plate measures less than 1.5 mm combined, or when the friction material itself drops under 0.5 mm. Squealing, glazing, or a sudden loss of bite are all early-warning signs.
New disc pads mustbe bedded in before serious riding - skip the bed-in and you'll glaze the pads and lose half the available braking power. Full routine below →
Who This Is For
- Commuters and weekend riders noticing longer stops, squeal, or a lever that pulls closer to the bar
- Mountain bikers burning through pads on long descents and wondering whether to switch from organic to sintered
- New owners of a used bikewho don't know the history of the pads and want to start with a clean slate
- Mechanic-curious riders who already handle their own chain and want the next bite-sized maintenance skill
Tools & Parts
Most of these you already own. The only category most home wrenches are missing is brake-specific cleaner - ordinary degreaser leaves a film that contaminates new pads on contact.
| Tools | Why You Need It |
|---|---|
| 3, 4, 5 mm hex keys + T25 Torx | Caliper, rotor, and pad-pin fasteners across Shimano, SRAM, Magura, and TRP |
| Needle-nose pliers | Pulling and reseating the R-clip on disc retaining pins |
| Tyre lever or piston-press tool | Pushing pistons back into the caliper to clear the new, thicker pads |
| Torque wrench (2-10 Nm) | Caliper bolts to spec (typically 6-8 Nm); rotor T25 bolts (4-6 Nm) |
| Park Tool DT-2 rotor truing fork (optional) | Bend a slightly bent rotor straight in seconds - cheap insurance against persistent rub |
| Consumables | Notes |
|---|---|
| Disc pads matched to caliper model | Shimano BR-M9100/BR-M8100 use N-series; SRAM Code/Guide use their own platform - never assume cross-fit |
| Rim pads (cartridge or post-style) | SwissStop FlashPro for road, Kool-Stop salmon for wet commuting, brand-specific carbon pads for carbon rims |
| Disc brake cleaner | Finish Line Speed Clean or Muc-Off Disc Brake Cleaner - never use chain degreaser on rotors |
| Replacement retaining pin / R-clip | Most new pad sets include them; reuse the old pin only if the threads are clean |
When to Replace Brake Pads
Wear thresholds at a glance
- Rim pads: replace when the wear-indicator groove is no longer visible - usually about 1 mm of material remaining.
- Disc pads: replace when friction material plus steel backing combined measures less than 1.5 mm, or friction material alone drops below 0.5 mm.
- Any compound: replace immediately if pads are glazed (mirror-shiny), contaminated with oil, or making a metal-on-metal grinding sound.
Both kinds of pad have manufacturer wear lines moulded or stamped into the friction material. Once those grooves disappear, the pad is technically still working - but heat dissipation, modulation, and the safety margin all collapse together. On disc systems, riding a pad to the backing plate scores the rotor and forces a $35-$80 rotor replacement on top of the pads. Always cheaper to swap on time.
Two warning signs catch riders off guard: squealing (often contamination, occasionally just a vibrating pad) and glazing(a hard, shiny surface from overheating that won't bite no matter how hard you pull). Glazed pads can sometimes be saved with a light sanding pass on coarse sandpaper, but if they're also worn near the threshold, just replace. Pair this check with the lever and rotor inspection from our pre-ride M-check guide and you won't be surprised mid-ride.
Rim Brakes (Cartridge & Non-Cartridge)
Rim pads come in two shapes: cartridge holders (Shimano Dura-Ace/Ultegra/105, most road groupsets) where the pad slides out of an alloy holder and a tiny grub screw retains it, and threaded post pads (older road bikes, V-brakes, cantilevers, BMX) where the whole pad assembly bolts to the brake arm with a 5 mm hex. Identify which style you have before ordering.
Step 1 - Release the Brake
On dual-pivot road callipers, flip the cable-release lever on the side of the calliper to its open position. On V-brakes, squeeze the arms together and lift the “noodle” out of its slot. On cantilevers, unhook the straddle cable. The arms should now swing freely.
Step 2 - Remove the Old Pad
For cartridge holders: back out the small retaining grub screw at the rear of the holder with a 2 mm hex, then slide the old pad out the back. For post pads: undo the 5 mm hex/nut securing the post, keep the washer stack in order (concave and convex spacers control toe-in), and lift the pad off.
Step 3 - Install the New Pad with Toe-In
Slide cartridge inserts in until they click and re-thread the grub screw. For post pads, reassemble onto the brake arm in the original washer order. Set toe-in: the leading edge of the pad should contact the rim about 0.5-1 mm before the trailing edge. The trick is to wedge a folded business card under the trailing edge while you tighten. Toe-in eliminates squeal and gives the pad even wear.
Step 4 - Set Pad Height on the Rim
Squeeze the lever so the pads contact the rim. The pad face must sit fully on the brake track - notriding up onto the tyre (a tyre blow-out at speed is the worst possible outcome) and not so low that the bottom edge hangs off the rim. On carbon rims, follow the rim manufacturer's pad height instructions exactly - carbon brake tracks are narrower than alloy.
Step 5 - Tension the Cable
Release the cable-release lever or rehook the noodle. Spin the wheel - the rim should pass cleanly between the pads with a hair of clearance on each side. Squeeze the lever; bite point should land roughly halfway through lever travel. If the lever comes nearly to the bar, undo the cable pinch bolt, pull a small amount of slack, and re-pinch (5-7 Nm). A barrel adjuster on the calliper or lever fine-tunes the rest.
Rim pads don't need a formal bed-in - the first five or six firm stops will scuff the new compound onto a clean rim track. Wipe the rim down with isopropyl alcohol first, especially if it's been ridden in the wet recently.
Disc Brakes (Hydraulic & Mechanical)
Hydraulic and mechanical disc systems share the same caliper anatomy - pistons squeeze pads onto a rotor - so the pad-swap procedure is virtually identical. The only difference: on a mechanical disc (TRP Spyre, Avid BB7, etc.) you adjust the inner and outer pad position with two small dials after the swap; on a hydraulic, the pistons self-adjust. The seven-step routine below is also written into the JSON-LD HowTo schema on this page so Google can show it as a step-by-step result.
Step 1 - Remove the Wheel and Inspect the Rotor
Open the brake quick release or thru-axle and pull the wheel. Spray the rotor with disc brake cleaner and wipe both sides with a lint-free rag. While you're there, check the rotor thickness - the minimum is etched on the rotor (typically 1.5 mm or 1.8 mm). Worn rotors are a separate replacement; do not mix new pads with a sub-spec rotor. A bent rotor can be straightened with the Park Tool DT-2 fork or sent to a shop.
Step 2 - Push the Pistons Back
With the old pads still in place, slide a clean tyre lever or dedicated piston-press tool between them and lever them apart gently and evenly. The pistons retract into the caliper bores. Stop when they're fully home. Never push pistons directly with a sharp tool- you'll scratch the seals and cause leaks.
Step 3 - Remove the Retaining Pin and Old Pads
Locate the retaining pin (a thin bolt or split pin running through the top of the caliper). Straighten and pull the R-clip with needle-nose pliers, then unthread or push the pin out. Lift the old pads up and out of the caliper. There's a small leaf-spring sandwiched between them - note its orientation; you'll re-use it.
Step 4 - Drop in the New Pads
Sandwich the new pads around the spring exactly as the originals were arranged. Handle pads by their backing plate - skin oil contaminates the friction surface and leads to permanent squeal. Slide the assembly into the caliper from the top until it seats. The retaining-pin holes in the pads should line up with the holes in the caliper body.
Step 5 - Reinstall the Retaining Pin
Slide the pin through the caliper, through both pads, and out the far side. Tighten to the spec stamped on the caliper or printed in the pad packaging - usually 2-4 Nm, finger-tight plus a nudge. Insert the R-clip so the pin cannot back out under vibration. Wiggle the pads gently - they should slide a millimetre or two side-to-side.
Step 6 - Refit the Wheel and Pump the Lever
Reinstall the wheel and torque the axle (typically 12-15 Nm for thru-axles - check your frame's spec). Squeeze the brake lever firmly five or six times. The pistons advance to take up the new pad gap; lever feel should return to normal - firm, with bite point about halfway through the throw. Spin the wheel and listen. A faint, even hum is fine; a once-per-revolution scrape is rotor rub. Loosen the caliper mounting bolts, squeeze the lever to centre the caliper, then re-torque to 6-8 Nm.
If lever feel stays spongy after several firm pumps, the system likely has air in the line and needs a bleed. See our Shimano & SRAM disc brake bleed guide for the full procedure.
Step 7 - Bed In the Pads
Fresh pads have a barely-there bite until you transfer a thin, even layer of pad material onto the rotor. The full routine is described in its own section below - do not skip it.
Sintered vs Organic vs Semi-Metallic: Which Compound?
Disc pads come in three broad compounds, each with a distinct feel and use case. There's no “best” - only what fits your conditions, your bike, and your weight.
| Compound | Bite | Heat | Wet | Lifespan | Best For |
|---|---|---|---|---|---|
| Organic / Resin | Strong from cold | Fades on long descents | Quiet but wears fast | Shorter | Road, light trail, dry conditions, riders who want quiet bite |
| Sintered / Metallic | Builds with heat | Excellent - takes abuse | Best in mud and rain | Longest | Enduro, e-MTB, heavy riders, wet/muddy conditions, long alpine descents |
| Semi-Metallic | Compromise | Better than organic | Decent | Medium | Trail riding, gravel, mixed-condition commuting |
The headline trade-off: organic pads bite hard from cold but glaze and fade on a long descent; sintered pads need heat to wake up but laugh at alpine passes and wet rotors. If you ride a 35 lb (16 kg) e-MTB on enduro tracks, sintered. If you ride a 17 lb (7.7 kg) road bike on dry pavement and care about silence, organic. Most XC and trail riders sit happily on semi-metallic. Our mountain bike sizing guide covers the discipline-by-discipline breakdown that drives this choice.
One non-negotiable: match the pad to the caliper. Shimano BR-M9100 (XTR), BR-M8100 (XT) and BR-M7100 (SLX) all share the four-piston N-series pad - you can run N03A resin or N04C sintered interchangeably. SRAM Code uses one pad shape, Guide uses another, and they are not cross-compatible despite looking similar. Always cross-reference the pad part number against your caliper before clicking buy.
Bed-In Procedure for New Disc Pads
The 20 + 5 routine
- 20 moderate stops from about 25 km/h (15 mph), slowing to walking pace without coming to a full stop.
- 5 hard stops from about 30 km/h (20 mph), again rolling out without locking the wheel.
- No full stops with the rotor hot - stopping completely transfers a localised pad print and causes pulsing forever.
- Let the rotor cool for a couple of minutes after the hard stops before parking the bike.
What's actually happening: every brake squeeze deposits a microscopically thin layer of pad material onto the rotor surface. After bed-in, the pad is no longer “biting steel” - it's biting itself, deposited evenly around the entire rotor. Skip the bed-in and the layer is patchy, which causes both squeal and the dreaded pulsing “judder” feel.
Find a flat, traffic-free road. A long quiet bike path or empty parking lot is ideal. Always wear a helmetfor bed-in - the first few stops will feel weak. By stop 15 or 16 you'll feel the bite ramp up; by stop 20 it should feel sharp. The five hard stops finish the job. The bike is then ready for normal riding.
Common Mistakes
- Touching the pad surface with bare fingers.Skin oil bonds to the friction material and you'll get squeal and weak bite from the first ride. Wear nitrile gloves or handle pads strictly by the backing plate.
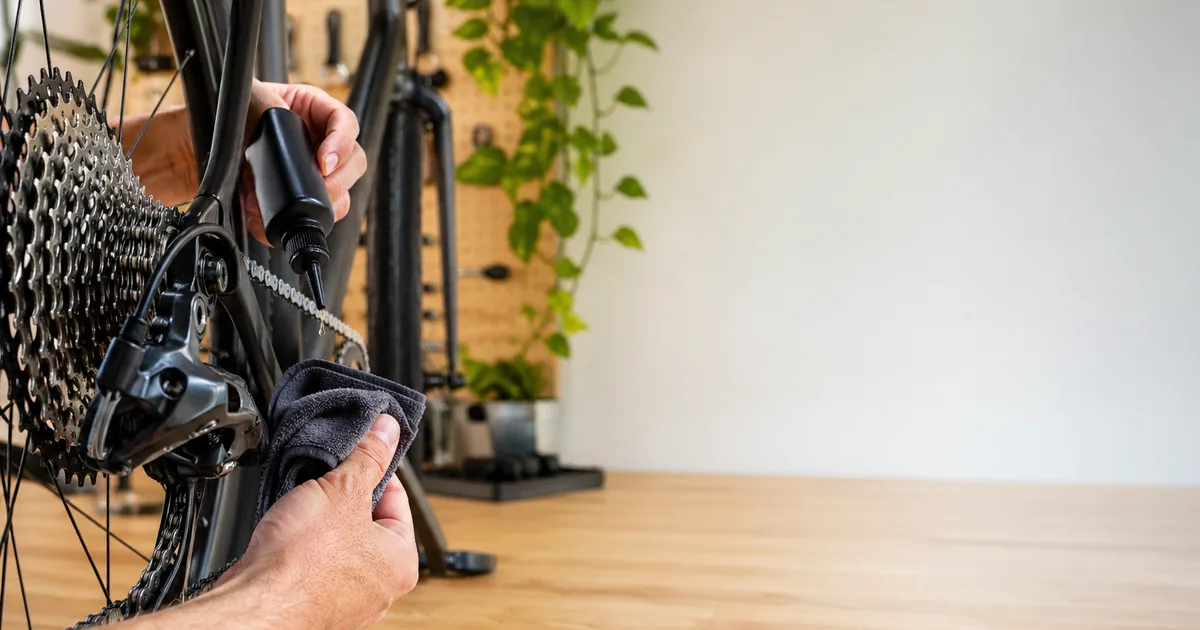
- Spraying chain degreaser near the rotor. Citrus and PTFE drip lubes will contaminate a rotor in seconds - the bike will then squeal until both pads and rotor are properly cleaned (and often both replaced). Clean drivetrains off the bike when possible; see our chain cleaning guide.
- Mismatched compounds front to rear. A sintered rear and an organic front feel inconsistent - the rear ramps up while the front is already at peak. Run the same compound on both wheels unless you have a deliberate reason not to.
- Over-torquing the retaining pin. The pin is only a 2-4 Nm fastener. Cranking it on a long-handled hex can crack the caliper or shear the pin head. When in doubt, finger-tight plus a small nudge.
- Skipping the bed-in “just this once.”A rider who skips bed-in is the rider who comes back six weeks later complaining about squeal. The 10-minute bed-in is the difference between brakes that work and brakes that don't.
- Re-using a contaminated rotor. If the old pads were oily, the rotor is too. Wipe with brake cleaner, then sand gently with 320-grit on a flat block, then wipe again. New pads on a contaminated rotor will glaze in one ride.
Troubleshooting
| Symptom | Likely Cause | Fix |
|---|---|---|
| Constant high-pitched squeal | Rotor or pad contamination; or rim pad with no toe-in | Clean rotor with brake cleaner; sand pad face; for rim, set 0.5-1 mm toe-in |
| Pulsing / juddering under hard braking | Skipped bed-in or bent rotor (uneven material transfer) | Re-do bed-in routine; true rotor with Park DT-2; if persistent, replace rotor |
| Lever pulls all the way to the bar | Air in hydraulic line, or rim cable too slack | Bleed the system; for rim, retension cable at the pinch bolt |
| Weak bite even after bed-in | Glazed pads from overheating, or wrong compound for the use case | Sand pads with 320 grit; if still weak, switch from organic to sintered or semi-metallic |
| Once-per-revolution rub or scrape | Bent rotor or off-centre caliper | Re-centre caliper (loosen mount bolts, squeeze lever, re-torque); true rotor if needed |
| Pads worn unevenly side-to-side | One piston sticking, or caliper not square to rotor | Push both pistons fully back, work them in and out with lever; if still uneven, bring to a shop for a piston service |
When to Call a Shop
Three jobs are honestly outside the home-mechanic comfort zone for most riders:
- A piston that won't retract. Stuck pistons mean a seal service - the caliper has to be opened, the piston extracted, the seal replaced, and the system bled. Fiddly, fluid-soaked, and easy to do wrong.
- A bent rotor that won't straighten.If the DT-2 fork can't bring the rotor true within a couple of minutes, you'll bend it back the other way and never get it flat. Replace the rotor (CenterLock or 6-bolt depending on your hub).
- Persistent contamination. Fresh pads + clean rotor that still squeal and glaze within a week usually means fluid is leaking past a piston seal - only a shop with the right tools and replacement seals can fix it cleanly.
Beyond brakes, if your bike feels generally off and a service is long overdue, a full shop tune-up is cheap insurance. Pair it with the broader check-list in our bike fitting guide if lever reach has been bothering you, and use our tire pressure calculator to lock in pressures before testing the new pads.
Recommended Pads & Cleaners
These are the pads, cleaners, and the one truing tool we keep recommending to riders. Pick the pad that matches your caliper, a brake-specific cleaner, and you're done shopping.
Brake Pads, Cleaners, and Rotor Tools
Hand-picked OEM pads, brake cleaners, and a truing fork to handle 90% of pad jobs at home.
Shimano
Shimano XTR BR-M9100 Disc Brake Pads (N03A Resin / N04C Metal)
OEM Shimano pads for 4-piston XTR/XT/SLX calipers. N03A is quiet resin with cooling fins; N04C is sintered metal for long descents and wet weather.
SRAM
SRAM Code / Guide Disc Brake Pads (Organic & Sintered)
Genuine SRAM replacement pads for Code R/RS/RSC and Guide R/RS/RSC calipers. Pick organic for quiet trail use, sintered for enduro and e-MTB heat.
SwissStop
SwissStop FlashPro / Catalyst Rim Brake Pads
Swiss-made cartridge rim pads for Shimano/SRAM holders. BXP for alloy rims, Black Prince for carbon - the gold standard for road rim braking.
Kool-Stop
Kool-Stop Salmon Rim Brake Pads
Legendary salmon compound that bites in the wet. Available as cartridge inserts or threaded post pads - the smartest $20 upgrade on a rim-brake commuter.
Finish Line
Finish Line Speed Clean Disc Brake Cleaner
Residue-free aerosol brake cleaner. Safe on rotors, calipers, and seals - use it on every pad swap to decontaminate the rotor before bed-in.
Muc-Off
Muc-Off Disc Brake Cleaner
Fast-flash brake-specific cleaner that won’t leave a film. Great for trailside contamination fixes after a wet, muddy ride.

Park Tool
Park Tool DT-2 Rotor Truing Fork
Use after a fresh pad install if the new pads rub or sing on one spot per revolution - that's a bent rotor, not a bad pad. Slot the fork over the rotor at the high spot, bend gently in 1-2 mm increments, and re-check between attempts.
As an Amazon Associate we earn from qualifying purchases. This helps support our free calculators.
Frequently Asked Questions
Conclusion
Pads are the one part you really shouldn't outsource. The job takes 45 minutes, costs $40, and the difference between fresh pads and worn ones is the difference between confidence and crash-luck. Inspect at every M-check, replace at threshold, swap compounds to match your terrain, and always bed-in. Pair this guide with our disc brake bleed guide, our wheel truing basics, and the pre-ride M-check to keep the whole stopping system honest.
Key Takeaways
- Replace at threshold: rim wear groove gone, or disc pad+backing under 1.5 mm combined.
- Match the caliper: Shimano N-series, SRAM Code/Guide-specific, rim cartridge vs post - check the part number.
- Sintered for heat and wet, organic for cold bite and quiet, semi-metallic for the middle.
- Always bed-in disc pads: 20 moderate stops from 25 km/h, 5 hard from 30 km/h, no full stops with a hot rotor.
- Never touch the friction surface - skin oil contaminates pads on contact.
Related Calculators & Tools
Pair fresh pads with the right pressure - grip and braking are a system
Confirm wheel and rotor size before ordering pads or replacement rotors
Sanity-check gearing if you also swap a cassette or chainring during the same service
Confirm overall fit if you inherited the bike and the brakes need attention
Continue Reading
Catch worn pads, loose calipers, and contaminated rotors before every ride

New ride? Make sure rim vs disc matches how and where you actually ride
Most contamination on rotors and pads starts with a sloppy lube job - clean it the right way

MTB pad choice depends on bike size, weight, and discipline - start with the right frame