How to Clean and Lube a Bike Chain (Without Stripping It)
How-To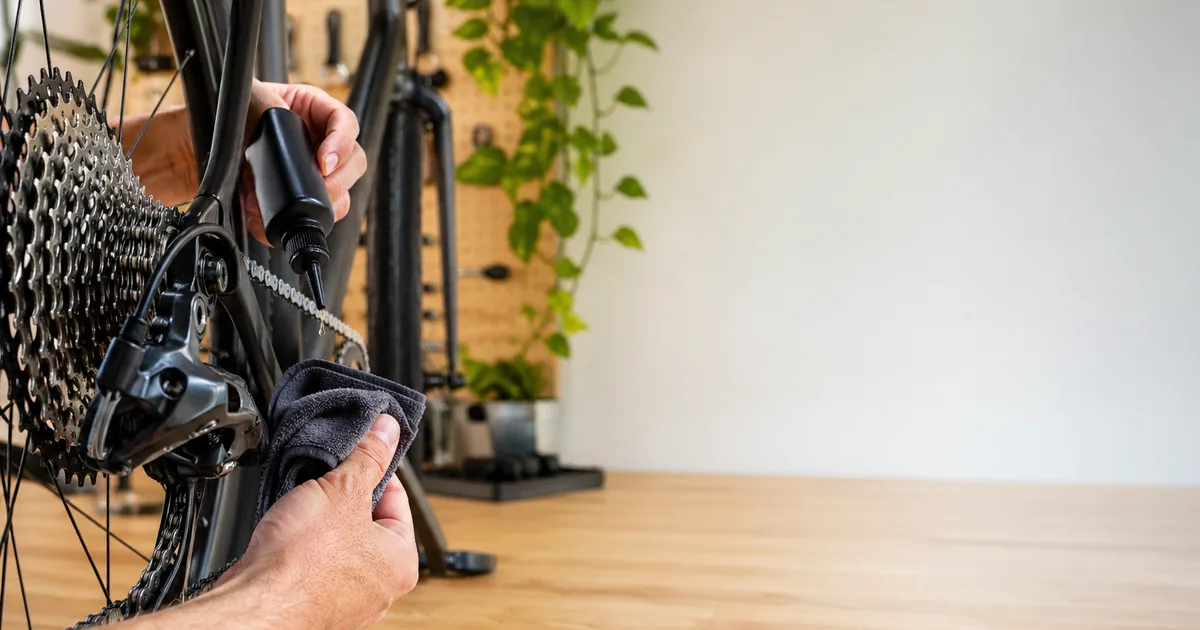
A clean, properly lubed chain is the single highest-leverage 30 minutes of bike maintenance you can do. Get it right and a $25 chain easily lasts 3,000-5,000 miles; get it wrong and you're grinding through chains, cassettes, and chainrings on a repeating bill. This guide walks through the seven-step routine shops use, the three lube families worth considering, and the small mistakes - over-lubing, hose blasting, WD-40 - that quietly kill drivetrains. No fancy gear required: a chain cleaning device, a bottle of degreaser, a bottle of drip lube, and a couple of rags.
At a Glance
- Time: ~30 minutes
- Skill level: Beginner
- Cost (one-off): ~$25 for degreaser + lube
- Tools needed: Chain cleaning device, brush, rag
- Re-lube interval: 100-200 km (wet) / 200-400 km (dry/wax)
- Saves: Hundreds of dollars in drivetrain wear
Quick Answer
Degrease, scrub with a chain cleaning device, rinse lightly, dry completely, then drip one drop of lube per roller and wipe the excess. Repeat every 100-200 km in wet conditions or every 200-400 km in dry/waxed setups, plus any time the chain looks gritty or sounds dry.
Not sure if your chain is even worth saving? Use our Chain Wear Calculator → before you reach for the degreaser.
Who This Is For
- Beginner riderswho've never properly cleaned a chain and don't want to make it worse
- Commuters and weekend cyclists who ride year-round and want their drivetrain to last as long as possible
- MTB and gravel riders dealing with mud and grit who need a fast, repeatable post-ride routine
- Anyone running an e-bike, where torque triples chain wear and a clean drivetrain matters even more
How Often to Clean and Lube Your Chain
There's no single right answer, but the table below covers 95% of real-world riding. The two triggers that override everything: a chain that sounds dry (clicks, squeaks, grumbles), and a chain that looks gritty (black sludge between the side plates).
| Conditions | Re-lube | Deep clean |
|---|---|---|
| Dry road / paved commute | Every 200-400 km | Every 800-1,200 km |
| Wet road / winter commute | Every 100-200 km | Every 300-500 km |
| Gravel / dusty trail | Every 150-250 km | Every 400-600 km |
| Muddy MTB | After every ride | Every 2-4 rides |
| Waxed chain (drip wax) | Every 200-400 km | Strip + re-wax cycle (no scrub) |
If you're hitting the high end of these intervals and the chain still runs silent, you're fine. If you can't remember the last time you lubed and the chain is squeaking, you're overdue - and probably losing 5-10 watts of friction on every ride.
Tools and Consumables
Split into tools (one-time buy) and consumables (replenish every few months). Buy bike-specific where possible - automotive degreasers can attack rubber seals on cartridge bearings.
| Type | Item | Why |
|---|---|---|
| Tool | Chain cleaning device (Park CM-25, Muc-Off X-3) | Scrubs all four sides of the chain in one pass |
| Tool | Drivetrain brush (e.g. Park GSC-1) | Stiff bristles for cassette and chainring teeth |
| Tool | Chain checker (Park CC-3.2) | Don't lube a chain that needs replacing |
| Tool | Work stand or rear-wheel prop | Backpedaling is the whole technique |
| Consumable | Degreaser (Finish Line Citrus, Muc-Off Drivetrain, Park CB-4) | Bike-specific, biodegradable, seal-safe |
| Consumable | Drip lube (Squirt, Finish Line Dry, Rock N Roll Gold) | Match to conditions - see lube types guide |
| Consumable | Microfiber rags / shop towels | Lint-free wipe is non-negotiable |
Not sure which lube to buy? Our chain lube comparison breaks down wax, dry, wet, and ceramic by mileage, conditions, and cost per kilometre.
The 7-Step Cleaning and Lubing Routine
Whole job: about 30 minutes the first time, 15 minutes once you've done it twice. Put the bike in a stand or prop the rear wheel so you can backpedal freely.
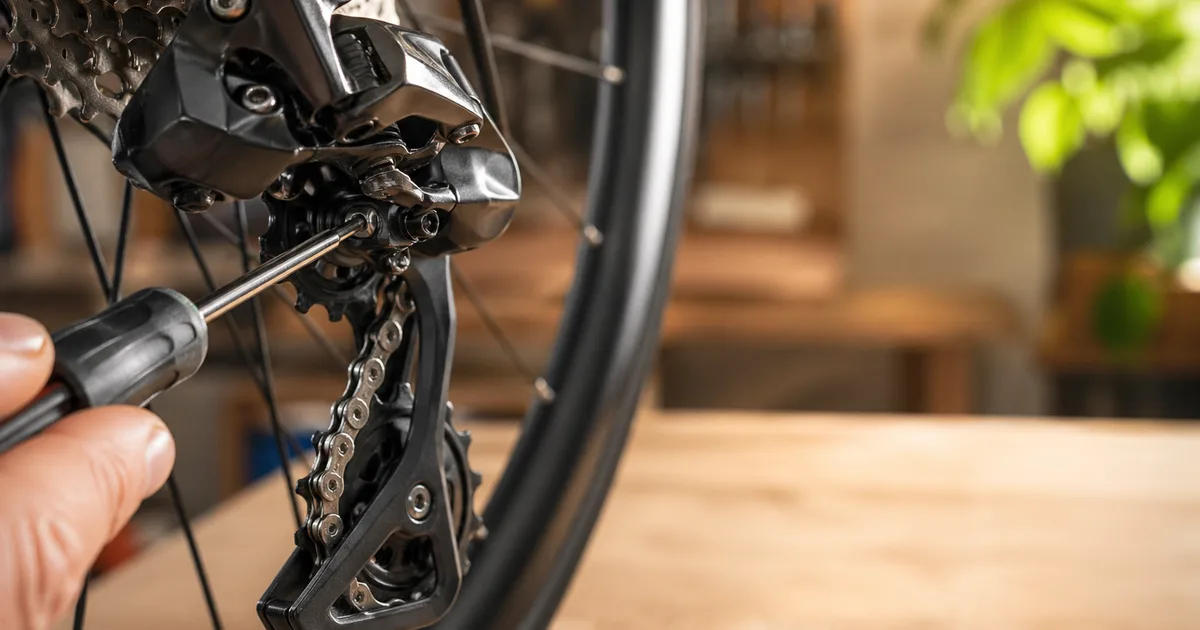
Step 1 - Inspect Chain Wear First
Before you spend any time cleaning, drop a chain checker between two links. If the 0.5% pin seats fully on an 11- or 12-speed chain - or the 0.75% pin on an 8-10-speed - the chain is past its replacement window. Cleaning it just delays the inevitable, and a fresh lube on a worn chain can mask the skip-under-load symptom that warns you. Read the full thresholds in our chain replacement guide and our Chain Wear Calculator.
Step 2 - Apply Degreaser to the Chain
Shift the rear derailleur to the middle of the cassette and the front to the big chainring - this gets the chain off both extremes and gives you clear access. Apply bike-specific degreaser generously along the chain, both sides, while backpedaling slowly through one full revolution. Let it sit for 30-60 seconds so it can wick into the rollers. Avoid spraying near the rear hub, bottom bracket, or disc rotors; degreaser on a rotor will contaminate the pads.
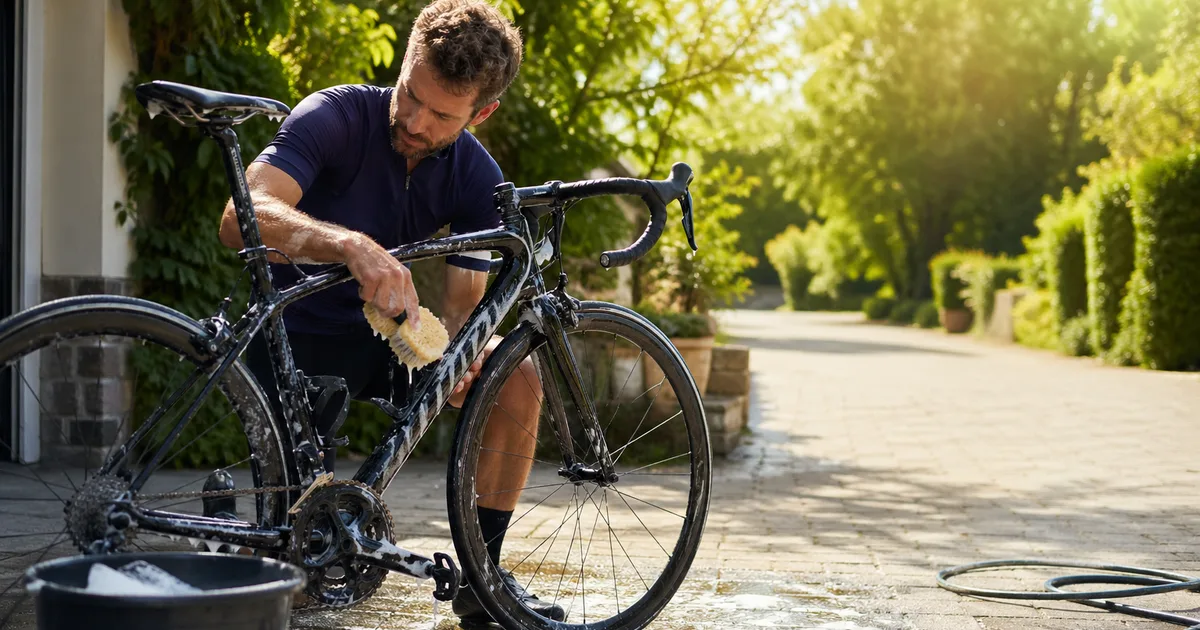
Step 3 - Scrub with a Chain Cleaning Device
Fill the chain cleaning device (Park CM-25 or Muc-Off X-3) with degreaser to the indicator line. Clip it onto the bottom run of the chain between the chainring and rear cassette, and backpedal 20-30 revolutions. The internal brushes scrub all four sides simultaneously - this is the only step that genuinely flushes grit out of the pin and roller area. While the device is doing the chain, use a stiff drivetrain brush to scrub the cassette cogs and chainrings.
Step 4 - Rinse Lightly with Water
Mist warm water from a spray bottle over the chain while backpedaling for another 10 revolutions. The goal is to flush out emulsified degreaser, not pressure-wash the bike. Never use a hose at high pressure on a drivetrain - water forced past hub, bottom bracket, or headset seals destroys bearings. Our bike washing guide covers safe water handling for the rest of the bike.
Step 5 - Dry the Chain Completely
This is the step most people skip and then wonder why their chain rusts. Wrap a clean microfiber rag around the chain, hold it firm, and backpedal until the rag comes off dry on both sides. Lubing a wet chain dilutes the carrier in the lube and traps water inside the rollers, where it quietly pits the pins. If it's humid, give the chain another five minutes air-drying before lubing.
Step 6 - Apply One Drop of Lube per Roller
This is the part where over-doing it actively hurts. Hold the lube bottle over the bottom run of the chain, just ahead of the rear cassette, and squeeze a single drop onto the top of each roller as you backpedal slowly. The lube belongs insidethe roller where the pin pivots, not on the outer side plates. A 116-link chain only needs 116 drops - that's about 1 ml of lube total. Match the lube to your conditions (dry / wet / wax) per our lube comparison.
Step 7 - Wipe Off the Excess
Let the lube wick in for 1-2 minutes (longer for wax-based drips), then run a clean rag along the chain while backpedaling 5 full revolutions. Squeeze gently - you want to take excess off the outside without pulling lube out of the rollers. The chain should look almost drywhen you're done. Lube on the outside only attracts grit, which is exactly what you spent the last 25 minutes removing.
Common Cleaning and Lubing Mistakes
- Over-lubing.A drippy, glossy black chain is carrying grit. The lube does nothing on the outside; it's only working inside the rollers. Wipe excess every single time.
- Lubing a dirty chain.Fresh lube on top of old grime turns into grinding paste. Always degrease and dry first - even a quick wipe-and-relube counts as “clean enough” for fast turnarounds, but never skip it entirely.
- Using WD-40 as lube. WD-40 is a water-displacer and light penetrant, not a chain lubricant. It evaporates within hours and leaves the chain drier than before. (WD-40 makes a dedicated Bike Chain Lubeproduct - that's fine. The blue-and-yellow can isn't.)
- Ignoring chain wear. Lubing a chain past 0.5% (0.75% on older drivetrains) wastes both the lube and the cassette. Always measure first - see our chain replacement guide.
- Hose-blasting the drivetrain. High-pressure water forced past hub seals, bottom bracket cups, or pivot bearings is the fastest way to ruin a $300 wheelset. Use a mist or low-pressure rinse only.
- Mixing lube types without stripping. Drip wax over dry lube, or wet lube over wax, gives you the worst of both. When you change lube families, fully degrease first.
Troubleshooting Table
| Symptom | Likely Cause | Fix |
|---|---|---|
| Chain still feels gritty after cleaning | Degreaser didn't reach inside rollers | Repeat cleaning device pass; soak the chain in degreaser for 5 minutes before scrubbing |
| Squeaking after lubing | Lube didn't penetrate; not enough dwell time | Re-apply, wait 5 minutes, backpedal 30 revolutions, then wipe |
| Surface rust within a day of washing | Chain wasn't fully dry before lube; or no lube applied | Degrease, dry thoroughly, apply lube; for severe rust replace the chain |
| Lube flinging onto frame and rim | Excess lube not wiped off; or wet lube on dry rides | Wipe excess after each application; switch to dry or wax lube for dry conditions |
| Black goo collecting on rear derailleur pulleys | Over-lubed chain attracting grit | Strip + re-clean entire drivetrain; reduce lube to 1 drop/roller and wipe more aggressively |
| Brakes feel weak after cleaning | Degreaser drifted onto rotor or pads | Scrub rotor with isopropyl alcohol; replace pads if contamination persists - see our brake pad guide |
When to Call a Shop
Chain cleaning is firmly home-mechanic territory, but a few signs mean you're looking at a bigger drivetrain job that's worth a shop visit:
- New chain skips on the cassette under load. The cassette is worn - see our cassette and freehub removal guide if you want to do it yourself, or send it to the shop.
- Chain drops or shifts hesitantlyafter cleaning. The cable may be contaminated by degreaser overspray. A new shift cable + housing is a $20 part; let a mechanic re-tune indexing if you're unsure.
- Visible “shark fin” chainring teeth (sharply hooked instead of symmetrical). Chainring replacement requires crank removal - a 30-minute shop job, not a 5-minute one.
- Chain rusts again within days despite proper drying and lubing. Either the rollers are pitted (replace the chain) or your storage environment is too humid (different problem).
- Persistent creak that survives a full clean. The noise is probably from the bottom bracket, pedals, or seatpost, not the chain. A shop diagnoses creaks faster than a home mechanic.
Recommended Cleaning and Lube Products
These are the degreasers, cleaning devices, and drip lubes we keep coming back to. One of each gets you a complete drivetrain maintenance kit for under $60.
Drivetrain Cleaning and Lube Kit
The shop-tested degreasers, scrubbers, and lubes we recommend for home mechanics.
Finish Line
Finish Line Citrus Bike Degreaser
Biodegradable citrus-based degreaser that cuts through chain grime without trashing seals or finishes. Workshop favourite.
Muc-Off
Muc-Off Bio Drivetrain Cleaner
Biodegradable, alkaline drivetrain cleaner that pairs perfectly with the X-3 chain cleaning device.
Park Tool
Park Tool CM-25 Professional Chain Scrubber
Sealed chain cleaning device with rotating brushes and magnet to catch metal swarf. The shop-grade option.
Muc-Off
Muc-Off X-3 Dirty Chain Machine
Affordable chain cleaning device with multi-directional brushes. A solid pick for home mechanics.
Squirt
Squirt Long-Lasting Dry Chain Lube
Wax-emulsion drip lube that runs clean, lasts 200-400 km, and is friendly to dry and mixed conditions.
Finish Line
Finish Line Dry Bike Chain Lube with Teflon
Classic PTFE drip lube for dry conditions. Cheap, easy to find, and dries clean if you wipe properly.
As an Amazon Associate we earn from qualifying purchases. This helps support our free calculators.
Frequently Asked Questions
Conclusion
Cleaning and lubing a chain is unglamorous work, but it's the single most leveraged 30 minutes you can spend on a bike. Do it on schedule, wipe the excess, and use bike-specific products and your drivetrain will outlast riders who spend twice as much on components. Pair this routine with our full chain maintenance guide, our chain replacement guide, and the pre-ride M-check and you're running a properly maintained bike for the cost of a few drinks a year.
Key Takeaways
- Re-lube every 100-200 km wet, 200-400 km dry/wax - or any time the chain looks gritty.
- One drop of lube per roller - anything more attracts grit and accelerates wear.
- Always wipe excess. A chain should look almost dry after lubing.
- Measure wear first.Don't lube a chain past replacement - use our Chain Wear Calculator.
- Skip WD-40 and the hose. Bike-specific degreaser, low-pressure water, and a real lube are non-negotiable.
Related Calculators & Tools
Get the right link count if cleaning reveals your chain is past its replacement point
Translate a checker reading into a clear keep-cleaning-or-replace answer
Sanity-check ratios if you swap cassettes alongside a tired chain
Confirm overall fit on a refreshed bike, especially if it is second-hand
Continue Reading

Catch a dry, gritty chain before it strands you on the road
Clean the rest of the bike on the same day without flooding hubs and bottom brackets
Re-tune your shifting after a deep drivetrain clean

Wax vs dry vs wet vs ceramic - which lube actually slows wear