How to Remove a Bike Cassette and Service the Freehub
How-To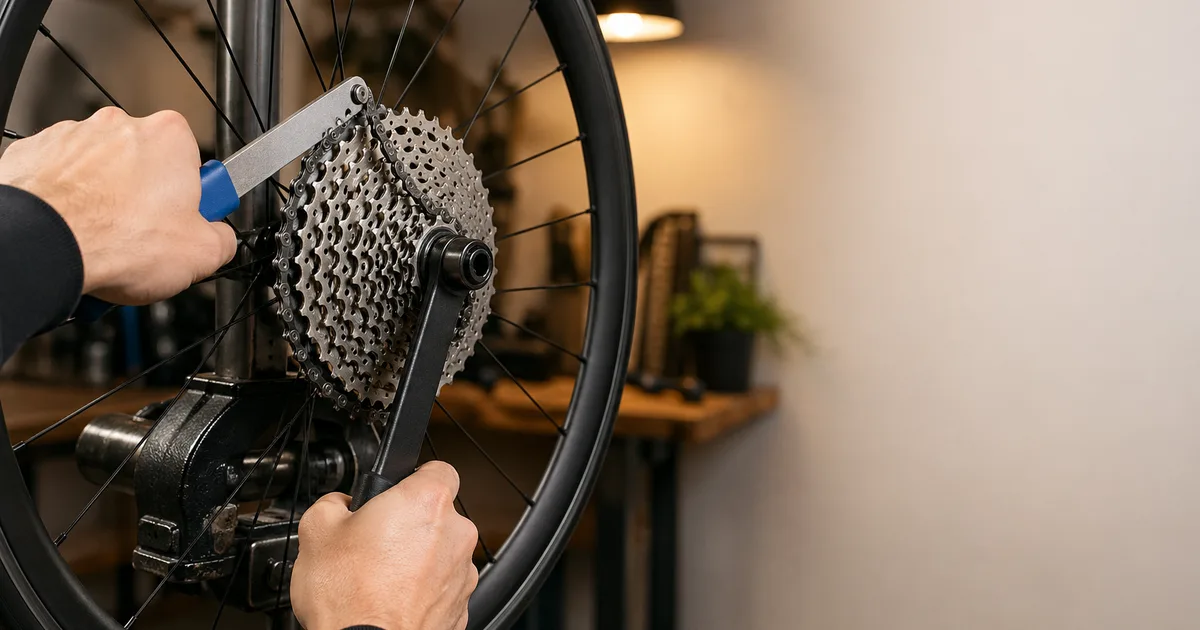
A cassette swap is one of the highest-leverage repairs in home bike mechanics. Three tools, fifteen minutes, and you can replace a worn cassette, deep-clean the drivetrain, service the freehub bearings, or change gear range entirely. The job has earned a fearsome reputation because the lockring releases with a startling pop and because the spline on your hub may not be the one your friend has - but once you match the right tool to the right standard, every cassette comes off the same way. This guide walks through HG, XD, Micro Spline and N3W, the chain-whip-and-lockring-tool sequence, and how to service both pawl and star-ratchet freehubs without turning a $300 hub into a paperweight.
At a Glance
- Time: 15 min removal, 45 min with freehub service
- Difficulty: Intermediate
- Cost: ~$60 for tools (one-time); cassettes $40-$400
- Torque: 40 Nm Shimano HG, 35 Nm SRAM XD/XDR
- Standards: HG, XD/XDR, Micro Spline, N3W
- Tools: Lockring tool, chain whip, torque wrench
Quick Answer
Take the wheel off, fit the correct spline lockring tool into the cassette, hold the largest cog with a chain whip, and turn the lockring counter-clockwise until it pops loose. Slide the cassette off, service the freehub if needed, then reinstall and torque the lockring to 40 Nm (Shimano) or 35 Nm (SRAM XD/XDR).
Changing range too? Compare ratios in our Gear Ratio Calculator →
Who This Is For
- Home mechanics who want to stop paying $30 in shop labour every time a cassette wears out
- Riders changing gear range - swapping from an 11-32 to an 11-36 to climb steeper hills, or to a tighter road cluster for flat racing
- Anyone with a noisy freehub that buzzes, skips, or fails to engage on the first pedal stroke
- Used-bike buyerswho need to deep-clean a drivetrain and don't know the cassette's history
Tools and Parts You'll Need
The tools are inexpensive and last a lifetime. The catch is matching the lockring tool to your freehub standard - a Shimano HG tool will not fit a SRAM XD lockring, and a Micro Spline tool fits neither.
| Item | What to buy | Approx. cost |
|---|---|---|
| Lockring tool (HG) | Park Tool FR-5.2 | $11 |
| Lockring tool (XD/XDR) | Park FR-5.4G or SRAM-spec | $13 |
| Lockring tool (Micro Spline) | Park FR-5.4H or Shimano TL-LR12 | $13 |
| Chain whip | Park SR-12.2 (5-12 speed) | $37 |
| Torque wrench | Anything reading 20-60 Nm | $40+ |
| Freehub grease | Park PolyLube 1000 or Dumonde Tech | $9-$15 |
| Replacement freehub (if needed) | DT Swiss, Hope, Shimano OEM | $45-$160 |
If you only ride one bike, buy the single lockring tool that matches it. If you maintain a road bike (HG) and a modern MTB (Micro Spline or XD), pick up both - they're cheap, and using the wrong tool is the single most common way to wreck an expensive cassette.
HG vs XD vs Micro Spline vs N3W
Four spline standards cover ~95% of bikes you'll see. They are not interchangeable: each requires a specific freehub body and a specific lockring tool. Identify yours before you buy anything.
| Standard | Speeds | Lockring tool | Brand / typical use |
|---|---|---|---|
| Shimano HG | 7-11 speed (most road, older MTB) | Park FR-5.2 (12-spline) | Shimano, SRAM 11sp road, most hybrid/commuter wheels |
| SRAM XD / XDR | 11-12 speed (10t smallest cog) | Park FR-5.4G (uses HG handle) | SRAM Eagle MTB, SRAM AXS road (XDR is 1.85 mm wider) |
| Shimano Micro Spline | 12 speed MTB (10t smallest cog) | Park FR-5.4H, Shimano TL-LR12 | Shimano XTR/XT/SLX/Deore 12-speed MTB |
| Campagnolo N3W | 9-13 speed (9t smallest cog) | Campagnolo-specific lockring tool | Modern Campagnolo Ekar gravel, Super Record, Chorus |
The fastest way to identify your standard: look at the smallest cog. An 11-tooth smallest cog almost always means HG. A 10-tooth smallest cog means XD/XDR or Micro Spline. A 9-tooth smallest cog points to N3W. If in doubt, take the wheel to a shop or post a clear photo of the freehub splines on a forum before buying tools.
When You Need to Pull the Cassette
Four scenarios cover almost every reason a home mechanic touches the cassette:
- Deep drivetrain clean. A cassette caked with old lube and grit will not come clean on the bike. Pulling it lets you scrub each cog with degreaser and a brush - and clean the freehub and chainstay underneath. Pair with our chain cleaning and lube guide for a complete drivetrain reset.
- Replace a worn cassette. If your old chain ran past 0.75% wear, the cassette is almost always shot. A new chain on worn cogs will skip within 50 miles. See our chain replacement guide for the wear thresholds.
- Service a noisy or skipping freehub. A freehub that buzzes louder than usual, drags the chain forward when you coast, or fails to engage on the first pedal stroke needs the pawls or star ratchet cleaned and regreased.
- Swap to a wider (or tighter) range. Going from an 11-32 to an 11-36 to climb steeper hills, or from a 10-50 to a 10-52 for steeper trails. Run the comparison through our Gear Ratio Calculator first so you actually know what you're gaining.
Cassette Removal in 7 Steps
Total time: about 15 minutes for removal and reinstall, or 45 minutes if you also service the freehub body. Work with the bike in a stand if you have one, or on its side with the drivetrain up.
Step 1 - Remove the Rear Wheel
Shift to the smallest cog before removing the wheel - it gives the derailleur the most slack. Open the quick-release or unthread the thru-axle and pull it out. Roll the chain off the cassette into the dropout, lift the wheel up and back, and set it on a clean surface. On thru-axle hubs, you'll usually need to pop off the non-driveside endcap and the drive-side endcap before the freehub body will slide free later - they're a tight push-fit.
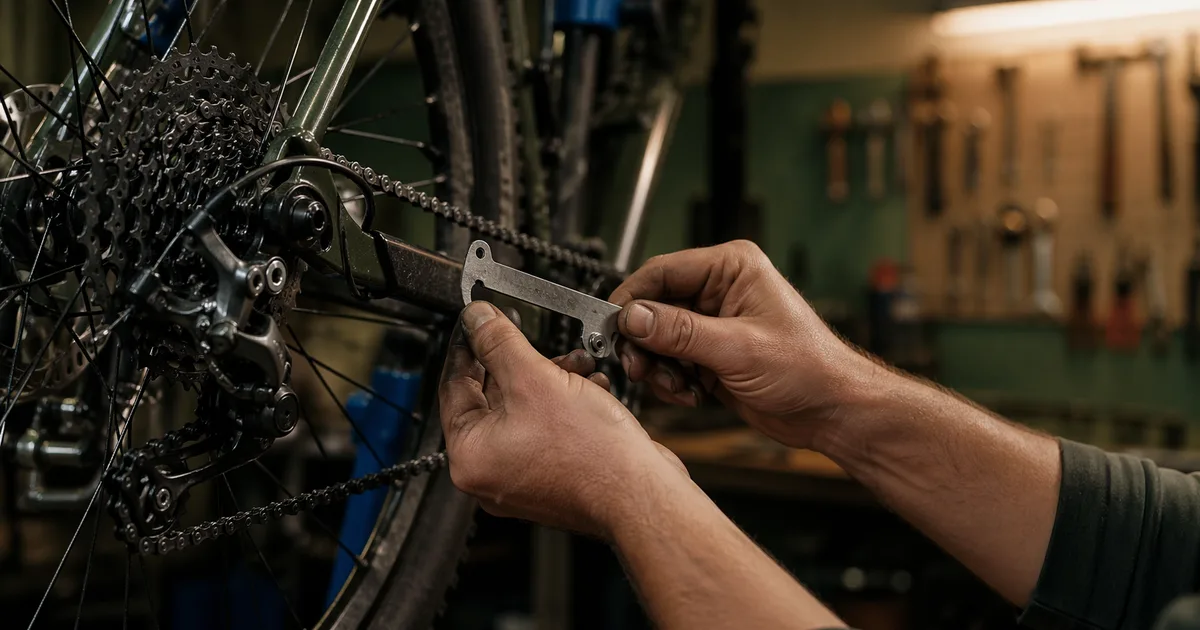
Step 2 - Insert the Lockring Tool and Fit the Chain Whip
Slot the lockring tool fully into the splines on the lockring (the outer ring with the “LOCK” arrow). On HG and Micro Spline you'll see 12 splines; on XD/XDR you'll see a smaller central spline pattern. If the tool wobbles, it's the wrong standard - stop and re-check. Wrap the chain whip clockwisearound the largest cog so the chain grabs the teeth when you push the handle down. The chain whip handle should point roughly to the 4 o'clock position.
Step 3 - Crack the Lockring Counter-Clockwise
With your weaker hand on the chain whip and your stronger hand on the wrench/ratchet, push both handles down at the same time - chain whip braces, wrench breaks the lockring loose. The lockring will release with a loud, sharp pop. That's normal: the lockring has anti-rotation serrations that click as they unseat. If nothing moves and the wrench feels like it's about to slip, stop and recheck the tool engagement before you round the splines.
Step 4 - Slide the Cassette Off and Note Spacers
Once the lockring is finger-loose, unthread it the rest of the way and lift the cassette stack off the freehub body in one piece if possible. On HG cassettes, the smallest few cogs are usually loose - keep them in order. Behind the cassette you may find a thin spacer (1.0, 1.85, or 2.0 mm). Note its position. On 8-, 9-, or 10-speed cassettes installed on an 11-speed-width freehub, that spacer is mandatory and easy to lose.
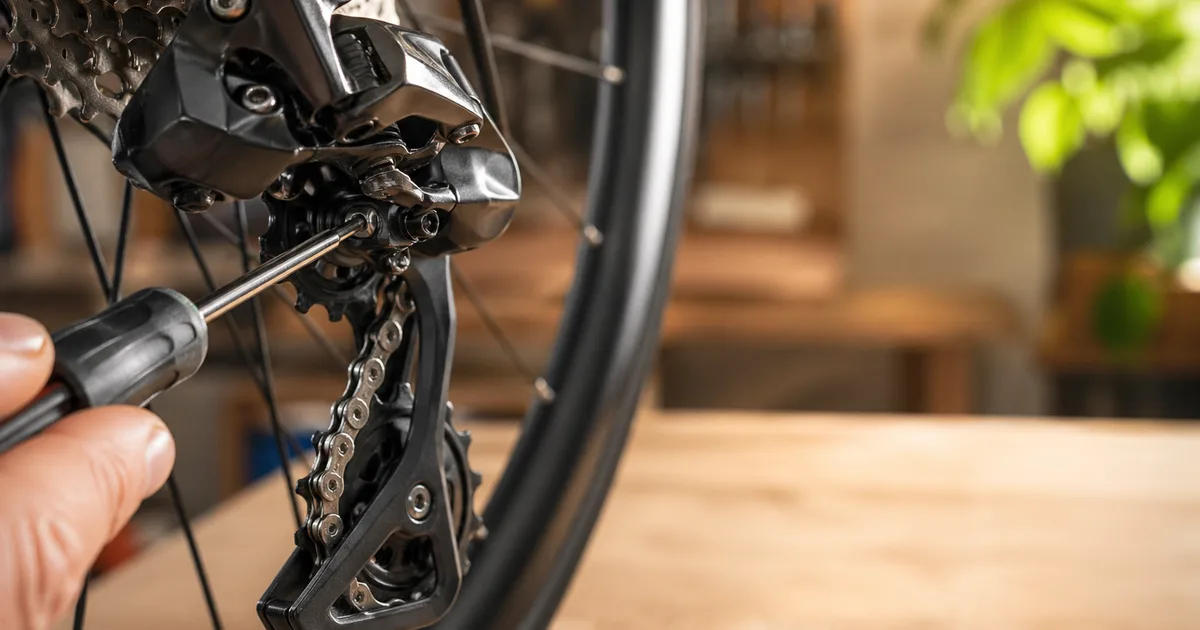
Step 5 - Service the Freehub Body
With the cassette off, you can pull most freehub bodies straight off the hub axle. Shimano and DT Swiss freehubs slide off by hand once the endcap is removed. Wipe the body with a degreaser-damp rag, then look at the engagement system:
- Pawl freehubs (most Shimano, Hope, Industry Nine). You'll see 3-6 spring-loaded pawls. Remove the circlip if present, lift the pawls, clean them with a soft brush and degreaser, then regrease lightly with a freehub-specific grease - a thin smear, not a glob. Heavy grease makes pawls stick and skip under load.
- Star-ratchet freehubs (DT Swiss, classic 240). Two toothed rings spring against each other. Pull both rings out, wipe them and the spring, regrease the teeth and the spring contact surfaces with a low-viscosity freehub grease (Dumonde Tech or DT Swiss-branded) - never use heavy bearing grease, which will mute engagement.
While the freehub is off, spin the hub bearings. Gritty or notchy bearings are a separate hub service job, but it's worth knowing now rather than later. If a wheel was already wobbly, this is also the right time to walk through our wheel truing basics.
Step 6 - Reinstall the Cassette Respecting Spline Orientation
Push the freehub body back onto the hub (you'll usually feel it click into the ratchet), reseat the endcaps, and slide the cassette stack on. Every freehub spline standard has one wider groove - match it to the wider tab on the cassette. The cassette only fits one way; if it doesn't drop fully home, rotate it until the wide-spline indexing aligns. Don't hammer it.
Step 7 - Torque the Lockring
Smear a thin film of grease or anti-seize on the lockring threads (this prevents galling and makes future removal far easier). Hand- thread the lockring on, then torque to spec:
- Shimano HG, Micro Spline, most generic HG: 40 Nm
- SRAM XD / XDR: 35 Nm
- Campagnolo N3W: 50 Nm (check your specific cassette - some Ekar variants spec 40)
You'll hear the same clicking from the lockring serrations on the way in - that's the lock engaging, not damage. Reinstall the wheel, run the chain over the cassette, and shift through every gear under light load. Hesitation likely means the rear derailleur wants a tweak - see our derailleur indexing guide.
Star Ratchet vs Pawl Freehubs
Engagement system matters because it changes both how the hub sounds and how you service it. The two big families:
| System | Brands | Engagement | Service quirks |
|---|---|---|---|
| Pawl & ratchet | Shimano, Hope, Industry Nine, most stock OEM hubs | 3-6 pawls, 24-120 POE | Pawls and springs are tiny - don't lose them. Light grease only. |
| Star ratchet | DT Swiss, Hügi, premium Bontrager | Two toothed rings spring together, 18/36/54 POE | Pulls apart by hand. Use DT-spec freehub grease only - heavy grease kills engagement. |
Hope freehubs (DTI, Pro 4, Pro 5) use a 4-pawl system with characteristically loud engagement - that's the sound of independent pawls clicking sequentially, not a fault. Industry Nine Hydra hubs run 6 pawls phased across the drive ring for a head-spinning 690 points of engagement; their service interval is shorter (every 6 months on hard riders) because the tighter clearances are less forgiving of dirt. DT Swiss star ratchets are almost the opposite - extremely robust, very long service intervals, but they will not survive automotive grease. Pick the grease type to match the hub.
Common Mistakes
- Wrong tool for the spline.Forcing an HG tool into an XD lockring rounds the splines on a $200+ cassette. If the tool wobbles or doesn't bottom out, stop.
- Ungreased lockring threads. The lockring sees big torque and seizes over time. A film of grease or anti-seize on reinstall saves you from drilling out a stuck lockring three years from now.
- Missing spacer on 8/9/10-speed cassettes. 11-speed-width freehub bodies need a 1.85 mm spacer behind older cassettes. Skip it and the cassette sits proud, the lockring bottoms early, and shifting goes haywire.
- Over-greasing pawls. A glob of bearing grease will damp the springs and stop pawls from snapping back - freehub skips under load. Use a thin film of freehub-specific grease only.
- Forgetting to reseat endcaps. Loose endcaps mean loose bearings - the wheel develops side-to-side play within one ride.
- Skipping the chain measurement. A new wider- range cassette may need a longer chain. Always recheck with our Chain Length Calculator.
Troubleshooting
| Symptom | Likely cause | Fix |
|---|---|---|
| Lockring won't crack loose | Seized threads, wrong tool, or ungreased original install | Apply penetrating oil at the lockring/cassette joint, wait 15 min, retry. If it still won't move, take to a shop before rounding splines. |
| Freehub still slipping under load | Worn pawl springs, glazed pawl tips, or grease too heavy | Replace pawl springs (cheap), re-clean and switch to freehub-spec grease, or replace freehub body if pawl tips are visibly rounded. |
| Freehub won't engage | Pawls stuck flat by old grease or broken spring | Remove freehub, fully degrease pawls, inspect each spring, regrease lightly. Replace any broken spring. |
| Cassette skips on biggest cog | Worn cog or spacer omitted, derailleur misaligned | Verify spacer present, re-index derailleur, or replace cassette if cogs are clearly worn (sharkfin teeth). |
| Cassette won't fully seat on freehub | Spline orientation wrong, debris in spline groove | Lift off, rotate cassette to align wide spline, clean freehub grooves with a brush, retry. |
| Loud clicking from hub when coasting (more than usual) | Freehub dry, or grease washed out by pressure-washing | Pull and regrease per Step 5. Avoid pressure-washing hubs in future - see our bike washing guide. |
When to Call a Shop
The cassette job is squarely in DIY territory, but a few situations are not worth fighting at home:
- Corroded freehub fused to the hub.A hub that sat outside through several wet winters can lock the freehub body to the axle. A shop has presses, heat guns, and replacement axles. You probably don't.
- Stripped lockring splines. Once the lockring is rounded, the cassette comes off only by carefully drilling or chiselling - leave that to a mechanic with a backup plan.
- Aluminium freehub with grooved cogs cut into it. High-torque cassettes can carve grooves into older alloy freehubs. The cassette won't come off cleanly until the freehub is replaced.
- Carbon hub with loose bearings or play.Don't improvise on a $1,200 carbon wheelset - let a shop press the bearings.
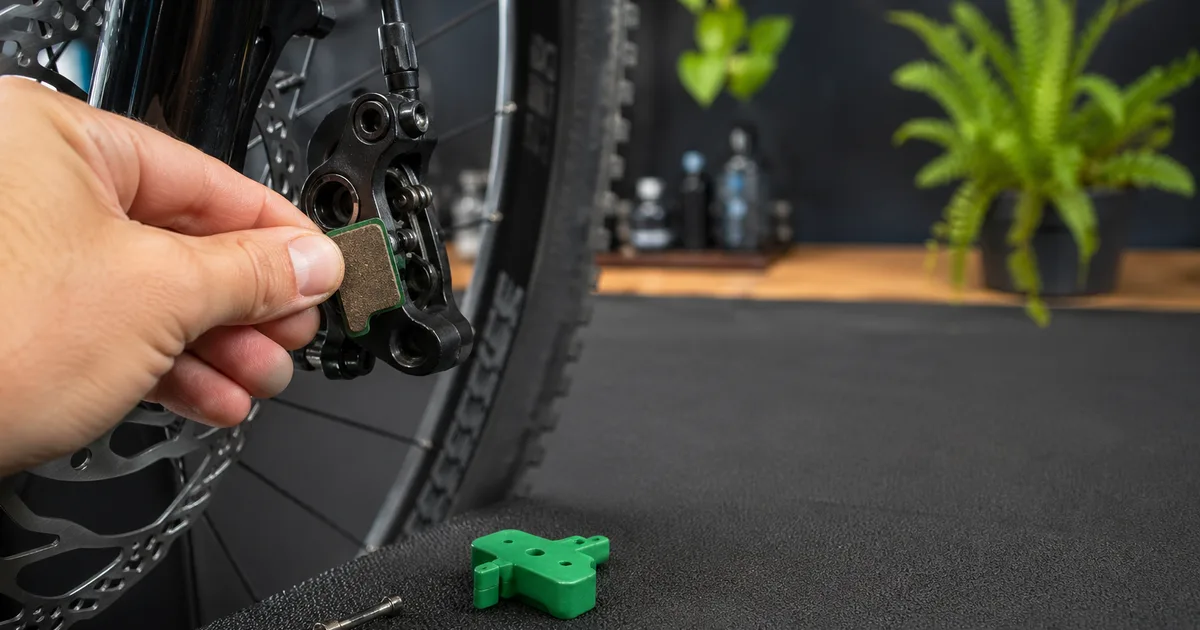
If you're comfortable with the cassette but want a complete bottom-end refresh, our bottom bracket service guide is the natural next project, and brake pad replacement is an obvious twofer with the wheel already off. While you're at it, run through the M-check from our pre-ride safety check guide before the next ride.
Tools and Products We Recommend
These are the tools and freehub spares we keep using ourselves and recommending to riders. Buy the lockring tool that matches your freehub standard first; the rest you can pick up over time.
Cassette and Freehub Tools
Our top picks for cassette removal and freehub service.
Park Tool
Park Tool FR-5.2 Cassette Lockring Tool
The shop-standard 12-spline tool for Shimano/SRAM HG cassettes and most centerlock disc rotors. Steel splines and a 1/2" drive socket end.
Park Tool
Park Tool SR-12.2 Sprocket Remover / Chain Whip
Holds the largest cog while you crack the lockring. Updated 2-section chain works on 5- through 12-speed cassettes including Shimano Micro Spline.
Park Tool
Park Tool PPL-1 PolyLube 1000 Grease
Light, water-resistant grease ideal for freehub pawls, ratchet rings, and cassette spline interfaces. Doesn’t gum up pawl springs.
Dumonde Tech
Dumonde Tech Freehub Grease
Purpose-made low-viscosity freehub grease that keeps pawls flicking without dragging. Popular on DT Swiss star-ratchet hubs.
DT Swiss
DT Swiss Ratchet EXP 36 Upgrade Kit
Drop-in 36-tooth star ratchet upgrade for compatible DT Swiss hubs. Halves the engagement angle from 20° to 10° for snappier pickup.
Shimano
Shimano FH-MT500 Replacement Freehub Body
Genuine Shimano HG-spline freehub body for MT500/MT400 hubs. Direct swap when pawls or splines have grooved.
As an Amazon Associate we earn from qualifying purchases. This helps support our free calculators.
Frequently Asked Questions
Conclusion
Cassette removal is one of the highest-return repairs in home bike mechanics. Three tools, fifteen minutes, a single torque spec, and you can clean a drivetrain properly, replace a worn cassette, swap gear range, or service a noisy freehub - jobs that would otherwise cost $30-$60 in shop labour each. Match the lockring tool to your freehub standard, grease the threads on the way back in, torque to spec, and the next removal will be a five-minute job. Pair this with our chain replacement guide and our chain maintenance guide and your drivetrain will outlast the rest of the bike.
Key Takeaways
- Match the lockring tool to your spline: HG, XD/XDR, Micro Spline, or N3W - they are not interchangeable.
- Chain whip + lockring tool, counter-clockwise. A loud pop is normal; rounded splines are not.
- Torque to spec: 40 Nm Shimano HG/Micro Spline, 35 Nm SRAM XD/XDR, 50 Nm Campagnolo N3W.
- Light freehub-specific grease only on pawls and star ratchets - heavy grease causes skipping.
- Changing range? Compare cassettes in our Gear Ratio Calculator and resize the chain with our Chain Length Calculator.
Related Calculators & Tools
Compare your old and new cassette range before you swap to a wider spread
Resize the chain if your new cassette has a bigger biggest cog
Confirm wheel diameter when matching cassette ratios to gain inches
Continue Reading
Sizing, lubing, and replacing chains end-to-end
Pad swap with the wheel already off - easy two-fer
Re-index the rear shifter after a wider-range cassette
The other bearing job most home mechanics put off too long