How to Tell When to Replace Your Bike Chain (and Avoid Trashing Your Cassette)
How-To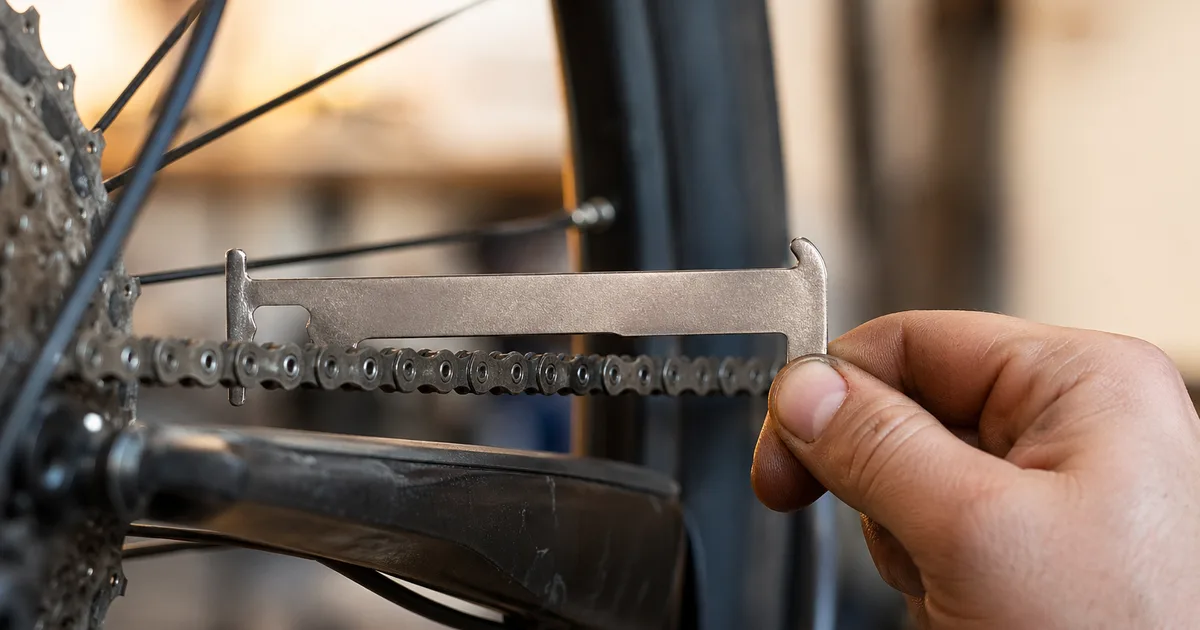
A bike chain is a consumable, not a permanent part. Replace it on time and a single $25 chain wears out - wait too long and you'll be buying a chain, a cassette, and possibly chainrings together for $150-$400. The good news: chains die predictably. A $13 tool and sixty seconds tell you exactly when to swap. This guide walks through what chain “stretch” really is, the 0.5% and 0.75% wear thresholds the whole industry uses, and how to do the replacement yourself in about half an hour.
At a Glance
- Replace at: 0.5% wear (11-12 speed) or 0.75% (8-10 speed)
- Time to swap: ~30 minutes
- Cost: $20-$60 for the chain itself
- Tools needed: Chain checker, chain breaker, master link pliers
Quick Answer
Replace your chain when a chain checker reads 0.5% on 11- or 12-speed drivetrains, or 0.75%on 8-, 9-, or 10-speed. Past 1% you'll almost certainly need a new cassette too.
Not sure how to read your gauge? Use our Chain Wear Calculator → Punch in your reading and we'll tell you what to do.
Who This Is For
- Beginner riderswho've never replaced a chain and aren't sure when one is “done”
- Commuters and weekend cyclists who want to maximise drivetrain life and avoid surprise shop bills
- Anyone who just bought a used bike and needs to know whether the existing chain has miles left or is hiding a ruined cassette
Why Chains “Stretch” (and What It Really Means)
Chains don't actually stretch - the steel side plates don't lengthen. What wears is the pin and bushing inside each link. Every pedal stroke, every link articulates as it wraps the chainring and cogs, and abrasive grit between the pin and bushing slowly grinds material away. That microscopic lossper linkadds up across 116 links and the whole chain gets measurably longer. We call it stretch, but it's really wear - and the rate depends almost entirely on grit, lube, and how often you ride in the rain.
The reason it matters: a worn chain no longer matches the tooth pitch on your cassette and chainrings. Each link sits a hair too far back, which gouges the trailing edge of every cog tooth. Catch the chain before that wear transfers to the cassette and you replace one $25 part. Miss the window and the new chain skips on the worn cogs, forcing you to replace cassette and chain together. Past 1% wear, the chainrings often go too. (For the cleaning routine that buys you thousands of extra miles, see our chain cleaning and lube guide.)
Three Ways to Measure Chain Wear
- Chain checker tool (recommended). A go/no-go gauge like the Park CC-3.2 drops between two links. If the 0.5% pin seats fully, the chain is at the replace-now threshold. Total measurement time: 5 seconds. Cost: ~$13. This is the standard method every shop uses.
- Ruler method. A new chain measures exactly 12 inchesacross 12 complete links (pin-to-pin, measured on the 12th pin). At 0.5% wear, that distance grows to 12 1/16". At 0.75%, it's 12 3/32". Accurate but fiddly - a worn chain sags, so you have to tension it straight against a ruler to read cleanly.
- Digital chain checker. Tools like the KMC Digital Chain Checker show percent elongation as a number on a screen. Useful if you want to track wear over time and see exactly how your lube and cleaning routine compare across chains.
Chain checker tools are cheap insurance. The first cassette you save pays for the gauge ten times over.
The 0.5%, 0.75%, and 1% Thresholds Explained
Three numbers cover almost every modern drivetrain. The right threshold depends on how many speeds you run - narrower 11- and 12-speed chains are less tolerant of wear than older 8- and 9-speed chains.
| Drivetrain Speed | Replace At | What Happens If You Wait |
|---|---|---|
| 12-speed (road, MTB, gravel) | 0.5% | Cassette wears fast past 0.5%; new chain often skips |
| 11-speed | 0.5% | Same story - tight tolerances, narrow cogs |
| 10-speed | 0.5-0.75% | A bit more forgiving; aim for 0.5% on quality cassettes |
| 8/9-speed | 0.75% | Wider chains tolerate more wear before transferring to cogs |
| Single speed / BMX | 1.0% | Thicker pins, no shifting - live longer, fail later |
Hit the threshold for your drivetrain and replace the chain immediately - not at the next service, not next week. The difference between 0.5% and 0.75% on an 11-speed cassette is roughly 500-1,000 miles of cog wear.
Use Our Chain Wear Calculator
Chain Wear Calculator
Enter your chain checker reading or your ruler measurement and we translate it into a clear answer for your specific drivetrain: keep riding, replace soon, or replace now (and probably the cassette too).
Open the Chain Wear Calculator →The calculator handles the speed-specific thresholds, converts ruler readings into percent elongation, and flags borderline cases where you should book a shop visit to inspect the cassette.
Signs You Need a New Chain (Without a Tool)
If you don't have a checker handy, these symptoms strongly suggest your chain is past its replacement window:
- Skipping under load. Stand up to climb and the chain jumps a tooth on the rear cassette - classic worn-chain symptom.
- Chain lifts off the chainring.Pull the chain forward off the front chainring at 3 o'clock. If you can lift it more than a couple of millimetres so you can almost see the tip of a tooth, it's worn.
- Chain hangs in a curve. Lift the bottom chain run off the smallest cog. A new chain stays straight; a worn chain drapes in a sad arc.
- Persistent noise after lubing. A clean, freshly lubed chain that still rumbles is usually worn out, not dry.
- Visible side-plate gaps. Hold a section taut and look at the inner plates - gaps wider than a hair indicate serious wear.
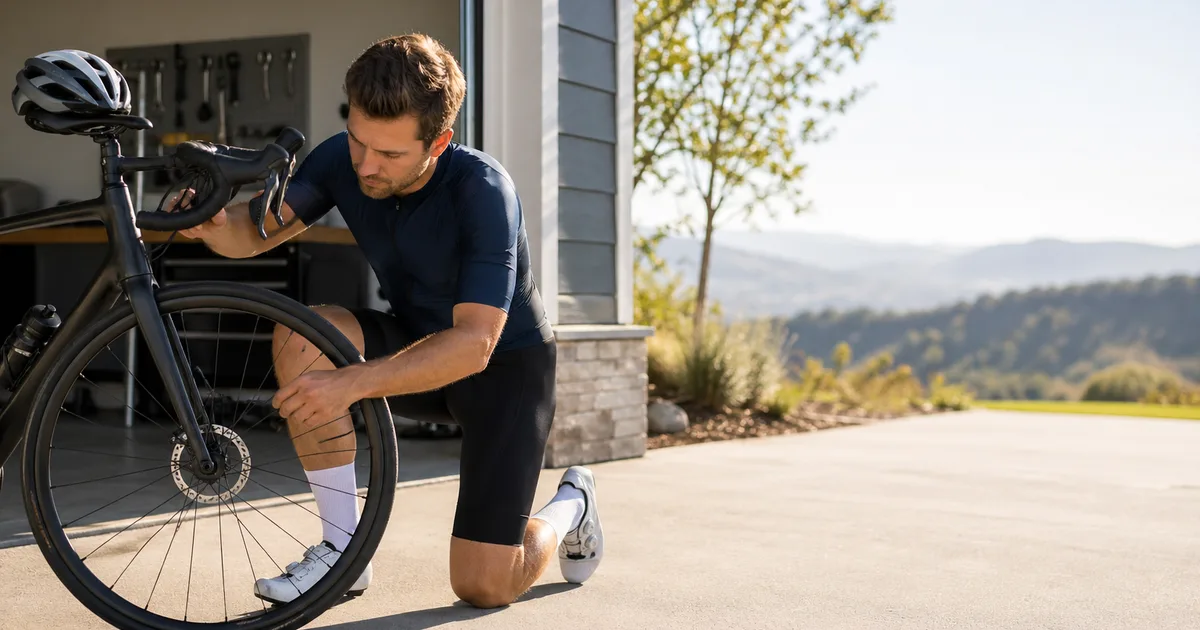
These visual checks aren't as accurate as a $13 gauge, but they catch chains that are already toast. Pair them with the M-check from our pre-ride safety check guide and you'll spot drivetrain trouble before you're stranded.
How Long Should a Bike Chain Last?
Chain life varies by an order of magnitude depending on lube and conditions. These are realistic mileage ranges for a clean, well-lubricated 11-speed chain on a road bike:
| Lube / Conditions | Typical Mileage to 0.5% | Notes |
|---|---|---|
| Hot wax (immersion) | 5,000-8,000 mi | Cleanest, lowest friction; needs re-wax every 200-400 mi |
| Drip wax | 3,000-5,000 mi | Easier than hot wax, still very low contamination |
| Dry lube (PTFE) | 2,000-3,500 mi | Clean drivetrain, but reapply every 100-150 mi |
| Wet lube | 1,500-3,000 mi | Best for rain; attracts grit and accelerates wear |
| Off-road MTB / wet conditions | 800-1,500 mi | Mud and grit are the fastest killers of any chain |
| E-bike (mid-drive) | 1,000-2,500 mi | High torque eats chains; consider a LinkGlide-spec chain |
Want to push the high end of these ranges? Switch to wax, clean regularly, and never ride a dry chain. Our chain lube comparison has the breakdown.
How to Replace a Bike Chain in 5 Steps
Whole job: about 30 minutes the first time, 10 minutes once you've done it twice. Tools: chain checker, chain breaker, master link pliers, and a clean rag.
Step 1 - Measure the Old Chain
Drop your chain checker into the chain on the top run between the chainring and rear cassette. Read the gauge before you decide anything else. If you're below threshold (under 0.5% on 11/12sp or 0.75% on 8-10sp), clean and lube the chain instead. If you're at threshold, continue. If you're past 0.75% on a modern drivetrain, plan to replace the cassette too - see our cassette removal guide.
Step 2 - Size the New Chain
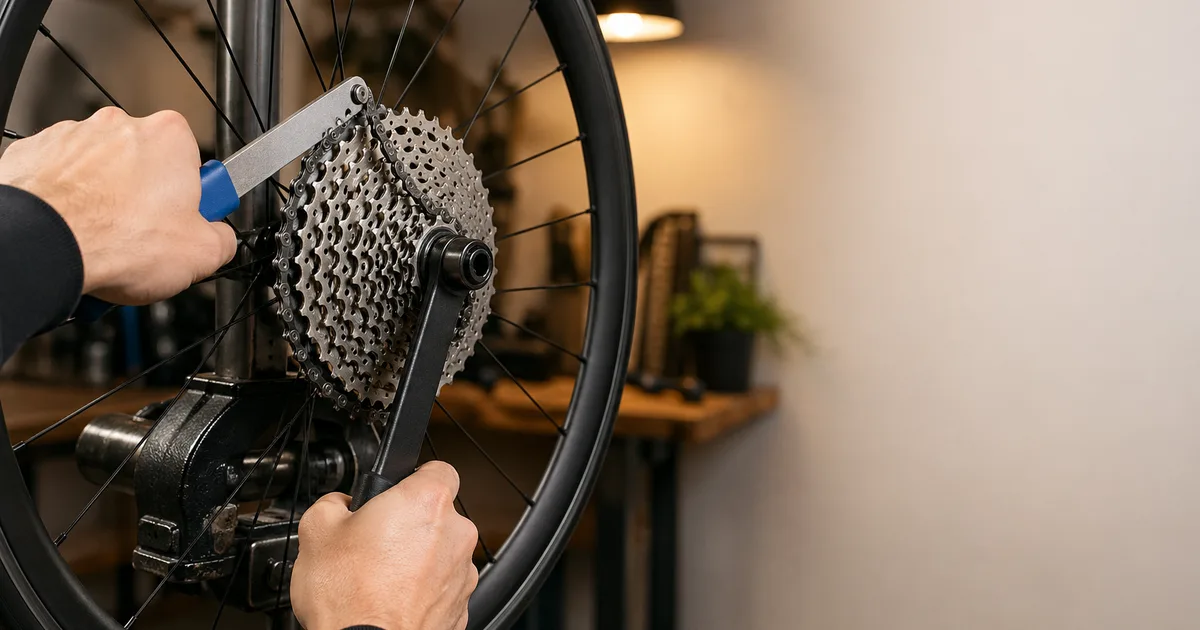
Buy a chain matched to your drivetrain speed (an 11-speed chain on a 12-speed cassette will not work). Lay the new chain alongside the old one and match the link count, removing extras with a chain breaker. If you don't have the old chain to copy, use the big-big sizing method: wrap chain around the largest cog and largest chainring (without going through the derailleur), add two links, and cut. Verify with our Chain Length Calculator.
Step 3 - Remove the Old Chain
If your old chain has a quick link (master link), squeeze it open with master link pliers and lift the chain off. Otherwise, use the chain breaker to push out a pin. Catch the chain as it falls so it doesn't mark the chainstay.
Step 4 - Thread the New Chain
Shift the rear derailleur to the smallest cog and the front to the smallest ring. Route the new chain through the front derailleur cage, around the chainring, back through the rear derailleur (over the upper pulley, between the guide tabs, around the lower pulley), and up to the smallest cog. Confirm the chain orientation matches any directional markings on the side plates.
Step 5 - Connect the Quick Link and Test
Insert the quick link halves through the two free ends. Pull the chain taut and pop the link tight by holding the rear brake and pressing down on a pedal. Backpedal a full revolution to confirm the link sits flush with no stiff spot. Shift through every gear under light pressure. If shifting hesitates or jumps, dial the rear derailleur per our derailleur indexing guide. Done.
Common Chain Replacement Mistakes
- Mixing speeds. A 10-speed chain on an 11-speed drivetrain will shift like garbage and wear cogs unevenly. Match chain speed to cassette speed.
- Reusing a single-use quick link. SRAM PowerLock and Shimano Quick-Link master links are stamped “single use” for a reason - they're designed to deform on first install. Use a new one each chain.
- Installing without measuring length.A chain that's too long sags into the chainstay; one that's too short rips the rear derailleur off in big-big.
- Skipping the cassette inspection. If your old chain ran past 0.75%, the cassette is almost certainly worn. A new chain on a worn cassette will skip within 50 miles.
- Not lubing the new chain. Factory grease is for shipping, not riding. Wipe off the factory coat with degreaser and apply your usual lube before the first ride. (Or, if you wax, start by stripping it - see our cleaning and lube guide.)
- Ignoring the chainstay. A new chain rubs against dirt baked into the frame - clean the bike at the same time. Our bike washing guide covers the right routine.
Tools and Chains We Recommend
These are the chain checkers and replacement chains we keep recommending to riders. Pick one of each and you're set.
Chain Checkers and Replacement Chains
Our top picks for measuring chain wear and the chains we trust to swap in.
Park Tool
Park Tool CC-3.2 Chain Checker
Go/no-go gauge that reads 0.5% and 0.75% elongation on 5-12 speed chains. The shop-standard chain wear tool.
KMC
KMC Digital Chain Checker
Digital readout chain checker that shows percent elongation directly - handy for tracking wear over time.
Pedro’s
Pedro’s Chain Checker Plus II
Two-step go/no-go gauge with separate 0.5% and 0.75% pins. Compatible with 5-12 speed chains.
Shimano
Shimano CN-LG500 LinkGlide E-Bike Chain
Heavy-duty LinkGlide chain engineered for e-bike torque and longer service life than standard 11-speed chains.
KMC
KMC X11 11-Speed Chain
Reliable 11-speed chain with reusable MissingLink quick connector. Cross-compatible with Shimano and SRAM 11-speed drivetrains.
SRAM
SRAM PC-1130 11-Speed Chain
SRAM’s value 11-speed chain with PowerLock quick link. Pairs cleanly with Shimano 11-speed cassettes too.
As an Amazon Associate we earn from qualifying purchases. This helps support our free calculators.
Frequently Asked Questions
Conclusion
A chain is the cheapest part of your drivetrain to replace and the most expensive part to forget. Buy a $13 chain checker, measure every couple of hundred miles, and swap the chain the moment it hits threshold. Do that and a quality cassette will last 3-5 chains; ignore it and you'll buy them in matching sets. Pair this guide with our full chain maintenance guide and our brake pad replacement guide to keep the rest of your contact-point parts honest.
Key Takeaways
- Replace at 0.5% on 11/12-speed, 0.75% on 8-10-speed.
- Use a chain checker - faster and more accurate than the ruler method.
- Match chain speed to cassette speed and use a fresh quick link every install.
- Past 1% wear? Plan on a new cassette too. Use our Chain Wear Calculator to confirm.
Related Calculators & Tools
Convert a chain-checker reading into a clear replace-now / still-good answer
Find the exact number of links you need before installing a new chain
Sanity-check ratios if you change cassettes at the same time as the chain
Confirm overall fit if you inherited the bike with a worn drivetrain
Continue Reading
Catch a worn chain before it strands you on the road

Wax vs dry vs wet - which lube actually slows wear

Clean and lube routines that double real-world chain life
Pull the cassette if your old chain ran past 1% wear