Bottom Bracket Service & Replacement: BSA, T47, Press-Fit
How-To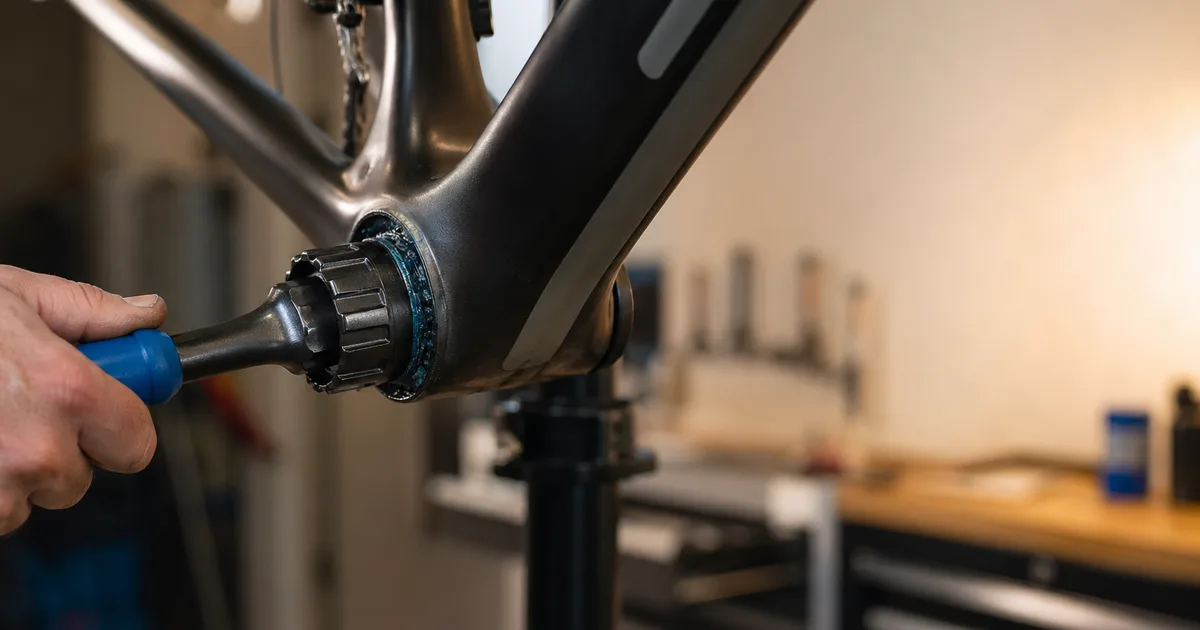
The bottom bracket is the loneliest part of a bike. It sits inside the frame, never sees daylight, and gets ignored until it creaks loud enough to ruin a Sunday ride. Replacing one is genuinely one of the best-value upgrades a home mechanic can take on - the part is $40-$110, the tools pay for themselves on the second job, and a properly installed BB transforms how a bike pedals. The catch is that bottom bracket standards are a swamp. BSA, T47, BB30, PF30, BB86, BB386EVO, PressFit 30, SRAM DUB - the wrong assumption costs you a part, a tool, and an hour. This guide covers every standard you'll meet on a modern bike, the exact procedure for removing and installing each, how to silence a creaking BB without throwing parts at it, and the small details that separate a BB that lasts 10,000 miles from one that needs replacing every winter.
At a Glance
- Time: 60-90 minutes
- Skill level: Advanced
- Cost: $80-$160 (part + tools amortised)
- Service interval: 5,000-15,000 mi
Who This Is For
- Riders chasing a creak they've already blamed on the saddle, seatpost, and pedals
- Home mechanics who own a torque wrench and want to graduate beyond chain swaps and tire changes
- Anyone building up a frame from the front triangle - you have to pick a BB that matches both shell and crank
- Owners of high-mileage gravel, road, or MTB bikes whose drivetrain has gone gritty under load
- Shop apprentices learning the difference between pressing a cup square and explaining a cracked frame to the owner
Tools & Parts You Need
BB service is one of the few jobs where the tools cost more than the part - but they last decades. If you're doing this once, borrow a press; if you're going to keep your bikes for more than five years, buy them. Pair this teardown with our chain cleaning routine and a cassette removal for one big workshop session.
| Tools (one-time) | Consumables (per service) |
|---|---|
| Park Tool BBT-79.3 (Shimano/SRAM DUB external cup) | Replacement BB matched to your shell |
| Park Tool BBT-22 (older 20-tooth UN-series cup) | Polylube grease (Park PPL-1) |
| BBP-1 bearing press (press-fit only) | Carbon assembly paste (press-fit cups) |
| Torque wrench (5-50 Nm range) | Loctite 222 (purple) |
| 8 mm hex / T25 Torx for crank bolts | Isopropyl alcohol & clean rags |
BB Standards Decoded
There are only two questions that matter: what kind of shell does the frame have, and what spindle does the crank use? Match those, and every other detail (chainline, Q-factor, bearing type) falls out of the spec. Use this table to translate the alphabet soup into a part you can actually buy.
| Standard | Shell Width | Shell ID / Thread | Spindle Ø | Found On |
|---|---|---|---|---|
| BSA (English) | 68 / 73 mm | 1.37″ × 24 TPI | 24 mm (Hollowtech II) | Most road, gravel, and trail bikes |
| Italian | 70 mm | 36 mm × 24 TPI | 24 mm | Older Italian-built road frames |
| T47 | 85.5 / 86 mm | M47 × 1.0 threaded | 24 or 30 mm | Modern gravel & titanium custom frames |
| BB30 | 68 / 73 mm | 42 mm press-fit | 30 mm | Cannondale and many road carbon frames |
| PF30 | 68 / 73 mm | 46 mm press-fit (cups) | 30 mm | Carbon road & gravel (early 2010s) |
| BB86 / BB92 | 86.5 / 92 mm | 41 mm press-fit (cups) | 24 mm (Shimano) | Modern carbon road (BB86) and MTB (BB92) |
| BB386EVO | 86.5 mm | 46 mm press-fit (cups) | 30 mm | Wider-than-PF30 frames (Cervélo, BH, Giant, etc.) |
| PressFit 30 | 68 / 73 mm | 46 mm press-fit (cups) | 30 mm | Specialized OSBB and many trail/enduro bikes |
| SRAM DUB | Any (BSA / PF30 / BB86 cups) | Cup-dependent | 28.99 mm | All current SRAM road, gravel, & MTB cranks |
The most important pattern: shell width + bore tells you the BB cup; crank spindle diametertells you the bearing inside that cup. SRAM DUB is the modern wildcard because it uses a unique 28.99 mm spindle that fits inside almost any frame standard with the right cup. Check our gear ratio calculator if a crankset swap is changing your chainring sizes - the chainline math has to add up before you commit to the parts.
Diagnosing a Creaking BB
Eight times out of ten the “BB creak” that brings a bike into the shop is not the BB. Before you crack the frame open, work through this elimination list under load - out-of-the-saddle climbing reproduces the noise far more reliably than spinning the cranks by hand.
- Pedals first:remove, grease the threads, retorque to 35 Nm. Solves about a third of all “BB” creaks.
- Saddle & seatpost:a dry seatpost or undertorqued rail clamp transmits a metallic click that sounds like it's coming from the BB shell.
- Chainring bolts: back each one out, grease, retorque in a star pattern.
- Crank-spindle interface:on Hollowtech II, the 24 mm spindle splines onto the non-drive arm - clean and regrease the spline if creak persists.
- BB cups themselves: only after the above. Press-fit BBs creak when the cup-to-shell interface goes dry; threaded BBs creak when undertorqued or installed without grease.
Step 1 - Identify Your BB Standard
Wipe the BB shell clean and look for stamped markings - manufacturers etch “BSA”, “BB86”, or “PF30” directly on the shell on most modern frames. If there's nothing printed, measure shell width with calipers (68, 73, 86, 92, or 86.5 mm are the common values) and inner diameter (1.37″ ≈ 34.8 mm for BSA threads, 41/42/46 mm for press-fit). Cross-reference the table above before ordering anything.
Step 2 - Remove the Cranks
For Shimano Hollowtech II: lift the small safety tab on the non-drive arm and back off the plastic preload cap with the included pin tool. Loosen both 5 mm pinch bolts on the non-drive arm in alternating half-turns. The arm will pull straight off; the spindle and drive-side arm slide out as one unit. For SRAM DUB cranks: the 8 mm hex drive-side bolt is self-extracting - one continuous unscrew pulls the spindle right through. For older square-taper or Octalink cranks, you'll need a CWP-7 crank puller. Don't hammer them off - you'll wreck the spindle interface.
Step 3 - Remove the Old Bottom Bracket
Threaded BBs: fit the BBT-79.3 (or BBT-22 on older units) flat on the cup, support it with a hand to keep the splines fully engaged, and unthread. Remember the drive-side cup is reverse-threadedon BSA - clockwise to remove. The non-drive cup is standard thread - counter-clockwise to remove. Press-fit BBs: insert a Park Tool RT-1 rocket tool from the opposite side and tap the cup out with a soft mallet, alternating sides every few taps so you don't cock the cup in the bore.
Step 4 - Clean & Inspect the Shell
Spray isopropyl alcohol on a rag and wipe every face of the shell. Use a stiff plastic brush in the threads. Look for: galled threads (silver flakes hanging in the BSA threads), an out-of-round press-fit bore (use calipers at three points 60° apart - variation >0.05 mm means trouble), and any cracks radiating from the bore in carbon frames. A galled or oval shell is the one failure that ends the home job - a shop can chase BSA threads or face press-fit shells, but a cracked carbon BB area is frame-fatal.
Step 5 - Prep the New Bottom Bracket
For BSA / T47 threaded cups: smear PPL-1 grease around every thread and on the cup flange where it meets the shell. Use anti-seize on titanium frames specifically - grease galls into Ti threads over time. For press-fit cups: apply a thin film of carbon assembly paste (or Loctite 641 retaining compound on aluminum frames with loose-fitting cups) to the cup's outer cylindrical surface. Never use grease on a press-fit interface - it lets the cup walk under load and is the #1 cause of recurring press-fit creaks.
Step 6 - Install the New Bottom Bracket
Threaded BBs: hand-thread the drive-side cup first (counter-clockwise for BSA), at least three turns, before touching a tool. If it won't go in by hand, stop - you're cross-threading. Once seated, torque to spec: 35-50 Nm for Shimano Hollowtech II, 34-41 Nm for SRAM DUB BSA, and 40 Nm for most T47 cups. Press-fit BBs: load the cup square in the BBP-1, advance the press in slow, even half-turns alternating sides until the cup flange meets the shell face. If the cup tilts during the press, back it out and start over - a tilted press cracks carbon.
Step 7 - Reinstall the Cranks
Slide the drive-side spindle through the new BB. Fit the non-drive arm onto the spindle splines (Hollowtech II) or thread the self-extracting bolt (SRAM DUB). For Hollowtech II, snug the plastic preload cap by hand until you feel resistance, then back off 1/8 turn - you want zero lateral play but no bearing preload. Torque the two pinch bolts in alternating half-turns to 12-14 Nm. For SRAM DUB, torque the drive-side bolt to 54 Nm in one continuous pull. Confirm the cranks spin freely with no side-to-side rock.
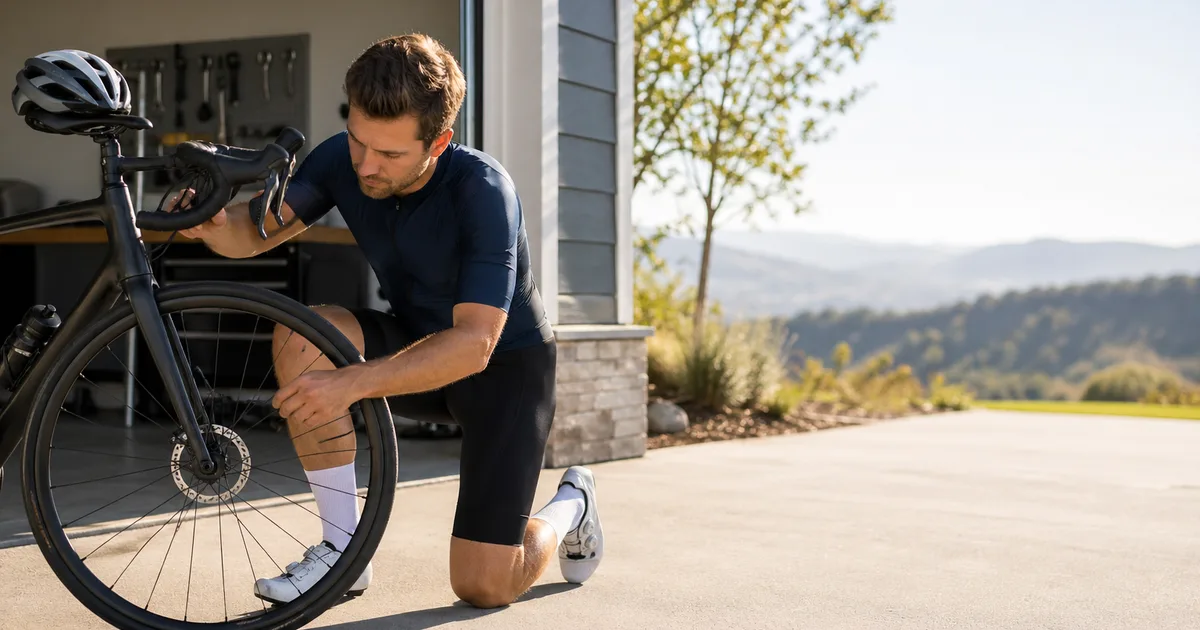
Step 8 - Test Ride & Re-Torque
Take the bike on a 5-10 mile loop with at least one hard out-of-the-saddle climb - this loads the BB way harder than anything you can do in the workshop. Back home, recheck crank-bolt torque (it's normal for fresh installs to need a small top-up) and re-test for lateral play. While you're at it, run through our M-check routine - rebuilds are when stem bolts and seatpost clamps quietly loosen too.
Common Mistakes
- Greasing press-fit cups instead of using assembly paste: guarantees a creak within 200 miles. Press-fit needs friction; grease kills it.
- Forgetting BSA drive-side is reverse-thread:people strip cups every weekend trying to muscle them “tighter” the wrong way.
- Skipping the torque wrench:Hollowtech II preload caps don't fix bearings; over-tight pinch bolts crush the spindle.
- Mixing 24 mm and 30 mm spindles: a Shimano Hollowtech II crank cannot run in a BB30 cup without an adapter, and even then chainline often comes out wrong.
- Pressing a cup that's tilted: the BBP-1 keeps things square - eyeball pressing with a hammer is how carbon frames crack at the BB shell.
- Re-using a bottom bracket: sealed cartridge BBs are not user-serviceable. If it came out, fit a new one. Cross-reference your chain wear at the same time using our chain maintenance guide.
Troubleshooting
| Symptom | Likely Cause | Fix |
|---|---|---|
| Creak under load, vanishes seated | Dry pedal threads or BB cup interface | Grease pedals first, then re-torque BB cups |
| Lateral crank play after install | Hollowtech II preload cap backed off too far | Snug preload until play disappears, retorque pinch bolts |
| Gritty feel when spinning cranks | Worn BB bearings or contaminated grease | Replace BB - sealed cartridges aren't serviceable |
| Crank tool spins on cup splines | Wrong tool generation (12 vs 16 notch) | Use BBT-79.3 (16-notch) for Shimano/SRAM DUB modern cups |
| Press-fit cup keeps walking out | Oval shell or grease used instead of paste | Have shell measured; switch to Loctite 641 retaining compound |
| Chainline off after install | Wrong-width spacers or BB shell | Verify spacer count matches frame standard (68 vs 73 mm) |
When to Call a Shop
BB service is one of the most rewarding home jobs - until it isn't. Stop and book a shop visit if any of the following come up:
- Galled or stripped BSA threads.A shop can chase the threads with a tap, or fit a thread-saver insert. Don't force a new cup into damaged threads.
- Out-of-round press-fit shell. Carbon frames need shell facing or a Hambini-style oversized cup. Aluminum may take a shell sleeve.
- Persistent creak after a clean install. Could be a cracked frame at the BB junction - a shop with an ultrasonic tester can confirm before you ride it again.
- Carbon cranks with damaged spindle interfaces. Replacement is the only safe fix.
- Anything on a frame still under warranty. A botched home install voids most carbon-frame BB-shell warranties.
Recommended BB Service Kit
Tools and parts that cover BSA, T47, and the major press-fit standards on one bench.
Park Tool
Park Tool BBT-79.3
16-notch external cup tool that fits Shimano Hollowtech II, SRAM DUB, Race Face Cinch, and most modern threaded BB cups.
Park Tool
Park Tool BBT-22
20-tooth socket for older Shimano UN-series and Octalink BSA cartridge bottom brackets - the tool you need for most bikes built before 2010.
Park Tool
Park Tool BBP-1 Press
Threaded bearing press for installing PF30, BB86/BB92, BB30, and BB386EVO press-fit bottom brackets without damaging the frame.
Shimano
Shimano BB-MT800 Hollowtech II
XT-grade external bearing BSA bottom bracket with sealed cartridge bearings - the workhorse for 24 mm Hollowtech II cranksets.
SRAM
SRAM DUB BSA / PressFit BB
28.99 mm DUB-spec bottom bracket - pick BSA, PressFit 30, or BB86 to match your frame and any SRAM DUB-equipped crank.
Wheels Manufacturing
Wheels Manufacturing T47 BB
Threaded T47 internal bottom bracket with Enduro ABEC-3 angular contact bearings for 24 mm or 30 mm spindle cranks.
As an Amazon Associate we earn from qualifying purchases. This helps support our free calculators.
Frequently Asked Questions
Conclusion
A bottom bracket is the cheapest part of your bike that absolutely has to work. Get the standard right, prep the interfaces correctly (grease threaded cups, paste press-fit cups), torque to spec, and a $50 BB will outlast two chains and a cassette. The day you stop booking shop appointments for BB service is the day your home workshop graduates from “flat-tire and chain” into real mechanic territory. While the cranks are off, treat yourself to a full drivetrain refresh - pair this job with our chain cleaning guide and derailleur indexing walkthrough and you'll roll out with a bike that pedals like new.
Key Takeaways
- Identify shell + spindle first. BSA + 24 mm, BB86 + 24 mm, PF30 + 30 mm, and SRAM DUB + 28.99 mm are the four combos covering 90% of modern bikes.
- Grease threaded cups, paste press-fit cups. Confusing the two is the #1 cause of recurring creaks.
- Torque matters. 35-50 Nm on Hollowtech II cups, 12-14 Nm on pinch bolts, 54 Nm on SRAM DUB drive bolts.
- Confirm fit first.If you're changing cranks or chainrings, run our bike fitting guide and bike size calculator before parts arrive.
Related Calculators & Tools
Confirm a frame still fits before sinking $120 into a new BB
Sanity-check chainline and gearing if you swap cranksets at the same time
Re-cut chain length cleanly if a new crank changes chainring size
Verify cockpit fit if you’re rebuilding a bike around a new drivetrain
Continue Reading
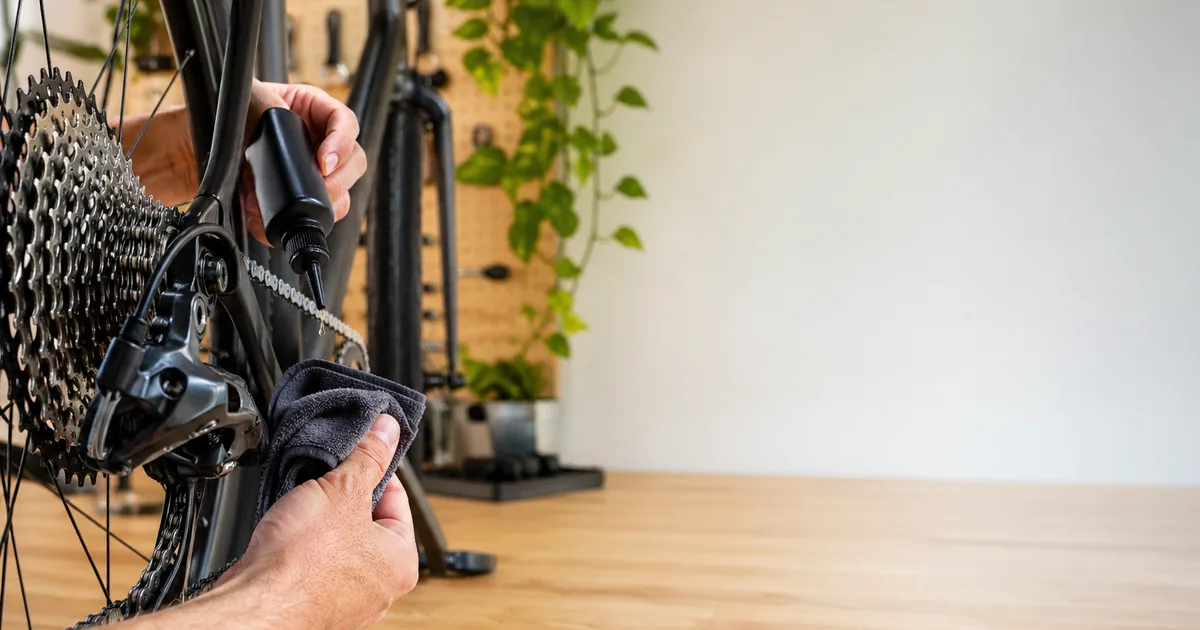
A clean chain is the easiest way to extend new BB bearing life
60-second crank rock test catches BB play before it strands you
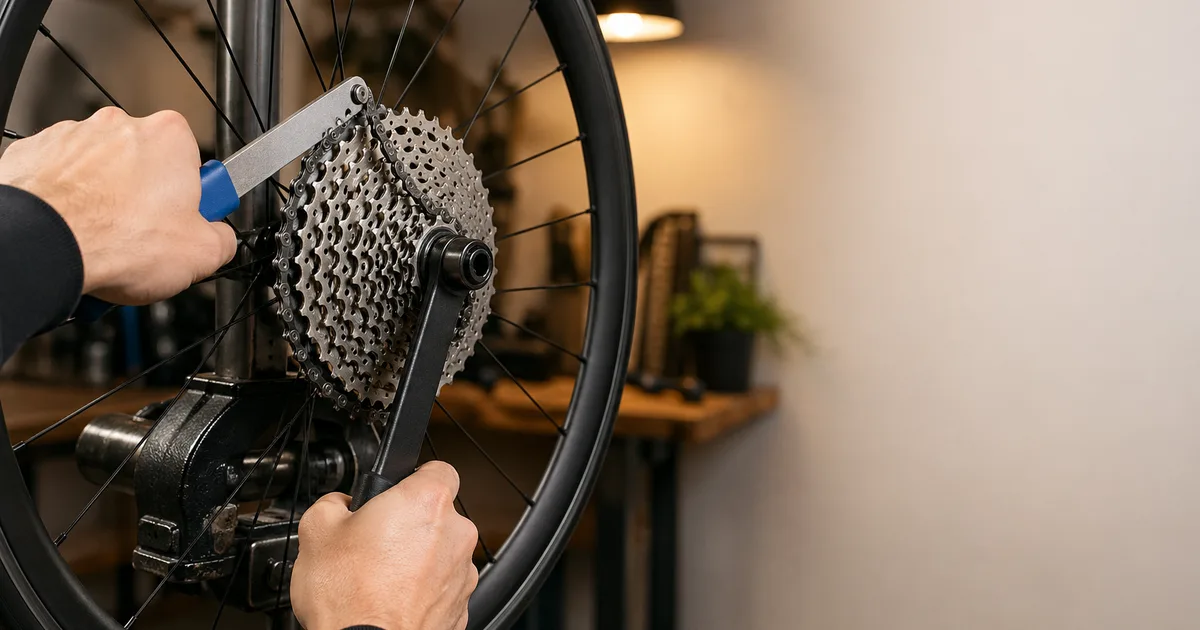
Same tool family - pair BB and cassette service in one workshop session

Same press tools and the other big creak source on most bikes