Tubeless Tire Setup & Sealant Top-Up: A No-Drama Guide
How-To
Tubeless tires save you from pinch flats, let you run lower pressures for grip, and self-seal most thorn punctures before you even notice. The catch: the first setup is fiddly, and a bad first attempt sours people on tubeless for years. This guide walks you through every step that actually matters - rim prep, tape, valve, bead seating, sealant volume, and the top-up rhythm that keeps tubeless reliable through the season. Plan on 45 minutes the first time and about 10 minutes for routine sealant refreshes.
At a Glance
- Time: ~45 minutes per wheel (first setup)
- Skill level: Intermediate
- Cost: $40-$80 per wheel in tape, valves, sealant
- Tools needed: 6 (levers, pump, core tool, syringe, rags, scissors)
Quick Answer
Confirm your rims and tires are tubeless-ready, tape the rim wider than the internal width, install a tubeless valve, mount one bead, pour in the right sealant volume (30 ml road / 60 ml gravel / 90-120 ml MTB), seat the second bead with a booster pump, and shake the wheel to coat the casing. Top up sealant every 2-3 months, sooner in hot or dry climates.
Need a starting PSI for your new tubeless setup? Use our Tire Pressure Calculator (tubeless mode) →
Who This Is For
- Gravel and MTB riders who want fewer flats and lower pressures without compromising rim protection
- Road riders moving up to 28-32mm tires on modern hookless or hooked wheels and ready to ditch latex tubes
- Anyone tired of paying a shop $40+ per wheel for what is genuinely a 45-minute home job once you’ve done it twice
Tools and Supplies
Split your shopping list into tools (you keep these on the bench) and consumables (you’ll re-buy these every season or two). The single biggest mistake riders make is skimping on rim tape and then chasing leaks for months - buy the right one and the rest of the job gets easier.
| Tools | Why You Need It |
|---|---|
| Plastic tubeless tire levers | Mount stiff TLR beads without slicing tape or scratching hookless rims |
| Floor pump (booster recommended) | Standard pump fills the casing; a charge chamber pops the bead |
| Valve core remover | Lets you blast air past the core for seating and inject sealant through the valve later |
| Sealant injector / syringe | Clean top-ups through the valve - no need to break the bead |
| Isopropyl alcohol + clean rags | Degrease the rim bed so tape actually sticks |
| Sharp scissors | Trim rim tape and X-cut a clean valve hole |
| Consumables | Notes |
|---|---|
| Tubeless sealant (Stan’s, Orange Seal, Muc-Off, Silca) | Pick latex for fast sealing or non-latex for hookless / allergy compatibility - see the comparison below |
| Tubeless rim tape | Buy 1-2 mm wider than the rim's internal width; Stan's Yellow and DT Swiss are the safe defaults |
| Tubeless Presta valves (removable core) | Match valve length to rim depth; carbon road wheels often need 60-80 mm |
| Tubeless-Ready (TR/TLR/TCS) tires | Non-tubeless tires can technically work but leak constantly - not worth the headache |
Maintenance interval
Top up sealant every 2-3 months in temperate climates, every 6-8 weeks in hot or dry conditions (Phoenix, southern Europe in summer), and at minimum twice a season. Replace tape when you replace the tire, or sooner if you spot weeping along the rim flange.
Why Go Tubeless
The headline benefit is puncture resistance. Liquid sealant plugs holes up to roughly 3-4 mm before you even notice them - exactly the thorns and small flints that ruin a ride with tubes. Pair this with puncture-resistant tubeless tires and you get the most reliable setup short of an airless wheel. Combined, the practical wins are:
- No pinch flats. Without a tube to bite, snake-bite flats from rim impacts effectively disappear.
- Lower pressures, more grip. You can run 5-10 PSI lower than tubed for the same rim protection - huge for cornering and rough surfaces. Our tire pressure guide and MTB pressure guide cover the math.
- Lower rolling resistance. No tube-to-casing friction and softer-running latex sealant net out faster on most surfaces.
- Slightly less rotating mass - modest, but real.
When Tubeless Is NOT Worth It
Tubeless is not religion. There are real cases where tubes win:
- Older rim-brake road bikes with narrow internal rims (15 mm or less) and no tubeless-ready wheelset - conversion is fragile.
- Hookless rims at high pressures. Hookless is rated for ~72.5 PSI max on most modern road wheels. Lightweight road riders who want to run higher pressures should stick with hooked tubeless or tubed.
- Low-mileage commuters. If you ride 1,000 km a year on smooth pavement, tubes plus a thorn-resistant tire are simpler and cheaper.
- Bikes you store flat for months. Sealant pools and dries; tubes don’t care.
Check Compatibility First
Three labels matter, and not all are interchangeable:
- Tubeless-Ready (TR / TLR / TCS). The modern standard. Tire and rim are designed for sealant; tape required, no rubber liner needed. This is what almost every wheel and tire sold since ~2018 uses.
- UST. The original Mavic standard - heavy butyl-lined tires, sealed rim beds, often no tape needed. Still appears on some high-end MTB wheels. Sealant optional but recommended.
- Hookless. No bead hook on the rim. Requires a hookless-approved tire (check the manufacturer’s list) and obeys a pressure cap, typically 72.5 PSI / 5 bar on road. Mismatch a hookless rim with a non-approved tire and the tire can blow off the rim.
Check rim internal width and pair it with a tire roughly 1.6-2.0× wider for a healthy, supported casing - the ETRTO sweet spot most brands target. Wheel-size or hookless questions? Run them through our Wheel Size Calculator or cross-check fit with our gravel sizing guide and mountain bike sizing guide.
Step-by-Step Tubeless Setup
Step 1 - Strip and Clean the Rim Bed
Pull the old tire and tube, then peel any existing rim tape. Wipe the rim channel and flange with isopropyl alcohol on a clean rag until it comes away dry and grey. Skipping this is the #1 cause of slow leaks - sealant residue, grease, and fingerprints stop new tape from bonding. Inspect the spoke holes: any sharp burrs from a recent re-spoke job get filed flat now.
Step 2 - Apply Tubeless Rim Tape
Start two spoke holes past the valve drilling so the overlap doesn’t sit under the valve. Pull the tape under tension, pressing firmly into the rim channel as you go - air bubbles or wrinkles will leak. Run a full lap, overlap the start by 4-6 inches, and trim. The tape should sit snug against both bead shelves without climbing the flange. If it’s too narrow, sealant migrates under the edges; if it’s way too wide, the bead won’t seat. Match width to 1-2 mm over the rim’s internal width.
Step 3 - Install the Tubeless Valve
Press a small X-cut through the tape exactly at the valve hole - don’t punch a big circle, you want the tape to seal around the valve base. Push the valve through from the rim bed side, fit the rubber gasket and lock-ring on the outside, and tighten finger-tight plus about a quarter turn with the valve core remover (or pliers, gently). Over-tightening deforms the rubber base and creates the dreaded valve weep.
Step 4 - Mount One Bead and Add Sealant
Mount the first tire bead onto the rim completely. Then mount the second bead all the way around except for a 6-inch gap opposite the valve. Shake the sealant bottle hard, then pour the correct volume directly into the casing through that gap (volumes in the next section). Pouring opposite the valve keeps sealant from flooding the valve core during seating. If you’re using a syringe, you can skip this and inject through the valve after seating instead.
Step 5 - Seat the Second Bead
Push the remaining bead onto the rim with your thumbs - work from the edges inward so you don’t trap sealant under the bead. Remove the valve core to maximize airflow. Now the moment of truth: blast air. A booster pump, compressor at ~100 PSI, or a single 25g CO₂ all work. You’ll hear two distinct bead pops. If the bead won’t seat, see the troubleshooting matrix below - do not just keep pumping with a flat floor pump.
Step 6 - Reinstall the Core, Set Pressure, Shake
Re-thread the valve core, inflate to your target ride pressure, and spin the wheel slowly while tipping the bike side to side for 1-2 minutes. You want sealant coating the entire inner casing, especially the bead-rim interface. Small sidewall weeping for the first ride is normal; persistent weep on day two means you missed a step. Bounce the wheel a few times to confirm bead retention, then go ride.
How Much Sealant?
Under-fill and you won’t seal anything; over-fill and you’re lugging dead weight. Start at the volumes below and adjust within 10-20 ml based on climate and tire porosity.
| Tire Type | Width | Sealant per Tire | Notes |
|---|---|---|---|
| Road | 25-32 mm | 30 ml | Latex sealant; refresh every 6-8 weeks at high pressure |
| Gravel | 35-50 mm | 60 ml | Bump to 75 ml on tan-wall casings (more porous sidewalls) |
| XC / Downcountry MTB | 2.2-2.4" | 90 ml | Standard 29er trail volume - sweet spot for most riders |
| Trail / Enduro MTB | 2.4-2.6" | 120 ml | Bigger casings need more sealant to coat fully |
| Plus / Fat | 2.8"+ | 150 ml+ | Add 30 ml per inch of additional width |
Top-Up Interval - The Shake Test
Sealant evaporates. Latex-based formulas dry to a thin rubber skin inside the tire; non-latex emulsions thicken until they stop flowing. Either way, your job is to keep enough liquid sealant inside to plug a fresh hole on demand.
Use the shake test: hold the wheel vertical and rock it back and forth near your ear. If you hear a clear sloshing wave, you have at least 20-30 ml of liquid left. Silence means it’s top-up time. Climate matters more than calendar - hot, dry air dries sealant in 4-6 weeks; mild, humid air can stretch it to 4 months. Default cadence:
- Temperate climate: top up every 8-12 weeks
- Hot / arid climate: top up every 4-6 weeks
- Heavy rain or wet riding: top up after each big wet ride if you noticed sealant escaping a cut
Top up through the valve with a syringe injector - unseat the bead only when you’re replacing the tire or there’s a sealant ball bouncing around inside (you’ll hear it).
Troubleshooting Matrix
| Symptom | Likely Cause | Fix |
|---|---|---|
| Bead won't seat with floor pump | Too little airflow at low pressure | Remove valve core, use booster pump or 25g CO₂; soap the bead to lubricate |
| Slow leak overnight | Tape gap, valve weep, or porous sidewall | Spin wheel, watch for bubbles in soapy water; re-tape if leak follows spoke holes |
| Sealant farting at the valve | Valve base not seated against tape | Tighten lock-ring quarter-turn at a time; replace gasket if deformed |
| Sealant ball rolling inside | Old sealant dried into a clump | Unseat one bead, scoop out the ball, refresh sealant |
| Bead unseats on hard cornering | Pressure too low or burped from a rim strike | Add 2-4 PSI; check tire-rim width pairing; consider an insert for aggressive trail use |
| Sidewall weeping after first ride | Porous casing not yet coated | Normal - ride 5-10 miles, sealant cures into casing pores |
If you’ve worked the matrix and still can’t seat the tire, see our flat repair guide - sometimes a plug or a new tire is the actual answer.
Pressure Recommendations
Tubeless lets you run lower than tubed for the same protection - but not arbitrarily lower. Use these starting ranges, then dial with our Tire Pressure Calculator (tubeless mode):
- Road (28-32 mm): 55-75 PSI hooked, cap at 72.5 PSI on hookless
- Gravel (40-45 mm): 28-40 PSI depending on rider weight and surface
- XC MTB (2.2-2.4"): 20-26 PSI front, 22-28 PSI rear
- Trail / Enduro MTB: 18-24 PSI front, 20-26 PSI rear; add inserts before chasing the bottom of the range
Riders moving from tubes typically drop 4-6 PSI in the first month - the grip difference is dramatic. For a deeper dive, our bike fitting guide and choosing the right bike articles tie pressure into broader fit decisions.
Common Mistakes
- Using the wrong tape width. Too narrow leaks under the edges; too wide stops the bead seating. Match it to internal rim width plus 1-2 mm.
- Skipping the alcohol wipe. A fingerprint of grease will guarantee tape failure in two months.
- Mixing sealant brands without rinsing. Some formulations curdle when combined. If you’re switching, scoop out the old and rinse with water before adding the new.
- Using ammonia-based sealant on carbon hookless rims. Some manufacturers (notably Zipp) explicitly forbid ammonia sealants. Check the wheel docs.
- Tightening valve lock-rings with pliers. Hand-tight plus a quarter turn is correct. More than that crushes the rubber base and starts a slow leak.
- Forgetting to top up. A dry tubeless tire is just an open casing. The whole system depends on liquid sealant being there when you cut the tire.
When to Call a Shop
Tubeless is well within home-mechanic scope, but a few situations deserve professional eyes:
- You’ve re-taped twice and the rim still leaks - the rim itself may be cracked at a spoke hole.
- A hookless rim repeatedly burps a tire that is on the approved list - could be a rim or tire dimensional issue.
- You don’t own a compressor or booster and your bead won’t seat after three CO₂ cartridges.
- You see fluid weeping from the rim flange, not the bead - that’s a rim crack until proven otherwise.
Sealant Comparison
These four sealants cover roughly 90% of bikes shipped today. The big decision is latex vs non-latex: latex seals faster and plugs bigger holes, non-latex is hookless-safe and won’t curdle in unusual chemistries.
| Sealant | Type | Particle Size | Refresh Interval | Best For |
|---|---|---|---|---|
| Stan's Race | Latex | Crystals + fibers (medium) | 2-3 months | Reference all-rounder - road, gravel, MTB |
| Orange Seal Endurance | Latex | Larger bits (heavy seal) | 3-4 months | Hot / dry climates, longer top-up cadence |
| Muc-Off No Puncture Hassle | Non-latex (ammonia-free) | Fine micro-fibers | 2 months | Hookless carbon rims, latex-allergic mechanics |
| Silca Ultimate | Non-latex (carbon-safe) | Fiber-loaded (large) | 4-6 months | Premium road / fast gravel; high pressures |
Recommended Sealants and Tools
These are the sealants, valves, tape, and pumps we keep recommending to riders. Pick a sealant that matches your rim/tire combo, the right tape width, and a booster pump - then setup gets dramatically easier.
Tubeless Sealants and Tools
Our picks for sealant, rim tape, valves, injectors, and booster pumps.
Stan’s NoTubes
Stan’s NoTubes Race Sealant
Latex-based sealant that seals fast and is the shop-standard reference for road, gravel, and MTB tubeless setups.
Orange Seal
Orange Seal Endurance
Long-life latex formula that survives hot, dry climates with fewer top-ups than standard sealants.
Muc-Off
Muc-Off No Puncture Hassle Tubeless Sealant
Non-latex, ammonia-free sealant that plays nicely with carbon hookless rims and is safe for latex-allergic mechanics.
Topeak
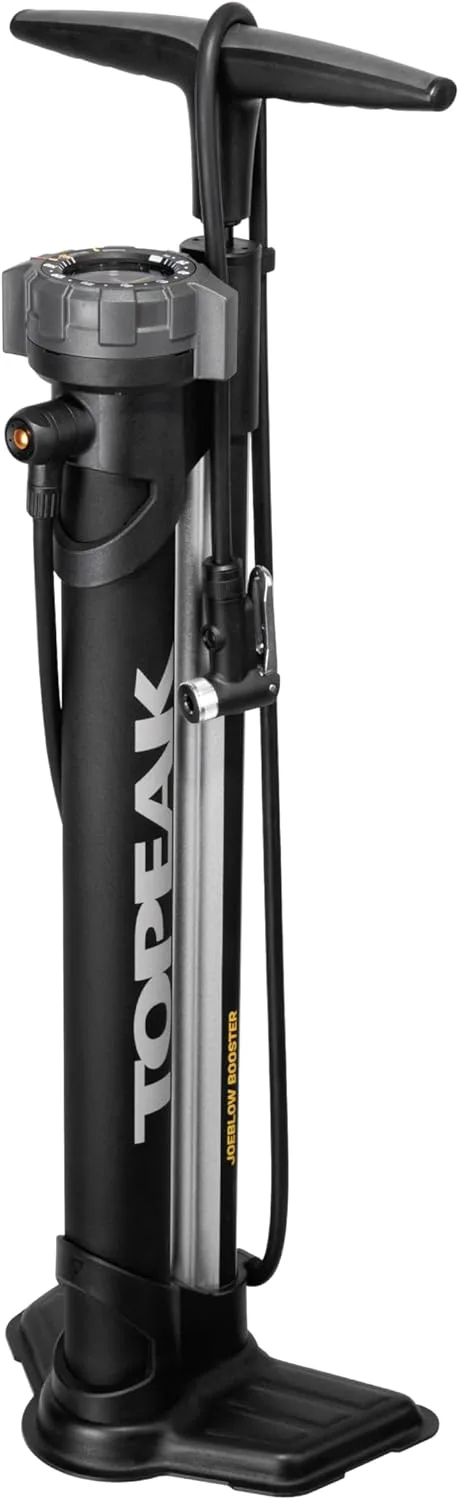
Topeak JoeBlow Booster Floor Pump
Floor pump with a 2 L charge chamber that releases a high-volume blast to seat stubborn tubeless beads. Switch lever toggles between standard inflation and charge-then-blast modes. Best in-class home option for road, gravel, and MTB tubeless setups.
Stan’s NoTubes
Stan’s Yellow Tubeless Rim Tape
The reference tubeless rim tape - sized 21mm to 39mm for road, gravel, and MTB internal widths.
Stan’s NoTubes
Stan’s NoTubes Sealant Injector
Clear-barrel syringe with hose for adding sealant through the valve without unseating the tire.
As an Amazon Associate we earn from qualifying purchases. This helps support our free calculators.
Frequently Asked Questions
Conclusion
Tubeless rewards careful first-time setup and almost zero attention afterwards. Tape clean, valve seated, the right sealant volume, beads popped, and a 60-second shake - that’s the whole job. Schedule a sealant top-up every 2-3 months, run a shake test before big rides, and you’ll punch through a season of thorns and rim strikes without thinking about it. The first conversion takes 45 minutes; every one after that takes 15. The flats you don’t get are the kind of return that makes the hassle worth it.
BikeSize Team - Last updated April 27, 2026.
Related Calculators & Tools
Get tubeless-specific PSI based on rider weight, tire width, and surface
Confirm 700c, 650b, 27.5, or 29 sizing before buying tires or sealant
Sanity-check overall fit if you are reworking the bike at the same time
Continue Reading

How to dial road and hybrid pressure once your tires are tubeless
Lower-pressure thinking for trail, enduro, and downcountry tubeless setups
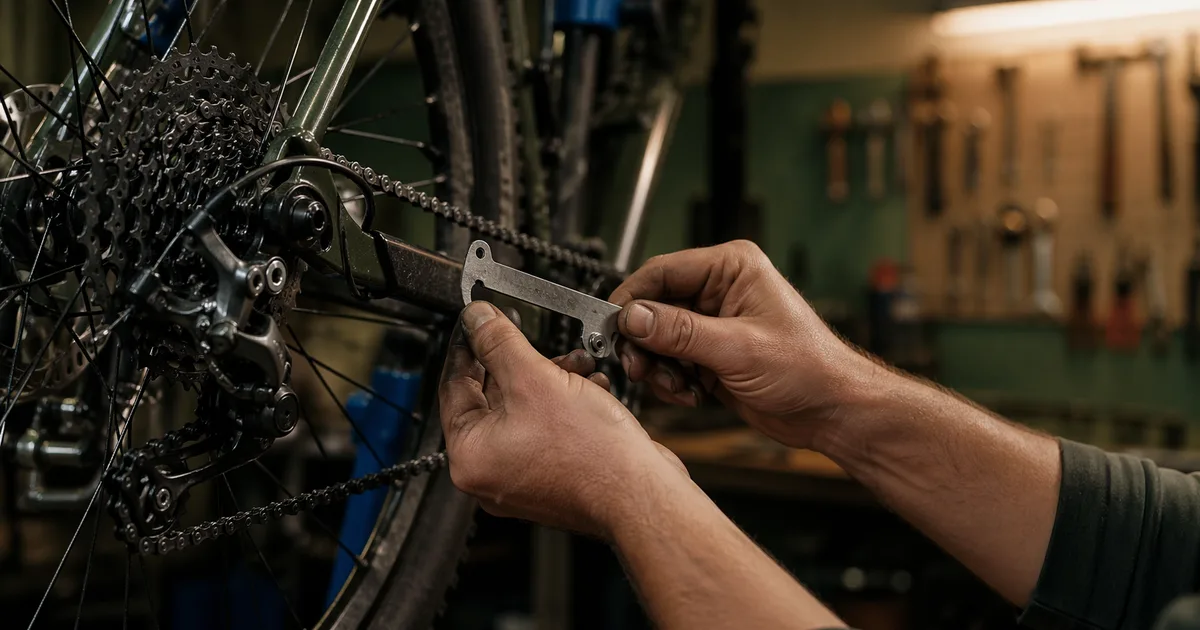
Pair tubeless prep with a drivetrain check while the wheel is out
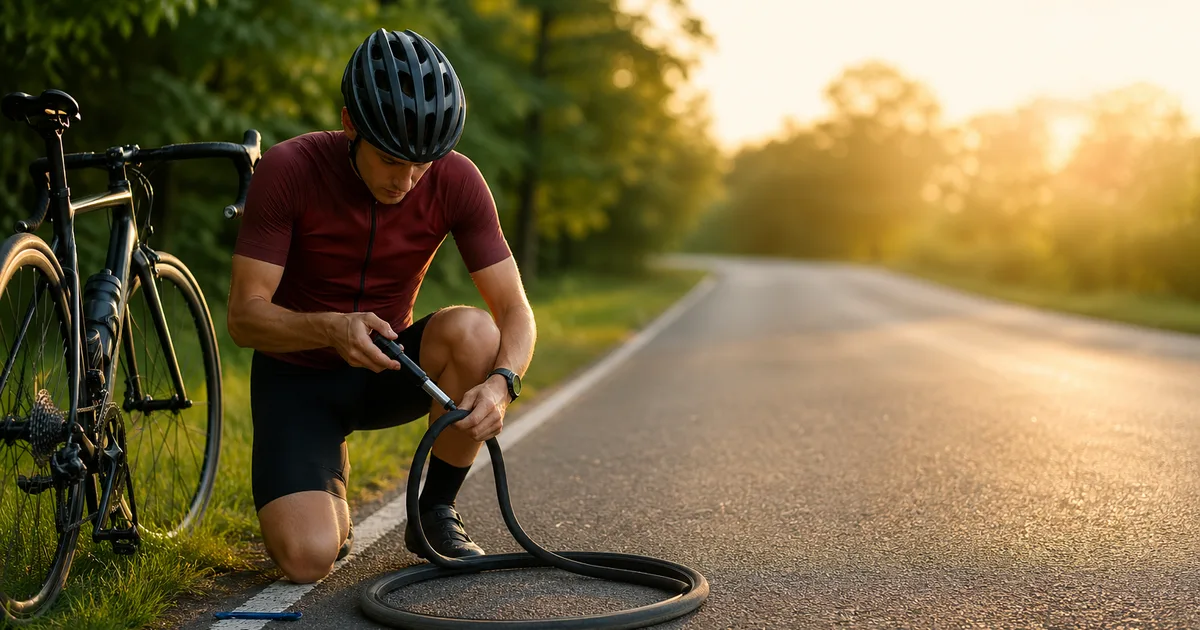
Roadside repair when sealant alone is not enough to plug the hole