How to Adjust Mechanical Disc & V-Brakes
How-To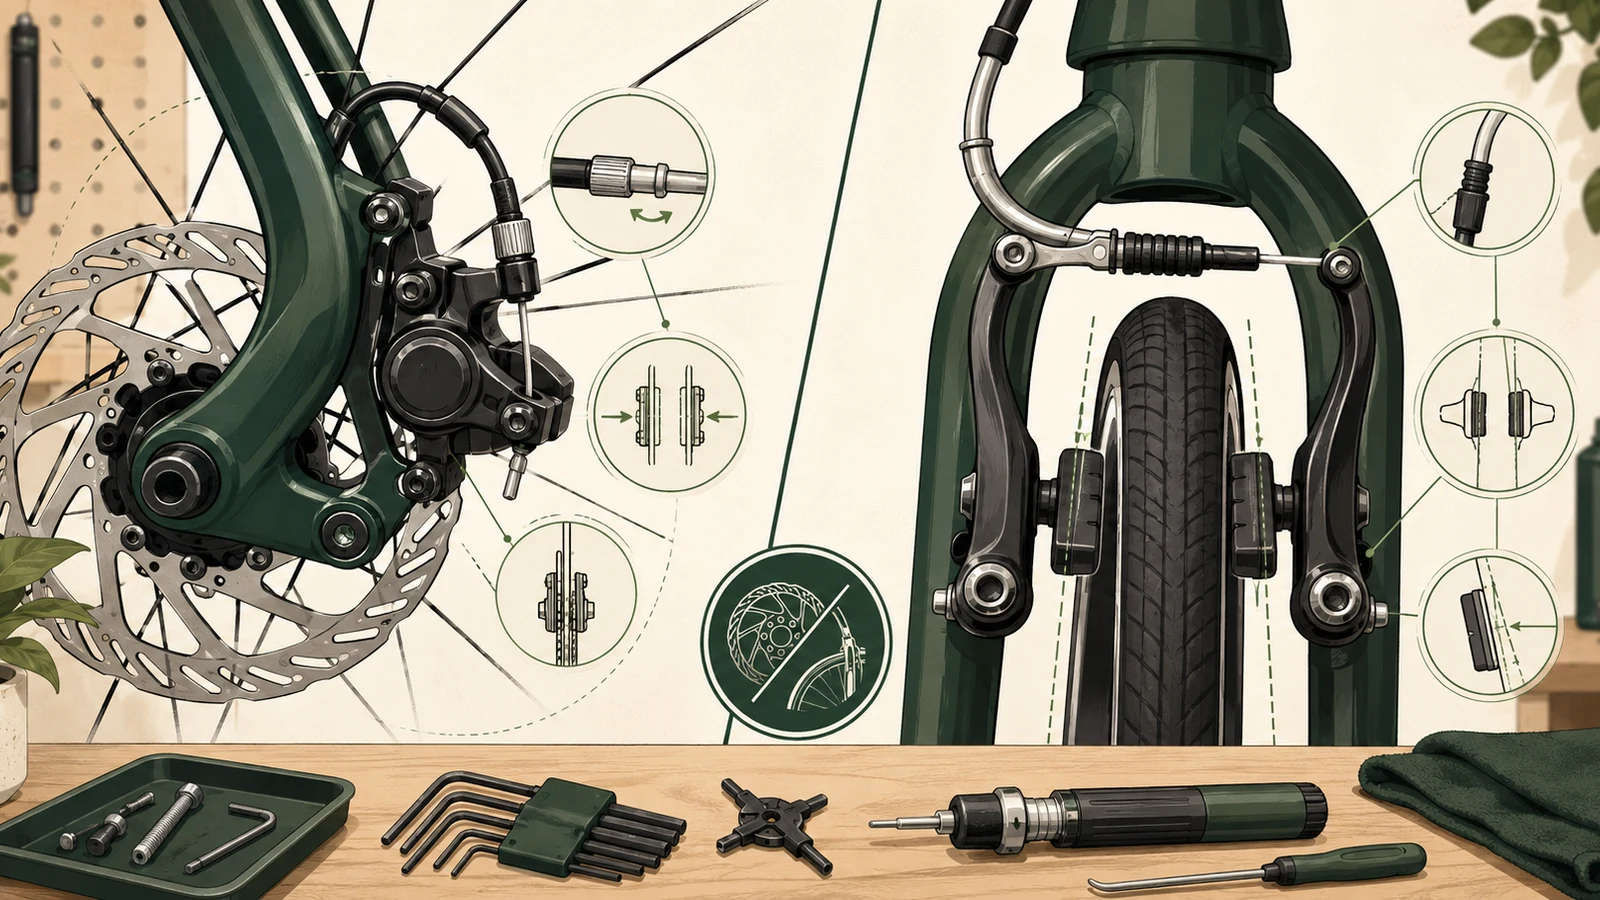
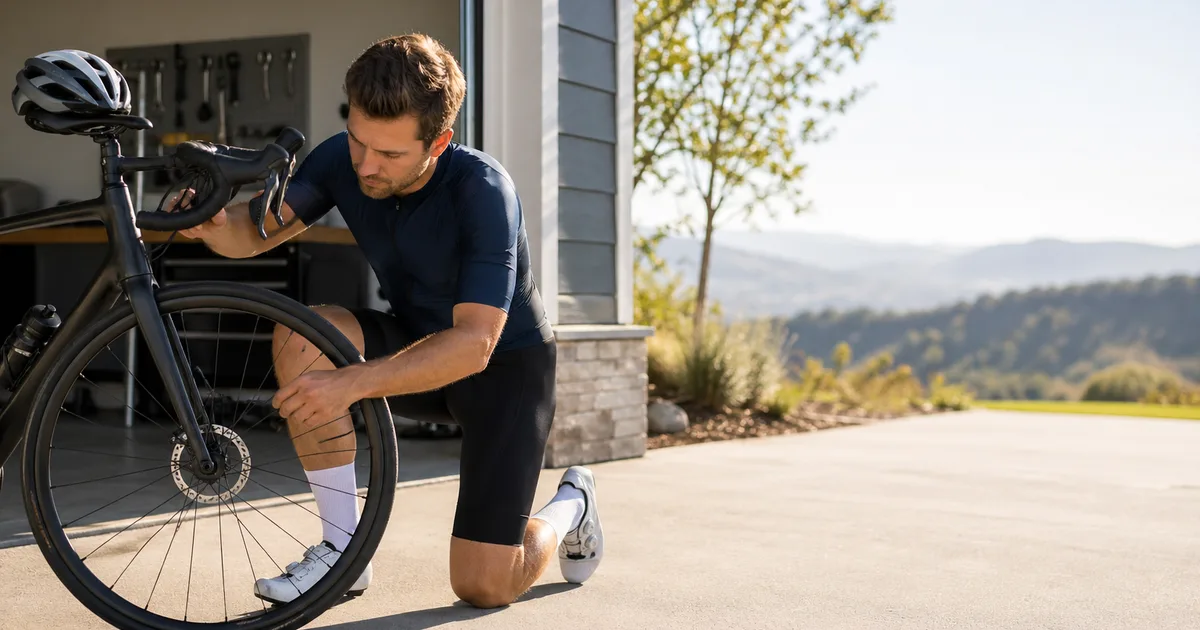
A brake that rubs, squeals, or pulls halfway to the bar almost never needs new parts - it needs ten minutes of adjustment. Cable disc brakes and V-brakes both come down to the same four dials: center the pads evenly, set the gap and toe-in, tension the cable, and tune the lever reach. This guide walks through both brake types from the same starting point, with the actual torque numbers and the safe walking-pace test that should follow any brake work. Budget about 30 minutes the first time and nothing in parts.
At a Glance
- Time: ~30 minutes the first time, under 10 once it clicks
- Skill level: Beginner-friendly
- Cost: $0 - this is adjustment, not replacement
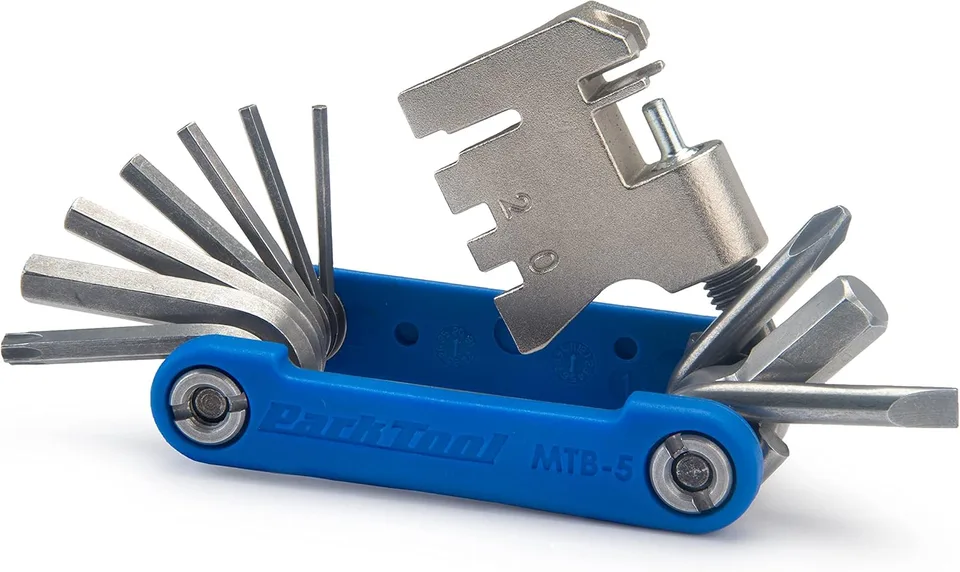
- Tools: Hex keys, T25, a Phillips, and a torque wrench
Quick Answer
To stop a brake rubbing, first center it - V-brakes with the spring screw at each arm, cable discs by loosening the caliper bolts and squeezing the lever. Then set the pad gap (about 1 mm per side on a rim, a hair off the rotor on a disc), tension the cable at the pinch bolt, and back the barrel adjuster out for fine clearance.
If the lever still feels gritty or vague after all that, the problem is a corroded inner cable or worn pads, not the adjustment. Jump to troubleshooting to sort which one you have.
First, confirm your brakes are cable-actuated
This guide covers mechanical (cable-pull) brakes: rim/V-brakes and cable discs like the Avid BB7, TRP Spyre, and Tektro MD-series. If a sealed hose runs to the caliper and there is no cable to grab, those are hydraulic - clearance is automatic and a soft lever means you bleed them instead.
Who This Is For
- Commuters and hybrid riders on V-brakes that have started to squeal or drag after a wet winter
- Gravel and touring riders running cable discs who want a rub-free, predictable lever for long days
- Anyone who bought a used bike and wants the brakes set right before trusting them on a descent
- Parents setting up a kid's bike who need the lever reach pulled in for smaller hands
How the Two Brakes Pull
Both brakes turn a squeeze at the lever into a clamp at the wheel, but they clamp different things. A V-brake (also called a linear-pull brake) has two tall arms that pivot off bosses on the fork or seatstays. The cable pulls one arm toward the other through a curved metal tube called the noodle, and rubber pads press the sides of the rim. Because the pads grab the rim itself, anything that moves the rim - a buckle, a loose hub, a crooked wheel - shows up instantly as rub.
A cable disc brake pulls an arm on the caliper that pushes a pad against a steel rotor bolted to the hub. Some calipers move only the outboard pad and flex the rotor onto a fixed inboard, wheel-side pad (the Avid BB7 works this way); others move both pads evenly (TRP Spyre, Spyke). The rotor is small and rigid, so disc setup is fussier about millimetres but far less bothered by a slightly out-of-true wheel.
The good news: the adjustment logic is identical. Center the pads, set the gap, tension the cable, set the lever. Get those four right and either brake feels new.
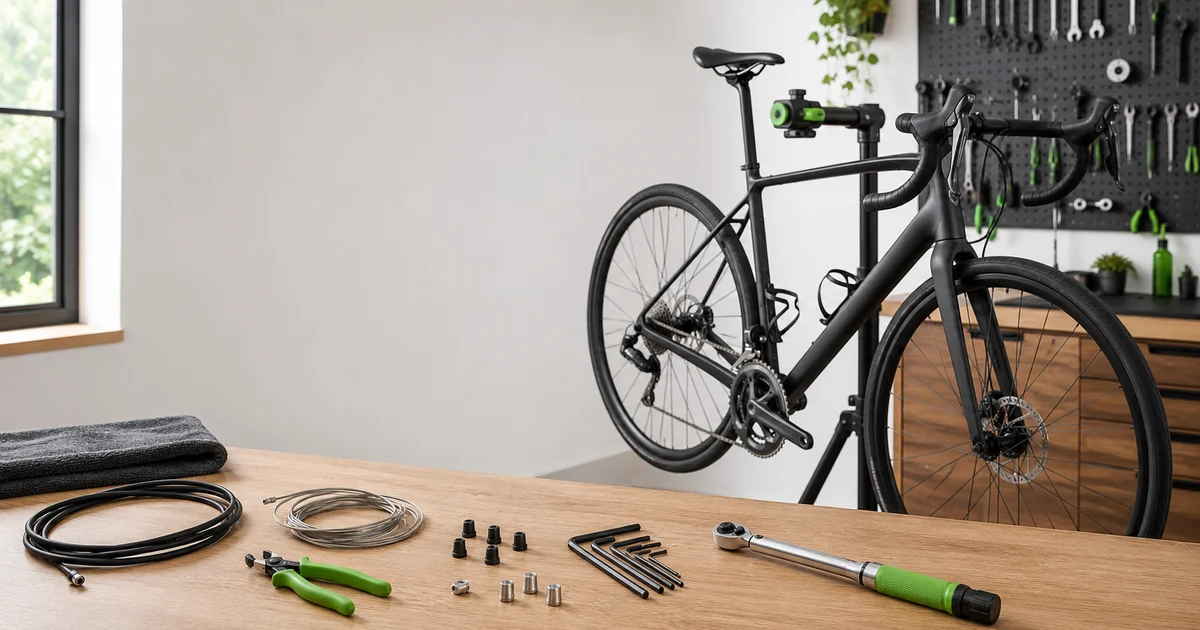
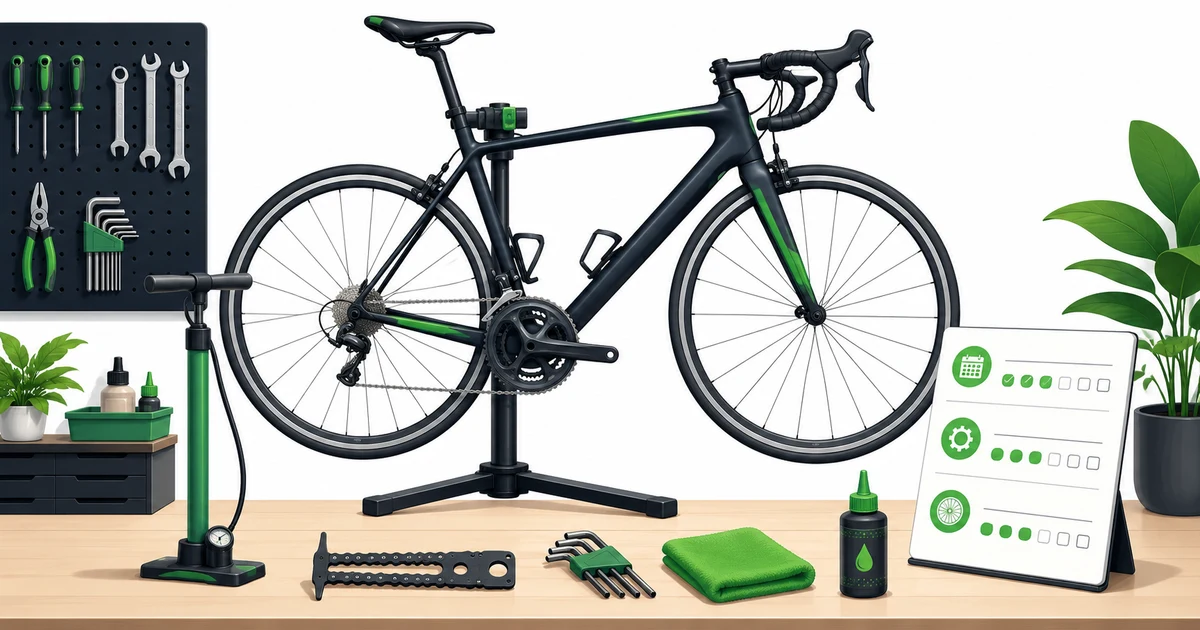
Tools & Parts
You almost certainly own most of this already. The one upgrade worth buying is a small torque wrench - brake pinch bolts and caliper bolts are easy to strip or under-tighten, and a slipping cable is the kind of mistake you only make once.
| Tool | What It Does |
|---|---|
| 2 / 2.5 / 5 mm hex keys | Pad eyebolts and cable pinch bolts on Shimano V-brakes and most cable calipers |
| T25 Torx key | Disc caliper mounting bolts and six-bolt rotor bolts |
| Small Phillips screwdriver | The spring-tension (centering) screws at the base of each V-brake arm |
| Torque wrench / driver | Sets pinch and caliper bolts to spec so the cable cannot slip |
| Cable cutter + end cap | Only if you find a frayed cable end and need a clean re-cut |
If the inner cable is rusty or the housing is gummed up, no amount of tension tuning will fix the gritty feel - that is a cable replacement, not an adjustment. And if the pads are down to the wear line, set them aside and read how to replace brake pads first; adjustment on a worn pad is wasted effort.
Adjust V-Brakes (Rim)
Work one wheel at a time and keep the brake assembled. Most V-brake problems are a pad that has worn into the rim at a slight angle plus an arm that has lost its spring balance.
Step 1: Center the Arms
Spin the wheel and look down the gap between each pad and the rim. If one pad sits closer, find the small Phillips (or 2 mm hex) spring-tension screw near the base of each arm. Tighteninga side's screw increases that spring's push and pulls its pad away from the rim; loosening lets the pad move in. Nudge in quarter turns until both pads sit the same distance off the braking surface and the wheel spins clean.
Step 2: Set Pad Height and Toe-In
Loosen the 5 mm pad eyebolt and set the pad so its full face lands on the braking surface, roughly 1 mm below the top edge of the rim. The pad must never touch the tyre - a pad riding high will cut the sidewall and blow the tube on a descent. Once the height is right, set toe-in: angle the pad so the leading edge (the front, in the direction the rim spins) contacts about 0.5-1 mm before the trailing edge.
The classic trick: slip a folded business card or a zip-tie behind the trailing edge of the pad, squeeze the lever to hold everything in place, then tighten the eyebolt and remove the shim. Toe-in is what kills the howling squeal most V-brakes develop as they wear.
Step 3: Tension the Cable
Wind the barrel adjuster at the lever almost all the way in (this leaves room to fine-tune later). Squeeze the two arms toward the rim by hand until the pads sit about 1 mm off each side, seat the noodle in its holder, pull the inner wire taut through the pinch bolt with pliers, and torque the pinch bolt to about 6-8 Nm. Let go and check the gap. Back the barrel adjuster out a turn or two until the pads clear the rim with a crisp, firm lever.
A well-set V-brake has both pads about 1 mm off the rim, a lever that firms up well before it reaches the bar, and no rub when you spin the wheel and let it coast.
Adjust Cable Disc Brakes
Cable discs reward patience and a good light. You are setting clearances you can barely see, so spin the wheel and sight the gap against a bright background between each tweak.
Step 1: Center the Caliper
Loosen the two caliper mounting bolts (usually T25) about a quarter turn each, just enough that the caliper can shift on its slotted mounts. Squeeze the brake lever firmly and hold it - on a dual-piston caliper like a TRP Spyre this self-centers the body over the rotor. Keep holding and snug the two bolts back to spec (about 6-10 Nm, check the stamp on your caliper). Release and spin: the rotor should run down the middle of the pad slot.
Single-piston calipers like the Avid BB7 center differently. Spin the inboard (wheel-side) pad adjuster in until that pad lightly touches the rotor, then loosen the mounting bolts, let the rotor sit flat against the inboard pad, and tighten. Back the inboard pad off a click or two afterward.
Step 2: Set Pad Clearance
Use the pad-adjuster knobs or dials to bring each pad to about 0.25-0.5 mm off the rotor - close enough for an instant bite, far enough that the rotor does not tick as it spins. On a dual-piston caliper, set both sides evenly. On a single-piston BB7, the inboard, wheel-side pad is fixed; set it close, then let the moving outboard pad flex the rotor across to meet it.
Step 3: Tension the Cable
Wind the inline barrel adjuster most of the way in. With the caliper actuation arm at rest, pull the inner wire taut through the pinch bolt and torque it to about 5-7 Nm. The arm should swing through its full travel when you squeeze the lever and snap back when you release. Tune the final pad gap with the barrel adjuster, the same as a V-brake.
If the rotor still ticks against one pad after all this, it is usually a slightly bent rotor rather than a setup error. A true wheel and a gentle nudge on the high spot with a rotor truing fork clears it; force it and you will warp the rotor the other way.
Lever Reach & Free Stroke
Reach is how far the lever blade sits from the grip at rest. If you have to stretch your fingers to the lever, you cannot brake hard in a panic, and small hands suffer most. Find the reach-adjust screw on the lever body - a small Phillips or hex screw, sometimes hidden behind the blade - and turn it to bring the lever closer. Set it so the pad of your index finger rests on the very end of the blade with a relaxed grip.
After moving reach, re-check the pad gap. Pulling the lever in changes how much cable it draws, so a brake that was perfect can suddenly drag or feel soft. A quick spin of the barrel adjuster brings it back. Lever position is part of cockpit fit, so if your hands or wrists ache on long rides, work through the bike fitting guide and confirm the frame itself fits with the bike size calculator. No lever tweak fixes a bike that is two sizes too big.
Torque Reference
These are typical ranges. The number stamped on your caliper or printed in the manufacturer's sheet always wins - when in doubt, look it up rather than guessing. Under-tighten a pinch bolt and the cable slips under hard braking; over-tighten and you crush the strands or strip an alloy boss.
| Fastener | Typical Torque | Notes |
|---|---|---|
| V-brake cable pinch bolt | 6-8 Nm | The cable must not slip - this one matters |
| V-brake pad eyebolt | 5-7 Nm | Hold the toe-in angle while you tighten |
| Disc caliper mounting bolts | 6-10 Nm | Shimano runs lower, SRAM higher - check the stamp |
| Disc cable pinch bolt | 5-7 Nm | BB7 sits near the low end of this range |
| Six-bolt rotor bolts | ~6.2 Nm | Tighten in a star pattern; use thread-lock if specified |
Common Mistakes
- Touching the rotor or pad with bare fingers. Skin oil contaminates the friction surface and causes a glaze and squeal that no adjustment fixes. Handle the rotor by its edge and wipe it with isopropyl alcohol.
- Setting a V-brake pad too high. A pad that overhangs the top of the rim digs into the tyre sidewall. At best it squeals; at worst it cuts the tyre and blows the tube. Keep it about 1 mm below the rim edge.
- Skipping toe-in. A flat, square pad on a rim is the number-one cause of brake howl. The half-millimetre of lead angle is not optional on most V-brakes.
- Chasing a soft lever with cable tension. If the lever still pulls toward the bar after a clean setup, the cause is usually a corroded inner cable or worn pads. Tightening past the right gap just buries the real problem.
- Forgetting the walking-pace test. Brakes are the one system you never sign off from the stand. Always roll slowly and squeeze before you ride.
Troubleshooting
| Symptom | Likely Fix |
|---|---|
| One pad rubs constantly | Re-center: V-brake spring screw on the close side, or loosen the disc caliper bolts and re-seat |
| Loud squeal under braking | Add toe-in (rim) or de-grease the rotor and bed in the pads (disc) |
| Lever pulls toward the bar | Add cable tension first; if it stays soft, suspect a worn pad or a stretched, corroded cable |
| Gritty, sticky lever feel | The inner cable and housing are contaminated - replace them rather than tuning |
| Rotor ticks once per wheel turn | The rotor has a slight bend; straighten the rotor and ease the high spot with a rotor truing fork |
| Weak bite even when adjusted | Glazed or contaminated pads, or a wet/oily rim - clean, sand lightly, or replace |
Where does this skill sit in the bigger picture? Right alongside cleaning and lubing your drivetrain and checking tyre pressure. If you are building a home-mechanic routine from scratch, our bike maintenance basics guide lays out the order to learn things in, and the pre-ride M-check is how you catch a dragging pad or frayed cable before it becomes a problem on the road.
When to Call a Shop
Most adjustment is genuinely DIY. Hand the bike to a mechanic when:
- The mounting boss is stripped. If a V-brake boss or a caliper mount thread will not hold torque, that is a frame or fork repair, not a tweak.
- The rotor is badly warped. If a truing fork cannot bring it flat in a minute or two, replace the rotor rather than fight it.
- You suspect a hairline crack in a caliper arm, a rotor, or a lever body. Braking parts do not get second chances.
- The brakes are hydraulic. A soft hydraulic lever is a bleed job, which needs the right fluid and a bleed kit.
Tools Worth Owning
You do not need a full shop to adjust brakes, but a few quality tools make it faster and safer. A torque driver keeps pinch bolts honest, a clean cable cutter saves a frayed cable, and a rotor truing fork is the one tool that turns a ticking disc into a quiet one.
Brake-Adjustment Tools
The hex/Torx set, torque driver, cable cutter, and rotor fork that cover every adjustment in this guide.
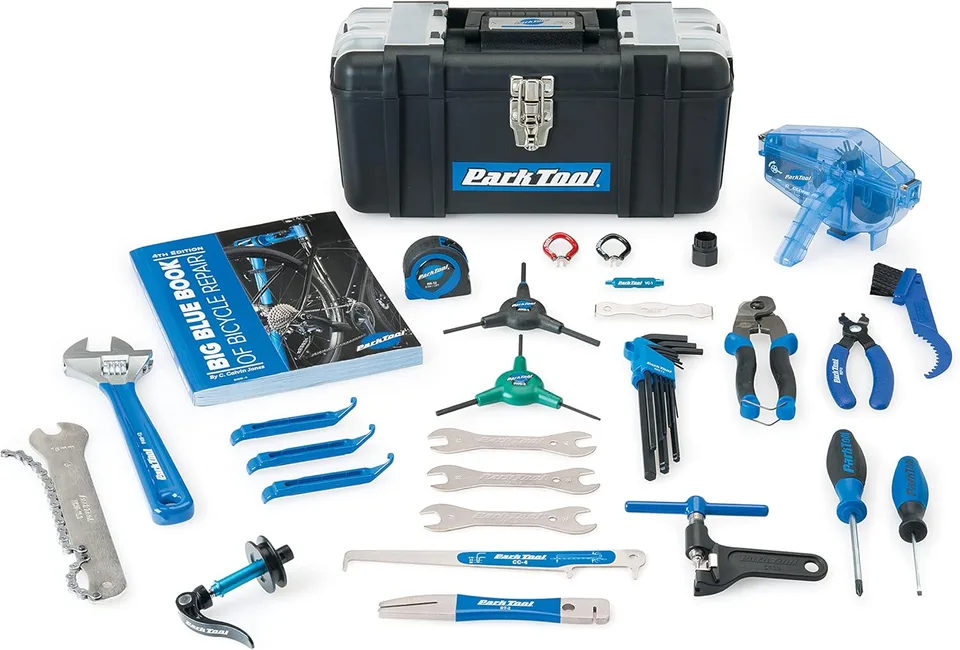
Park Tool
Park Tool AK-5 Advanced Mechanic Tool Kit
Complete drivetrain + brake + cockpit tool kit for serious home mechanics. Step up from the SK-4 starter kit; step down from the pro-shop EK kits. Hex/Torx range covers virtually every modern bike fastener.
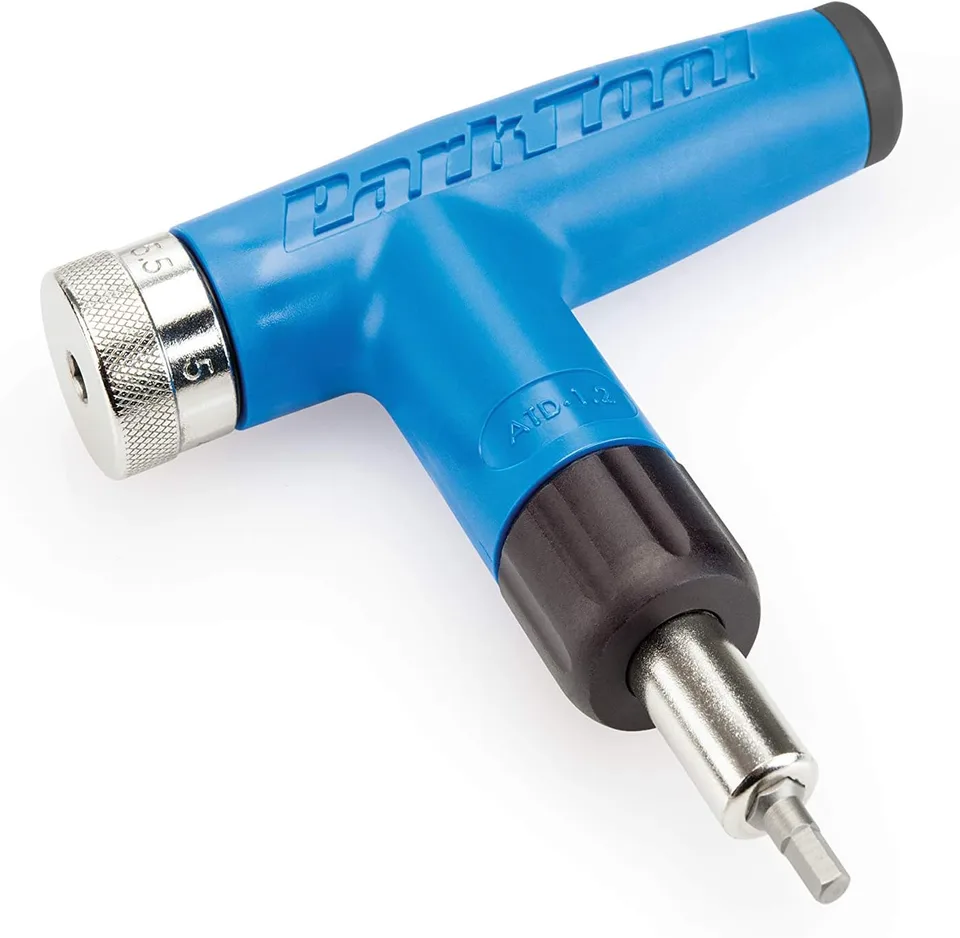
Park Tool
Park Tool ATD-1.2 Adjustable Torque Driver
Critical for modern carbon stems, seatposts, and handlebar clamps where over-tightening cracks the part. Range covers virtually every modern cockpit bolt; for higher-torque bolts (cassette lockrings, BB cups) use the TW-5.2 or TW-6.2 instead.
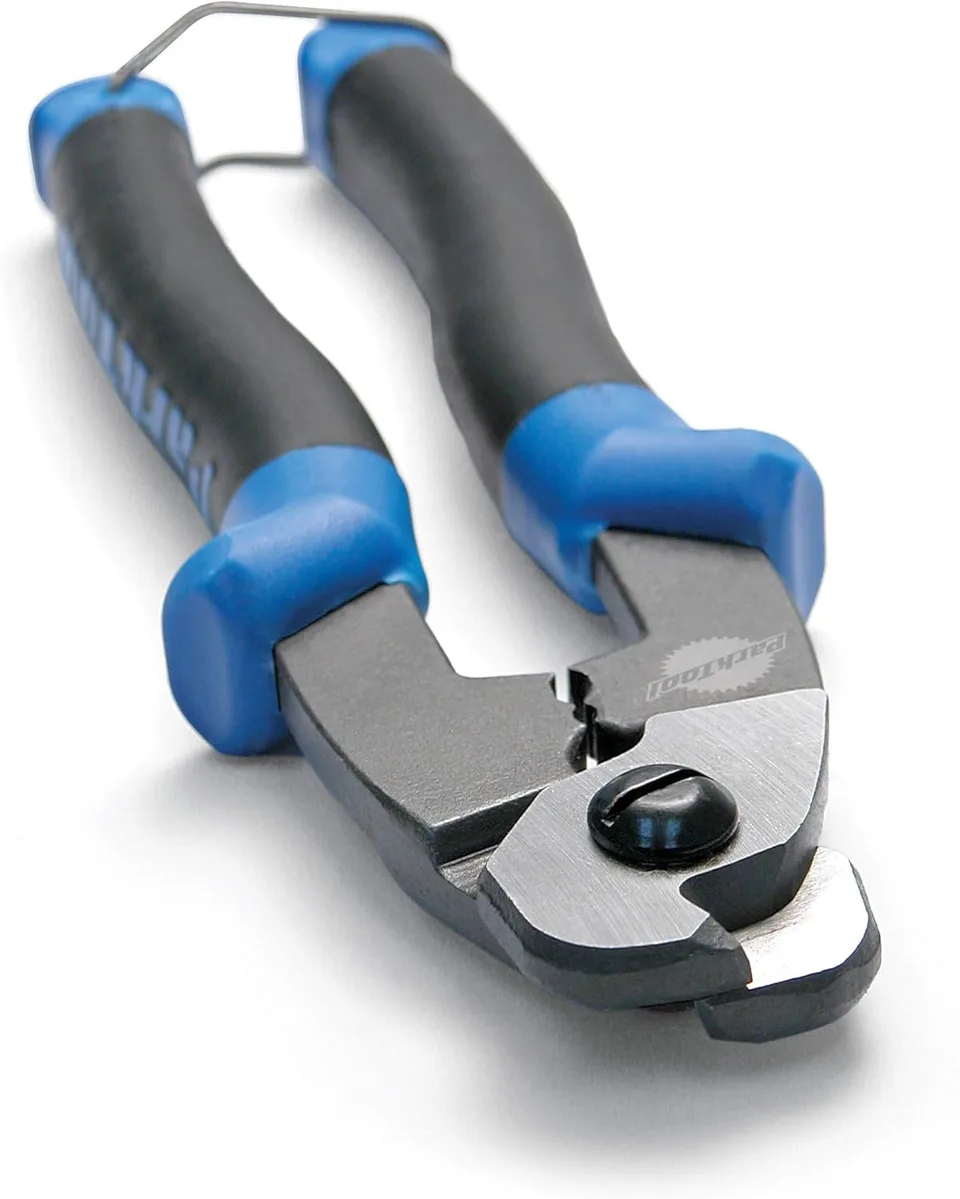
Park Tool
Park Tool CN-10 Professional Cable & Housing Cutter
Universal for any cable-actuated bike. Significantly cleaner cuts than diagonal pliers - leaves housing ends square so ferrules seat properly. Do not use on hydraulic brake hose (use the HBT-1 hose cutter for that).

Park Tool
Park Tool DT-2 Rotor Truing Fork
Use after a fresh pad install if the new pads rub or sing on one spot per revolution - that's a bent rotor, not a bad pad. Slot the fork over the rotor at the high spot, bend gently in 1-2 mm increments, and re-check between attempts.
Park Tool
Park Tool MTB-3.2 Multi-Tool
Trail-ready multi-tool with disc-brake-specific helpers (rotor truing, pad spreader). Slightly heavier than a stripped-down road multi-tool, but covers every adjustment a modern MTB needs out on the trail.
As an Amazon Associate we earn from qualifying purchases. This helps support our free calculators.
Frequently Asked Questions
Conclusion
Brakes feel intimidating because they are the part you cannot afford to get wrong, but the adjustment itself is simple and repeatable. Center the pads, set the gap and toe-in, tension the cable, tune the lever, then test at walking pace. Do that whenever the lever starts feeling vague or a pad starts to rub, and you will keep both V-brakes and cable discs sharp for years. Pair this with pad replacement when the friction material runs low, and fold the quick check into your pre-ride M-check so nothing surprises you on the road.
Key Takeaways
- Four dials, both brakes: center, gap and toe-in, cable tension, lever reach.
- Gap: about 1 mm per side on a V-brake, 0.25-0.5 mm per pad on a cable disc.
- Toe-in kills squeal on rim brakes; a clean, oil-free rotor kills it on discs.
- Torque the pinch bolt (6-8 Nm V-brake, 5-7 Nm disc) so the cable cannot slip.
- Always test at walking pace before you ride - never sign brakes off from the stand.
Related Calculators & Tools
Inherited a used bike with grabby brakes? Confirm the frame actually fits you first
Check your wheel and rotor diameter before ordering pads, rotors, or longer brake noodles
Grip and braking are one system - the tyre has to bite before the brake can do its job
Sorting the cockpit anyway? Sanity-check your gearing while the bike is in the stand
Continue Reading
The 60-second check that catches a dragging pad or a frayed cable before you roll
Lever reach is part of cockpit fit - set the bars and levers so you can brake one-fingered
If the lever feels gritty no matter how you tune it, the inner wire is corroded
Where brake adjustment fits in the home-mechanic skill ladder, from M-check to overhaul