Proper bike fit checklist: saddle, reach and controls
GuideCheck the method and measurement endpoints, then confirm the position on the bike.
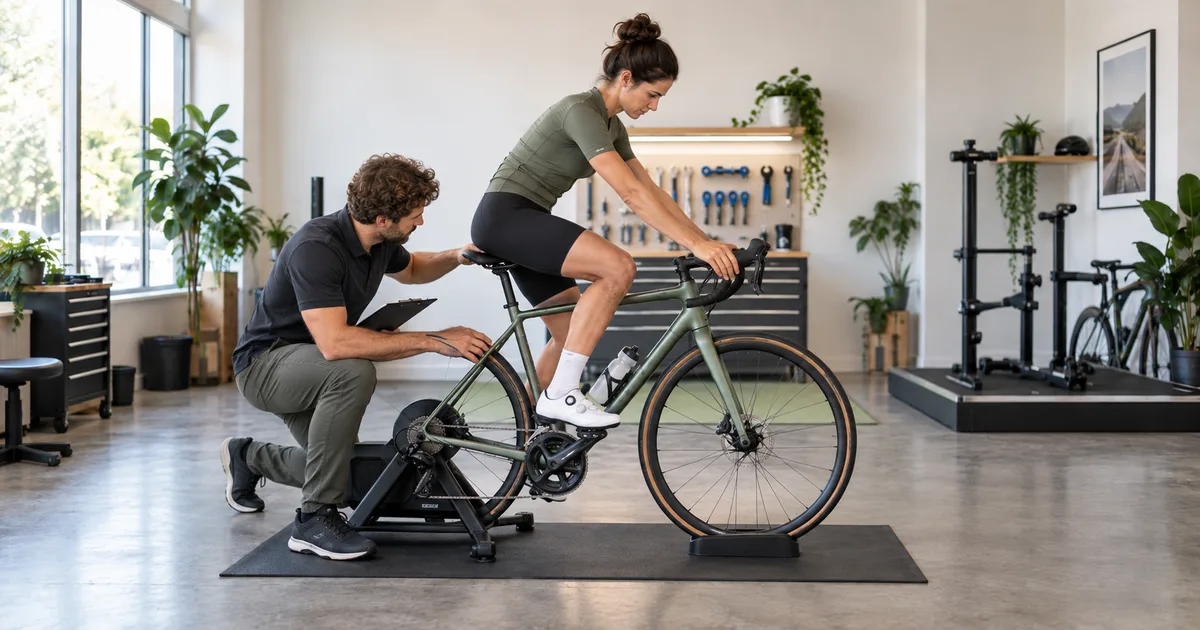
A useful fit check starts before you pick up an Allen key. Record the current setup, put on your usual riding shoes and decide what you are trying to improve. "The bars feel far away after twenty minutes" is a better starting note than "the bike feels wrong."
Work through frame access, saddle, feet, cockpit and controls in that order, then take a controlled ride. Change one variable at a time so you can tell whether it helped. This checklist is for checking a position and spotting problems that need hands-on help, not diagnosing pain from a list of symptoms.
1. Confirm frame access before adjusting
Check the exact model-year size chart, physical standover and your ability to mount, stop and dismount. A low top tube is not evidence that the saddle or bars fit. On a heavier bike, check that you can walk, park and control it at low speed. Do not attempt an unsafe lift merely to complete a checklist.
If the frame itself is unsuitable, use the two-size worksheet or compare another model. Adjustments cannot change the top-tube height or wheelbase.
2. Set saddle height, setback and tilt
Before moving anything, photograph the seatpost markings and saddle rail position. Measure height using a stated reference point and note the saddle model. Photos are useful for returning to a setting, but they do not replace checking insertion marks that may be hidden inside the frame. Ask a mechanic if you cannot establish the limits.
- Use the saddle-height calculator as a starting estimate. Note whether a method measures from the bottom bracket or pedal; those values are not interchangeable.
- Check smooth pedaling with some knee bend near the bottom of the stroke, without reaching with the toes or rocking the pelvis to reach the pedal.
- Set fore-aft position for supported pedaling, not simply to bring the handlebars closer. Begin with a sensible saddle tilt and investigate pressure rather than making large compensating changes.
- Keep the seatpost within frame and post insertion limits and the saddle clamp within the rail marks. Use specified torque and appropriate tools, or ask a mechanic.
Saddle shape and width can also affect support. Use the saddle width guide when pressure persists; a new saddle is not a guaranteed cure for an unsuitable position.
Check the position while pedaling
A stationary leg-extension check gives you a starting observation. Follow it with easy pedaling on a securely supported bike or a safe short ride. Notice whether you keep sliding to a different part of the saddle, reaching for the bottom of the stroke or shifting sideways. These are observations to investigate, not proof that one particular adjustment is required.
Do not judge saddle height by whether both feet rest flat on the ground while seated. Many conventional adult bikes require you to move forward off the saddle when stopping. If that movement is not manageable, discuss a different frame style or setup with a shop rather than forcing a pedaling position you cannot use confidently.
3. Check feet, shoes and pedals
Use the shoes you normally ride in. On flat pedals, check secure contact without repeatedly searching for a stable foot position. With clipless pedals, check cleat compatibility, secure fasteners and predictable release in a safe supported setting. Do not force your feet into an uncomfortable angle.
Changes to shoes, pedals or cleats can alter effective leg extension. Recheck saddle position afterward. Persistent hotspots, numbness or knee discomfort need an assessment; symptoms alone cannot identify a single adjustment.
If a problem began just after changing shoes or pedals, bring the old equipment or its measurements to the assessment. Sole thickness, cleat placement and pedal design can change the foot's position relative to the crank. That history is more useful than repeatedly changing saddle height without recording why.
4. Check reach, handlebar height and width
In your intended posture, look for relaxed shoulders, usable elbow bend and the ability to look ahead without strain. Check the hand positions you actually use. Bar width, sweep, drop-bar reach and hood position can change comfort even when the frame measurements match.
Use the cockpit fit guide and handlebar-width calculator for starting checks. Stem and spacer changes must stay within the fork, stem and bar makers' limits. Ask a mechanic to check compatibility and cable or hose routing.
Try the hand positions you actually need
On a drop-bar bike, check the hoods and drops, including access to the brakes in each position. Comfortable hands on the bar tops do not settle the question if you cannot brake from there. On a flat-bar bike, check whether lever angle and bar sweep let your wrists remain in a position you can use while steering and braking.
A side-on photo can help you describe the position to a fitter, but camera angle and a posed posture can be misleading. Resist choosing a stem solely to imitate someone else's photo. The useful test is whether your own riding position works with reliable control access.
5. Confirm brake-lever and control access
You must be able to operate the brakes from normal riding positions without losing a secure grip. Check both levers and the positions used for descending or standing. Reach adjustment is model-specific; follow the brake maker's instructions and preserve full, safe brake operation. If lever travel, clearance or braking is uncertain, have the system checked before riding.
Also check shifters, dropper controls and any e-bike assistance controls. A comfortable handlebar position that prevents reliable braking does not pass. Fit changes are not a substitute for the pre-ride mechanical safety check.
Separate a fit problem from a mechanical problem
A lever that sits too far from your fingers may have a suitable reach adjustment. A lever that pulls to the bar without dependable braking needs a mechanical inspection. Similarly, a slipping saddle or loose handlebar is not feedback about your preferred position. Stop and have the hardware secured correctly before continuing any fit test.
6. Test gently and notice warning signs
Start in a safe, low-traffic area with controlled starts, stops and turns. Build riding time gradually and check the position during normal pedaling, not just while stationary. Record what changed, how long you rode and when discomfort appeared.
Stop riding if you cannot brake or steer safely. Do not ride through persistent pain or numbness; arrange a prompt medical assessment rather than using this checklist to diagnose the cause. Seek urgent medical care for sudden weakness or a sudden loss of normal sensation.
Keep a log you can use on the next ride
Record the date, original measurement, exact change, route and riding time. Add where you felt discomfort and when it began. Keep the wording descriptive: "right hand tingled after fifteen minutes on the hoods" is useful; "stem definitely too long" is a conclusion you have not yet established.
For example, a fictional log might read: "Shop raised the bars using the approved setup. Saddle and cleats unchanged. Same shoes, twenty-minute easy loop. Easier to look ahead; braking still comfortable. Longer-ride comfort not yet checked." That entry separates what changed, what you observed and what remains unknown.
Keep the test conditions reasonably similar. A new position on a short, easy ride cannot be fairly compared with the old position at the end of a hard day. Once basic control checks pass, build toward your normal riding gradually. If symptoms return, stop the experiment and take the log to the appropriate professional.
When to book a professional fit
Book a fit when two sizes remain unresolved, neither frame meets your needs within limits, or repeated small adjustments fail to settle discomfort. A fitter can assess your proportions, mobility, riding goals and actual contact points. A mechanic handles unsafe or incompatible hardware; persistent or concerning symptoms also warrant a clinician.
Ask a local bike shop about a pre-purchase sizing consultation or a fit appointment for your existing bike. Confirm whether it includes an on-bike assessment, cleat setup where relevant, a written position record and follow-up. Bring riding shoes, usual clothing, your current bike if available, exact candidate geometry and a record of symptoms and previous changes.
Choosing your first bike? Use the first-bike buying guide before booking a purchase. For detailed setup background, see the bike fitting guide.
Frequently Asked Questions
Sources and limits
Reviewed September 17, 2026. General checks: REI Bike Fitting Basics. Use the exact component and bicycle manuals for torque, insertion and adjustment limits; Trek manuals is one manufacturer entry point. This is a screening checklist, not a diagnosis or a substitute for hands-on fitting.